4 Fairy Tale Reader’s Theaters

 Summer is coming! We only have 4 more days of school! Do I sound excited? Well we have had such a busy week I’m kind of tired. But the kids have tons of energy still! We may have to play a game of kickball tomorrow with the other 2nd grades!

Here were our 3 Little Pig houses we used for our puppets while we sang silly songs…..
See ya later….alligator…after awhile….crocodile…see ya soon…macaroon….adios…cinnamon toast….

Here are a few shots of our cute Fairy Tale Plays we did this week for the 1st, 2nd and 3rd grades. I really enjoyed them. The kids got to be such great actors and had super expression! I think most of the parents enjoyed coming to see them too.

Our marionette puppets The 3 Billy Goats while we sang some silly songs in the background….

 We sang some silly songs in between the songs, about ladybugs and “Old Dan Tucker who came to town riding a billy goat, feeding a hound, washed his face in a frying pan, combed his hair with a wagon wheel and died with a toothpick in his heel”…..you get the nutty drift.

The cast of “The 3 Little Pigs”  They sure did a great job! 
The cast of Goldilocks and the 3 Bears….so cute!  I got these costumes from Oriental Trading for $5.00 each  a
couple of years ago. Only problem was that they are adult sizes. I had to cut each leg and arm with scissors and sew them shorter. They are still a bit too big, but the hats I couldn’t resist for the PRICE! 
Captain Jack and Polly Parrot introduced the shows…..

The 3 Billy Goats Gruff characters….they did a cute job….I  made the ears and horns out of  a hairband and some felt. I’m pretty handy with a glue gun, right? The beards are just a piece of fur taped on.  They lasted about as long as the play before they fell off!

 Here the kids are singing a silly song called “Oh There’s a Ladybug in my Soda”.  It’s fun. They waved their ladybugs to the rockin beat of the song like they were dancing.  Sadly, most of the legs and antennae were torn off by the time we had performed this song a dozen times. 
 The 3 Little Pigs in action, and the mean old wolf!

These were cute little letters sent from one of the other gifted classes. Kids did such cute drawings and letter writing. I just loved this one of Little Red Riding Hood.  Our costumes were so cute! 

 I didn’t get a good picture of Red, but she was all dressed up in a red dress and cape and had a little red basket she toted around.  The wolf in this one was great too.  I forgot to snap some pics! Darn. 
 Loved the depiction of our 3 little pigs.  One was wearing the BYU shirt in blue, the other 2 pigs were in University of Utah red. A local rivalry between the 2 colleges was exploited by the author of this version of the pigs……creative license was put to good use! 
 Luckily for me there were no die hard Ute fans in the audience that didn’t have a sense of humor…hehe…..

This one looked exactly like the wolf outfit. We had a brown “mullet” wig and a big nose, hysterical looking. And a black cat suit.  The 2 kids who played wolves were awesome. Great job Zach and Saige! 

Here’s our whole cast of characters after the Fairy Tale plays.  It will be a great memory for the kiddos I think. 😀 

The Ugly Duckling

Our Ugly Duckling musical was a smashing success! 
Thanks to a lot of people’s help, especially the parents! Thanks for the costumes, the cute signs (Mrs. Kenner did a fab job for us!). We really appreciate all the support parents! 
The kids learned their lines and dances and songs so well! 

And their costumes were so cute! Love the little doggie and those pigs and swans! 

Mrs. Stockett was a great director! 

And Mrs. Adams assisted with the choreography and lines…..

Here are the kids on their final song…”Believe in Yourself! That’s all that it takes! “

Cute backdrop painted by one of the parents….

The star of the show, Zach was a great Ugly Duckling! 
Brynlin’s family came…..
I saw so many other families too! Thanks for coming everyone! 
and Trace’s family came too…..
I didn’t get everybody’s picture with their family….I wish I could have though! 
Andrew was a great soloist and skunk! 

Zach’s grandma love the show too…. Zachary was a great soloist and actor. His mom made this cute costume too! 

So did Gavin’s family! 

And Ty’s mom and bro loved it too…..
Our class sure had a lot of fun!
Thanks to Morgan’s mom for making all of our cute signs….They were fabulous. Thanks to the parents for helping kids learn their lines, solos, and with the cute costumes.  It was a fantastic success!  

Ladybug Life Cycles

Ladybugs! 

Ladybugs life cycles was the topic in our class this week.  We read about life cycles in the weekly reader, and literature books.
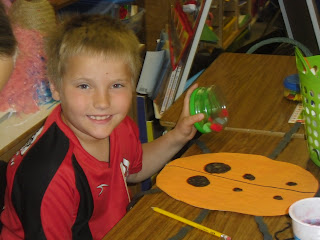
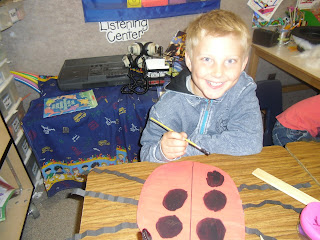
Gavin painting his orange ladybug art project…
Ladybug poems, life cycles and art were the topic of the week….

Books:  The Grouchy Ladybug by Eric Carle
Five Little Ladybugs by melanie Gerth
Are You a Ladybug? by Judy Allen Tudor
Ladybug Life Cycles by Justin Martin

I love Eric Carle books. One way I love to introduce telling time by 5 minute increments is using the book “The Grouchy Ladybug”.  It has clocks on every page and they have incremental times listed.  It’s a good springboard for telling time.
We read the book and then we make a ladybug clock. I just found a basic clock pattern and copy it off on red construction paper. Then I add a half circle shaped, small, black, head and have the kids give it a face with white crayon. Then we add 6 black legs and we accordian fold them so it looks kind of funny. Here are our ladybug clocks.
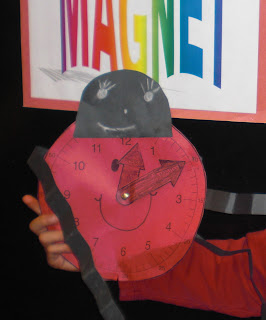
Very Grouchy Ladybug Clocks – great for a math extension….
Then we read books on Ladybug Lifecycles and I also have a few Weekly Readers/Scholastic News that I save if they have any Science in them.  I also save the Science Spin magazine if they are good ones.

SHARED READING

“Five Little Ladybugs”

Five little ladybugs climbing up a door, One flew away and then there were four.

Four little ladybugs sitting on a tree, One flew away and then there were three.

Three little ladybugs landing on a shoe, One flew away and then there were two.

Two little ladybugs looking for some fun, One flew away and then there was one.

One little ladybug sitting in the sun, She flew away and then there were none.

MUSIC: I found a cute song called Ladybug in my Soda on the website K-8 Kidstunes and got a copy for 99 cents in an MP3 download. The link is HERE but you do have to sign up a “kid” to get the cheap version. I have kids and grandkids so it’s easy now that I have signed up. It’s a funny song with a real catchy beat and easy to learn.

MATH:
A fun printable with black dots on individual ladybugs to print out can be found HERE
at A Kids Math. You can print off a dozen of these to place in a center with a key. Kids write down their answers on an answer sheet and then check with the key.

These clocks are great for practicing telling time….

Here is a link for a telling time worksheet HERE at ABC teach.

CLOCK MATH
Every day for a few weeks call out different times and have them put the hands on their clocks. Be sure to also introduce half past, quarter past, quarter till. These are really difficult concepts for young children to get so I introduce it in first grade. I also have a magnetic clock I keep on my white board. I draw 4 lines on the fact to “cut” the clock into “quarters” or fourths. I point out that 3 and 9 are the quarter past and quarter till numbers.

Fun Game: Find a partner and use both of your ladybug clocks. Decide to do “o’clock” or “thirty” for doing elapsed time. Then decide how many hours difference there is going to be and make up a sentence. Example:  3:00 is 2 hours later than 1:00. 12:30 is 3 hours later than 9:30 etc. Elapsed time is another very hard concept for young kids to get. This is higher level but some of your high kids will get it and you will be differentiating for those who can do it.
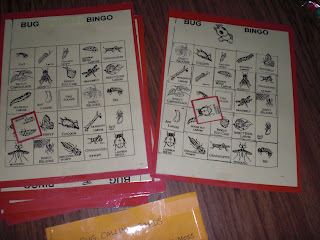
We haven’t yet played this Bug Bingo but I’m leaving  it out for a center game….great for insect vocabulary development!

LADYBUG SONGS TO SING! 
(We put these songs on the back of our ladybug painted art)
Ladybug Song (Tune: If You’re Happy and you Know it, Clap Your Hands)
Oh I wish I were a little ladybug,
I’d be shiny red and black,
I’d eat aphids for my snack,
Oh I wish I were a little ladybug!

Ladybugs    (Tune: Oh My Darlin’ Clementine
I’m an insect, not a spider
I’ve got 6 legs instead of 8
I have 4 parts to my life cycle
I eat bugs that farmers hate

We put the 2 songs above on the back of our painted ladybug art projects and sang it together.

Another cute poem I found online…Use it on the back of your clocks!

SCIENCE: Do a Life Cycle of a Ladybug wheel on a paper plate divided with a criss cross. The link can be found at A Kids Heart HERE. Color the life cycle and then glue it down. OR….Write the 4 steps to the life cycle of a Ladybug. We decided to do a 4 flap book and used macaroni, dried beans and rice for the stages.
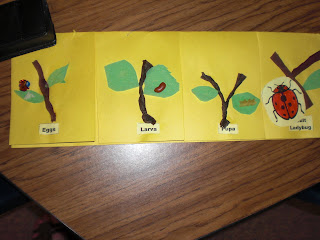
Here is the top of our flip book. We folded it into 4, cut just the top layer.

 Another fun center I do is I have 2 classroom microscopes and insect slides. I put those out with a bin full of dollar store plastic insects and 4 little magnifying glass viewers and insect books. I took a picture on my classroom camera and then left it in the classroom! I’ll post pics of that next week too. The kids LOVE LOVE LOVE this center. I’ve collected about 2 dozen insect books so I put a new batch out each week and we switch from ants, to ladybugs and dragonflies, and next week is grasshoppers and caterpillars.               

My microscopes with the pictures of butterfly life cycles….
I have a huge plastic bug collection and insect cards and hand lenses at a center with my bins of insect books.
Kids seem to love this center better than most. And on the floor nearby I have a giant floor puzzle on insects.

Just some of my book collection, I seriously have about 30 insect books! 

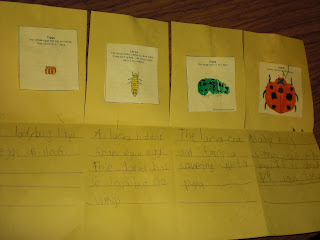
WRITING: I love to do a minibook describing the life cycle of a ladybug.  I use yellow construction paper and give each student one large piece I have folded in half the long way. Then fold that in half 2 more times to make the 4 folds. Then I cut 4 slits evenly in just the top half of my paper. It will give you 4 pages to lift up and write.
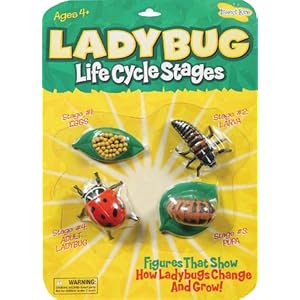
   LADYBUG LIFE CYCLE STAGES BY INSECT LORE

Trace painting his cute bug….
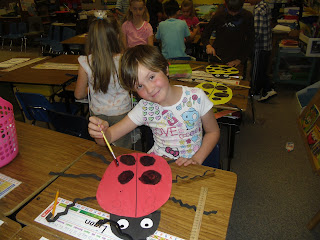
Nova did a great job on her ladybug painting….
Ladybug painted art project…love the antennae! 
Here are the 4 stages of a ladybug’s life  (art from Enchanted Learning)
Then we do our own Ladybug Life Cycle Flap Books. Inside the top flap we paste a picture of the life cycle stages. On the bottom of the inside flap we draw pencil lines with a ruler and write 2 sentences depicting what is happening in the stage in the picture above the writing.  A link for the clip art stages is at Enchanted Learning  HERE for Ladybug Lifecycles. They always turn out really cute. Don’t forget to watch the utube video before doing the writing.
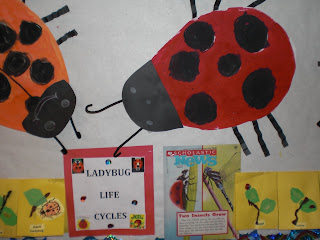
Cute painted ladybugs with their chenille stem antennae!
Completed Flip Book. Oops, he forgot to color the pupa macaroni!

On the tops of the flap books are brown and green crepe paper to make twigs and leaves. Then I add macaroni for the life cycle. A few pieces of rice for the eggs, then a kidney bean for the larvae worm stage. Then a piece of shell macaroni for the cocoon stage. Have the kids color the macaroni with markers.  And finally a clip art ladybug to color for the final adult beetle stage. I found another lip art ladybug I liked for the cover and I typed up the 4 words of the stages. Then I copied the Enchanted Learning page with these additions. That’s the life cycle!

Ladybug art project….this one was before the black chenille antennae were added….

Then we watched the life cycle utube video from the top of my post.
A fun website that has lots of ladybug facts is called Ladybug Lady and her link is HERE. She also has lots of good ideas for classroom teachers.

I got a larger one of these and 5 smaller ones. I’ve used the large one for larvae.

Get some ladybugs from your local Home Depot or Lowes.  They only last a few days though so I’d set them free in your garden after a day or so.

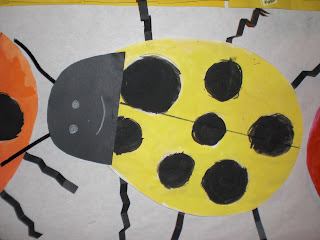
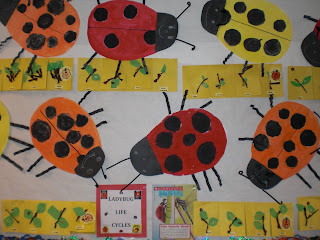
My class painting their ladybugs….there were red, yellow and orange ladybugs….just like in nature.
Ladybug life cycles were a lot of fun….
We traced small and large paper cups for the spots….

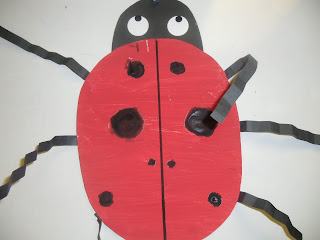
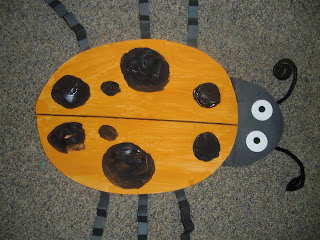
ART: Paint a ladybug on art paper. When dry use black markers to make the line down the middle and dots on his back were traced using the top circle and bottom circle of a dixie paper cup. Add 2 wiggly eyes. Paint yellow, orange and red. Wait for color to dry.
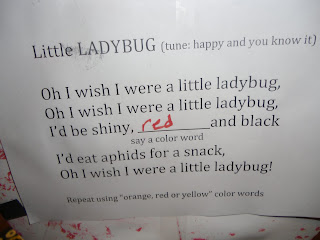
Song we put on the back of our ladybugs and sang it.

Then add black painted spots. Dry and then Cut out. Add some black chenille stems with tape for the antennae and 1/2 inch by 6 inch legs (we accordian folded the legs)..  On the back type up this poem and read for a shared reading activity.

We read Scholastic News on Ladybug and Dragonfly Life Cycles and did a Venn Diagram comparing  the two insects.
Here is our finished Ladybug Life Cycle bulletin board!

To make the spots on the ladybugs, I found, after trial and error, that the kids need to trace the circles. We used paper cups. The little spots are the base of the cup, the bigger spots are the top of the cups. Then outline the circles in black crayon. That will help the kids not to go over the traced circle. Then paint with black paint and small paintbrushes.  If you let them freehand the spots don’t turn out looking as circular.  Just a word to the wise.

We added white stickers and then small, black stickers on top of the white for the giant, bug eyes.  The antennae are 2 black chenille stems curled at the tops and taped onto the back of the bugs.  The black heads are 1/2 circle black construction paper.

FUN MATH EXTENSION!
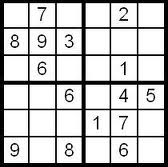
Add a fun Sodoku to the back of your ladybug pictures or clocks!

I hope you had fun seeing what we have learned about LADYBUGS!

A Funny Mother’s Day Story

One of my BEST days of being a mother…my birthday picnic in October 2011 at Vivian Park, Provo, Utah.

 I thought I would share one of my near and dearest stories of being a mom. NOT!  I was President over the Stake Primary, basically Sunday School for the children aged 3 to 11 at church.  I was holding a board meeting down the street at a friend’s home.

Busy church activities sometimes took over my life…sometimes.

I knew I would only be gone a little over an hour and my husband was on his way home from work. I called him and he assured me he would be home by 7:00.  So I left my 11 year old daughter Tiff in charge of my 4 kids ages 4 to 11, but forgot, (excellent mom that I am) to give her the phone number. I just didn’t think it would be an issue. I left the kids playing with play dough and with plenty of snacks and took off.

Me on a much better day…

Little did I know how wrong I would be. About an hour later I got a call from a neighbor Terry, down the street. She said the words no mom wants to hear, “Pattie, I don’t want to alarm you, but you better get home right this minute!” and she didn’t tell me why. I jumped in the car and tore home (about 2 blocks). As I turned my corner my eyes  met with  police cars, lights flashing, paramedics, and the fire department all in my driveway. And no cars of ours there, nor were any adults in charge. Yay for us! What model parents!

The hubs and I…..He is still my best friend…..even after THIS experience! 

And just about every neighbor in my entire neighborhood standing out on their front lawn TALKING TOGETHER and wondering where in the heck the parents were and what terrible disaster had struck inside the house while those no good parents were gone who knows where!

When I got there I ran inside, terrified, with my heart in my stomach, praying all was well. I bumped into a fireman that goes to my church and asked him what had happened. It is comical now, but at the time, not so much.  My 6 year old had put some of the playdough in his ear and the kids tried getting it out. But it just went in deeper.  When they couldn’t get it out, they (the 9 and 11 year old) decided to call 911 to ask how to get playdough out of somebody’s ears.

Yeah. A real emergency, playdough in the ears. I couldn’t even believe it.  I learned later that my 11 year old daughter had told the police, “My mom is at a church meeting.” So the officer had taken her in his squad car down to my church and paraded around asking where I was!!  Yeah. I know. It just gets better. So not only in my neighborhood was I TOAST, but now also at church. Complete humiliation!  It was a really bad night for a mom, as you can just imagine.

The “REAL funny” part comes later when all the hoopla had left my house. I had pulled all the curtains. The kids had gone to bed and I was sitting in the dark crying. And my happy-go-lucky husband shows up. In a real good mood, I might add.  He’d forgotten HE ALSO had a church meeting. He was a high counselor in our church and also had a 7:00 pm meeting he’d forgotten AND neglected to tell me about. He rushed to his meeting assuming that the kids would be okay for an hour too. So we both blew it. Parents of the year, yeah.

My fun hubs….he always could make the hard things easier somehow…..

The next day was Halloween. Yeah! What a bummer!  We BOTH remember trick or treating through our neighborhood THAT year.

At Halloween this year with my 3 granddaughters….MUCH more fun! 

So I guess, time + crisis = humor, as they say. I can laugh about it now, but it was probably my worst experience being a mom,( that I’m willing to share)!  But as all moms know, there are a multitude of stories, equally awful, that we could substitute, am I right?

BUT…….. I can tell you with complete conviction, looking back, 
IT IS ALL WORTH IT.

Cuz look what I got! 

My family is the best, most important thing in my life.  Enjoy them while they are little. It goes so quick. Happy Mother’s Day to all who mother, whether it is your own kids or others, we all honor you today. For all the highs and all the lows, for all the laundry, the meals, the parent-teacher conferences, the doctor visits, the Scouts, music lessons, laundry, PTA meetings, sports, laundry, (LOL) taxiing everybody around constantly,  homework you helped with and Birthday parties you planned. It’s your day to shine!  Happy Mother’s Day!

The college grad playdough pusher..…yes I’ve gotten over it…it took a lot of therapy…….just kidding. Who could afford therapy?….I had good friends. And that’s the best a mom can ask for.

Cinco de Mayo Mariachi guitars and corn tortillas

Happy Cinco de Mayo Everybody!  

We had fun all this week learning about the Mexican culture….
Mexican Maracas made from recycled cans, dry beans, yarn and beading on the ends….Fun to dance the Mexican Hat Dance to!  

We started our Cinco de Mayo celebration this week by doing a choral reading of FIESTA 
a book in one of the reading series at our school.  Then we looked at some of the Mexican blankets, a tortilla maker, and clothing of the Mexican culture John had brought in. Thanks John!

A very cute wordsearch for Cinco de Mayo is HERE at Kaboose.

Here are our cute mariachi guitars….
Here is our Cinco de Mayo bulletin board….with our guitars and our writing…..

The inspiration for the Mariachi Guitar art project can be found HERE at Kaboose.  We made ours pretty big and VERY colorful!I let the kids choose the color for their guitars.  We doubled them, cut them out, stuffed them with newspaper strips to make them 3D, then added the string, the triangles and the “frets”(brown parts).

And we learned some new Spanish words from each other….like “Cinco” for 5 and “Mayo” for May!
Here is our finished bulletin board with Cinco de Mayo writing all about the Mexican Fiestas.

Then I showed the kids how we make corn tortillas.  I have a tortilla maker I bought at OLVERA STREET, a tourist spot in Los Angeles. You can get them at Mexican markets or at cooking supply houses.

Here is what the MASA HARINA corn tortilla dough looks like made up…it’s fun to play with! Kids love it. 

Tortilla Maker…..

Use 2 pieces of parchment paper and place dough in between them on the tortilla press…..
Smashing the dough between 2 sheets of parchment paper…..it will look like this! A perfect corn tortilla! 

Then fry them in a frying pan…1 minute on each side! 

Check out the tutorial on my cooking blog….The Weekday Chef  HERE! 
The dough is in the Mexican food section of the grocery store and is called  Masa de harina. 

A great story I read the kids is called THE TORTILLA FACTORY. by Gary Paulsen The Link is HERE. Lots of kids have seen how they make the flour tortillas at the burrito restaurants here but not so much the corn tortillas
.Front Cover

Flower CraftWe love this Cinco de Mayo Tissue Party Flower craft for kids. It’s simple, easy and fun! And, don’t forget super colorful!
Craft supplies you will need:
Tissue paper
Pipe cleaner
Scissors
Craft instructions:
Cut large squares (6X6) out of the tissue paper.
Have the children choose and stack about 10 squares of different color tissue paper.
Show the children how to accordion fold the tissue paper stack using about 1 in folds.
Then, have the children place a pipe cleaner in the middle of the folded tissue paper and secure it by bending the pipe cleaner over the middle of the folded paper and then twist the ends together.
Once done, have the children starting pulling the tissue paper pieces toward the middle, starting with the top piece.  Have the children hold on to the bottom piece as they do it.
And, voila, the children now have Tissue Paper Flowers for Cinco de Mayo!

In the past I’ve made churros and pinatas, and we’ve even done a large pinata filled with candy, but it was over so fast I didn’t feel it was very fun for most of the kids. I’m not going to do real pinatas again.  But I have done tiny individual ones from a paper bag. Link HERE for last year’s Cinco de Mayo activities.


Last year we did the flag of Mexico and some Mariachis, and cute Sombrero hats using Fiesta stickers from a party store. Link is HERE at Party Cheap. 


But this year we decided to make Marraccas out of empty, rinsed out,  vegetable cans I’ve been saving up all year. 

These are the stickers I had used last year and still had plenty….I think they
were from Oriental Trading….We put them on hats last year, and this year we added them to
the mariachi guitars. 
I found some paper that looked kind of AZTEC-Y so I copied it and Added the Cinco de Mayo label…then had the kids color them with markers as a fast finisher all week. Most of them got done with it by Friday. 
Here was a finished one with the yarn and beads added to the ends. 

Then we cut them out and glued them on cans.. We put popcorn and black beans inside and taped them shut with book tape…..then added some yarn and beads tied onto the ends of yarn….
After the beading of our finished Maracas we HAD to do The Mexican Hat Dance! 
Da da…..da da……..da da…..clap clap!  Mexican Hat Dance! 
I had hats all over the classroom!  It was fun!   
Finished Maracas! Ole!
More Maracas….just after the Mexican Hat Dance…we were all packed up to go home….
Cinco de Mayo is a fun holiday…..
The last few beaders finishing their Maracas….

It was fun….

 One math game played was CINCO math Bingo and I used mental math and place value problems I made up on the spot. They had to add and subtract in their heads.  For instance, I’d say, “what is 132 plus 20” or “What is 340 take away 300?”  Then they would put the bingo marker on that number. Or I’d say, how much is 3 quarters worth? Or one quarter plus a nickel?  Lots of fun and pretty challenging too! 
We play till 3 people get bingos and then we start a new game. 

Weekly Readers we read on Mexican culture…..
I saved a few of these Weekly Readers on Hispanic Culture.

It would be fun to come up with a Jeopardy game with simple questions on fiestas, traditions and foods wouldn’t it?  Yeah, I don’t know if I’m that ambitious! 

Color Word Match Game

A Cinco de Mayo Fill in the Blank I made up can be found HERE at this link. And of course we HAD TO DANCE!  We layed the Mexican Hats all over the floor and groups of 3 kids danced around them. I should have made a video, But we danced to this one and it’s pretty good too!

 Enjoy! Arriba! OLE!  And HAPPY CINCO de MAYO!

Earth Day Activities

Earth Week Writing and Art projects…..

This week we were a little late in getting our Earth Day stuff done. I really like to spend a full week on Earth Day, I think it is that important for kids to know that we can all make a difference in how we Reduce our trash use, reuse things and recycle what we can. And most of them don’t know how much trash we dump in our landfills, or even what a landfill is!

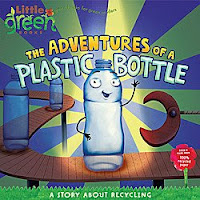
The Adventures of a Plastic Bottle: A Story About Recycling by Alison Inches  It’s a great week to learn how we all can help in the goal of reducing our trash, recycling, and not wasting resources.

Going Green Bracelets…..all 30 kids made these….check out Oriental Trading for the  cute foam beads.
We wrote about how we can help during Earth Week…

Earth Day prompt; I can help the earth by……

Composting is very good for the earth! The kids learned a lot from all their readings….

Oh no! Pollution is not good!  Yuck! 
Our bulletin board…. with our 2 weekly readers…..
We talked about the 3 Rs; Reducing, reusing and recycling…
We chose our Earth Day writing papers…..

 Then painted the earth on coffee filters…..and glued on hands…..

And colored rainbows…..gotta love a rainbow! 
Picking up trash for Earth Week is a great idea! 
Walking instead of taking a car…great idea!  
Earth Week book center…..we read many Weekly Readers too….
And I bought “Peat Pots” for us to plant vegetables seeds of our choice…..
We wrote down things we would try to do to be better at ecology…..
And recycling and not adding to the pollution we see…in water, parks and beaches….
We’ve learned a lot about our world these past few weeks…..

Planting Vegetable Gardens

We just got done planting our Vegetable Gardens in “Peat Pots”…
The boys here are showing off their seed choices….in these Peat Pots.

 Springtime in Utah means we actually get a few tulips, daffodils and crocus coming up as soon as the snow melts. So it makes me think about my flower and vegetable gardens. And with the April showers we get, it is the perfect time to plant some seeds.

Flowers made from cupcake liners….the roots are made from string….
Everybody picked out their 2 favorite veggies to plant in their Peat Pots….

We read about Jack and Beanstalk and wrote about him last year. See it HERE.  And this year we read about a special Garden in our Literature Book. So we brainstormed what would happen if we planted some “magic” seeds?

So….. we wrote about our own magical garden where some of our most favorite foods could grow from magical seeds. We had everything from donuts and pancake plants to ice cream and pizza plants. Yummy!

The girls loved planting veggies too.

They really loved Mrs. Adams art using “string” for the roots….so cute!  Everybody labeled the parts of the plant too….

Look at that ride in Adam’s Donut Garden! How fun! A donut bouncy house! 

 We made advertising POSTERS for our AMUSEMENT PARK GARDENS. Then we wrote a persuasive advertisement to go along with our poster enticing people to come to our park.

Peter’s Pizza Park is FREE on Weekends!  Who could pass THAT up? 
Here’s our creative writing….Lots of fun Gardens and Parks…..just like Disneyland!  

Here’s a sampling…but they were all very fun to read about…..

And all these parks are such deals! Only a buck! I wish it was real life and not a fantasy park! 

Leave it to Gavin to think up a Money Garden….where  his money grows on plants!  Yay! 

Nova’s and Zach’s Pizza Gardens had a Pizza ferris wheel and pizza plants all over….yum!  I’d take a  BIG BITE! 

Come One, Come All! Love it! 

 I think I’d be persuaded to go and check some of these wild parks out….wouldn’t you?

Narrated story of Eric Carle’s The Tiny Seed…with sound effects…..

We wrote down which seeds we planted on sticks so we don’t forget…..Some cute plant tag printables are HERE at Chart Jungle.


Books in my Plant unit that  I Love:
1. Planting a Rainbow by Lois Ehlert
2. The Tiny Seed by Eric Carle
3. Flower Garden by Eve Bunting
4. From Seed to Plant by Gail Gibbons
5. From Seed to Sunflower by Gerald Legg

I leave these books out on my science center and kids really do get through the whole lot of them….and some of them I read aloud…..

The book Flower Garden has such lovely pictures….one of my favorites….
I found these “Peat pots” for $2.00 for a set of 22…..perfect for my classroom. Then I picked out vegetable seeds I wanted to plant indoors to do some “starts” for my own veggie garden.  The kids got to pick 2 kinds of seeds for their “starter” plants.  
Also Planting a Rainbow and The Tiny Seed…..great books for kids.

I gave them the choice of tomato, cucumber, sugar snap peas, radishes, zuchini or cilantro herb.  Most of them picked tomato or sugar snap peas, but we had quite a variety.  I placed them in this grow tray and put a grow light on them.

Their rotation with Mrs. Adams where they did a Plant Journal

And other assorted activities….

The boys liked the Plant and Seeds art project they did in science rotations.

The girls with their labeled parts of a flower….

Plants and seeds are one of my favorites! 
I hope our seeds sprout up very soon….and I better get my own garden started too!   Happy Spring Gardening!!!

April Watercolor flowers and Kite Poems

April Showers bring Pretty Spring Flowers…..and KITES! 
We made DIAMONTE Poetry on Kites this week…..and Coffee Filter Flowers 

DIAMONTE POEMS are poems in a diamond pattern…they go like this…
                     1 word                                                                    
        2 word phrase describing above word        
3 words ending in “ing” describing first word  (participles)
         2 words (adjectives)                                          
                    1 word (synonym of 1st word)        

   See a link HERE for instructions and a sample form.           

We painted coffee filters and added sunflower seeds and stems….

Our  bulletin board reads “April Showers Bring Pretty Spring Flowers”

Pretty Springtime Kite poetry 

We added chains to each kite of our spelling words written two times each….

The flowers can be either painted with water colors or dipped in food coloring and dried…..
We did it both ways and the food coloring way is definitely easier and less messy! 
Just snip a little strip in between two folds so every 3rd fold cut out….

Paint the center area a different color and when dried add the sunflower seeds to the flower….

They were all different color combinations….really cute….

So were our poems from all things SPRING! 

Sports were represented……as well as……

Allergies of course…..and……

Insects of all sorts…..

And Springtime Animals too……can’t forget those……

And all kinds of weather and flowers…and even Hunting! 

Of course football….we have some die hard football lovers here…..

And Gardening too….

Easter poems  too….

And plants…I think we covered it all! 

This is an easy art project for spring….coffee filter flowers….

Dip them…..dry them….trim them….and glue them on a stem with a leaf…..

We backed our flowers with another filter just to keep them looking 3 D and perky…. 

It was fun and easy! Dip and Dry….then trim them and embellish them….

This little girl “rounded” her petals on her Spring Watercolored flowers  too.  

Gotta love the flower with a face, am I right?   Happy Spring Everybody! 

Colored Eggs and Sidewalk Chalk

 For our Easter Party this year we did something different. Since I have most of my class from last year I decided to do some colored eggs and baskets, and then go outside and do some sidewalk chalk. It was a perfect day too.

We made little Easter baskets with chicks inside….

We colored eggs…

Addie drew some Easter bunnies…

 I was surprised how much the kids loved their little baskets with the little fuzzy chickie inside.

Emma drew Easter eggs and chicks….
We made baskets out of our lunchtime milk cartons…..
We washed them out…filled them with Easter grass…..

Then we colored some hard boiled eggs Mrs. Moss brought to school……

Then we put handles on our little baskets and decorated them up…..

Everybody picked a bunny, made strips of grass too…..

We wrapped these strips of “grass” around our milk cartons…then added cute egg  and bunny cutouts to them…

Matt made a giant, pastel, ice cream cone….
Finished Easter baskets ready to hold our colored eggs….

Brynlin made so many cute things…the chalk was very bright and colorful! 

Here are all the guys proud of their baskets! 

Zach made a cute Easter Bunny….all the kids that came out after school saw our chalk  creations….
Here little chicky chicky….

Easter Cards went home to parents too….

We wrote parent letters for inside the cute cards too. They were very nice. I think they will be a fun surprise on Easter morning!  

Easter Letters to Parents

They were cute with the cards on top….

Trace made a really pretty Easter egg! 
Nova made some Easter eggs and Spring Flowers….

Happy Spring Break everybody! 
I hope the principal liked our sidewalk chalk art…cuz we forgot to ask if it was okay! Oops! 

Easter Cards and Baskets

We made little itty bitty baskets for our colored eggs from a lunchtime milk carton at school.
We colored eggs and put our names on them to fill our cute baskets…
AND….. we made cute Easter cards with Easter baskets filled with eggs and things inside….

We wrote letters to mom and dad to go inside our cards too…

We had just about every color of the rainbow…..well….except purple….

The cards turned out so pretty! 

Every card was unique 

Lots of love went into them…..

Lots of fake candy too….snicker….

Then we made tiny baskets out of pint milk cartons from lunchtime….

We cut off the tops, stapled on handles and filled them with  Easter grass….

Then we decorated the outside of  them and added a little fuzzy chick…..

Here’s a finished one….super cute…..perfect for our colored eggs…

It was fun for the kids to color the hard boiled eggs Mrs. Moss brought in….

Here we are with our finished baskets after school…..Happy Easter! 

Hope you all have a great Spring Break! 

It will be fun to do some Easter Egg hunts…..

Hope you all have fun! 

Happy Easter!