Books:The Grouchy Ladybug by Eric Carle Five Little Ladybugs by melanie Gerth Are You a Ladybug? by Judy Allen Tudor
I love Eric Carle books. One way I love to introduce telling time by 5 minute increments is using the book “The Grouchy Ladybug”. It has clocks on every page and they have incremental times listed. It’s a good springboard for telling time. We read the book and then we make a ladybug clock. I just found a basic clock pattern and copy it off on red construction paper. Then I add a half circle shaped, small, black, head and have the kids give it a face with white crayon. Then we add 6 black legs and we accordian fold them so it looks kind of funny. Here are our ladybug clocks.
Very Grouchy Ladybug Clocks
Then we read books on Ladybug Lifecycles and I also have a few Weekly Readers/Scholastic News that I save if they have any Science in them. I also save the Science Spin magazine if they are good ones.
SHARED READING
“Five Little Ladybugs”
Five little ladybugs climbing up a door, One flew away and then there were four.
Four little ladybugs sitting on a tree, One flew away and then there were three.
Three little ladybugs landing on a shoe, One flew away and then there were two.
Two little ladybugs looking for some fun, One flew away and then there was one.
One little ladybug sitting in the sun, She flew away and then there were none.
MUSIC: I found a cute song called Ladybug in my Soda on the website K-8 Kidstunes and got a copy for 99 cents in an MP3 download. The link is HERE but you do have to sign up a “kid” to get the cheap version. I have kids and grandkids so it’s easy now that I have signed up. It’s a funny song with a real catchy beat and easy to learn.
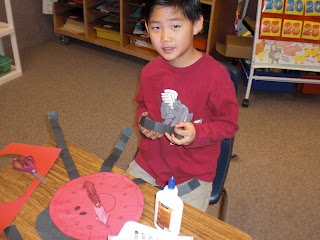
Peter is making his Grouchy Ladybug Clock
MATH: A fun printable with black dots on individual ladybugs to print out can be found HERE at A Kids Math. You can print off a dozen of these to place in a center with a key. Kids write down their answers on an answer sheet and then check with the key.
We kept these in our desks for a week and used them to practice telling time….
CLOCK MATH Every day for a few weeks call out different times and have them put the hands on their clocks. Be sure to also introduce half past, quarter past, quarter till. These are really difficult concepts for young children to get so I introduce it in first grade. I also have a magnetic clock I keep on my white board. I draw 4 lines on the fact to “cut” the clock into “quarters” or fourths. I point out that 3 and 9 are the quarter past and quarter till numbers.
Fun Game: Find a partner and use both of your ladybug clocks. Decide to do “o’clock” or “thirty” for doing elapsed time. Then decide how many hours difference there is going to be and make up a sentence. Example: 3:00 is 2 hours later than 1:00. 12:30 is 3 hours later than 9:30 etc. Elapsed time is another very hard concept for young kids to get. This is higher level but some of your high kids will get it and you will be differentiating for those who can do it.
We played this Bug Bingo and then I left it out for a center game….great for insect vocabulary development!
The next week after doing our life cycle books we painted our own ladybug beetles! Attach a poem or a Sodoku math to the back for fun!
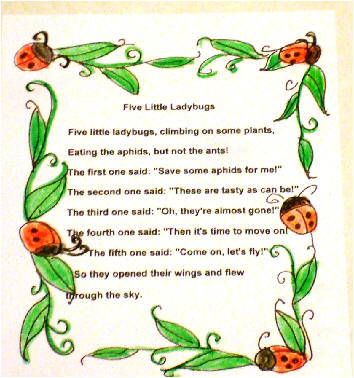
Another cute poem I found online…Use it on the back of your clocks!
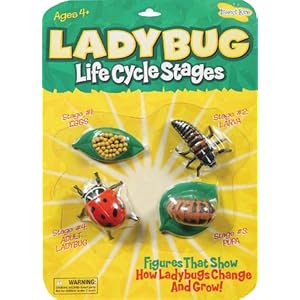
SCIENCE: Do a Life Cycle of a Ladybug wheel on a paper plate divided with a criss cross. The link can be found at A Kids Heart HERE. Color the life cycle and then glue it down. OR….Write the 4 steps to the life cycle of a Ladybug. We decided to do a 4 flap book and used macaroni, dried beans and rice for the stages.
Here is the top of our flip book. We folded it into 4, cut just the top layer.
Another fun center I do is I have 2 classroom microscopes and insect slides. I put those out with a bin full of dollar store plastic insects and 4 little magnifying glass viewers and insect books. I took a picture on my classroom camera and then left it in the classroom! I’ll post pics of that next week too. The kids LOVE LOVE LOVE this center. I’ve collected about 2 dozen insect books so I put a new batch out each week and we switch from ants, to ladybugs and dragonflies, and next week is grasshoppers and caterpillars.
WRITING: I love to do a minibook describing the life cycle of a ladybug. I use yellow construction paper and give each student one large piece I have folded in half the long way. Then fold that in half 2 more times to make the 4 folds. Then I cut 4 slits evenly in just the top half of my paper. It will give you 4 pages to lift up and write.
Here is the 4 stages (art from Enchanted Learning) writing from a first grader!
Then we do our own Ladybug Life Cycle Flap Books. Inside the top flap we paste a picture of the life cycle stages. On the bottom of the inside flap we draw pencil lines with a ruler and write 2 sentences depicting what is happening in the stage in the picture above the writing. A link for the clip art stages is at Enchanted Learning HERE for Ladybug Lifecycles. They always turn out really cute. Don’t forget to watch the utube video before doing the writing.
Cute painted ladybugs with their chenille stem antennae!
Completed Flip Book. Oops, he forgot to color the pupa macaroni!
On the tops I use brown and green crepe paper to make twigs and leaves. Then I add macaroni for the life cycle. A few pieces of rice for the eggs, then a kidney bean for the larvae worm stage. Then a piece of shell macaroni for the cocoon stage. Have the kids color the macaroni with markers. And finally a clip art ladybug to color for the final adult beetle stage. I found another lip art ladybug I liked for the cover and I typed up the 4 words of the stages. Then I copied the Enchanted Learning page with these additions. That’s the life cycle! Then we watched the life cycle utube video from the top of my post. A fun website that has lots of ladybug facts is called Ladybug Lady and her link is HERE. She also has lots of good ideas for classroom teachers.
I got a larger one of these and 5 smaller ones. I’ve used the large one for larva.
Get some ladybugs from your local Home Depot or Lowes. I bought some individual butterfly garden holders from Oriental Trading a few years back and we put one on each table for kids to observe with hand lenses. It is fun to see how different their colorings and sizes are and to see them close up. They only last a few days though so I’d set them free in your garden after a day or so.
We traced small and large paper cups for the spots….
ART: Paint a ladybug on art paper. When dry use black markers to make the line down the middle and dots on his back were traced using the top circle and bottom circle of a dixie paper cup. Add 2 wiggly eyes. Paint yellow, orange and red. Wait for color to dry. Then add black painted spots. Dry and then Cut out. Add some black chenille stems with tape for the antennae and 1/2 inch by 6 inch legs (we accordian folded the legs).. On the back type up this poem and read for a shared reading activity.
We read Scholastic News on Ladybug and Dragonfly Life Cycles and did a Venn Diagram comparing them.
Did you know they come in 3 colors? Red, orange and yellow!
Here is our finished Ladybug Life Cycle bulletin board!
FUN MATH EXTENSION!
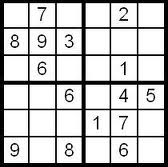
Add a fun Sodoku to the back of your ladybug pictures or clocks!
I hope you have fun seeing what we have learned about LADYBUGS!


