I saw this artist’s cute renditions of kids drawings on “How to Be a Pirate” or “How to Be a Fairy. I thought that sounded so fun for kids. I wanted them to do some writing on something other than reports and non-fiction and narrative stories since we’d done plenty of each during our writing block.
So We first looked at Helen Doodles drawings HERE. I liked how her drawings had lots of fabulous writing hints on them too. For How To Be a Pirate she had listed pirate lingo like “Walk the Plank and Shiver Me Timbers” and stuff like that….GREAT tips for kids to jumpstart their own brainstorming.
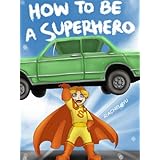 |
| Then this book was another inspiration. Kids love superheros! |
So how about a “How To Do It” instructional writing? That would be fun with a kid’s imagination tied into it! It also teaches kids another “AUTHOR’S PURPOSE FOR WRITING….TO INFORM, ENTERTAIN, PERSUADE”. This will definitely fit into the first 2 purposes for these authors to write!
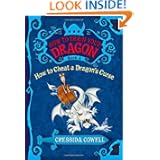 |
| Another Inspiration were the series of books called “How to Train Your Dragon”….These are very popular in my class too…. |
The pictures of hers reminded me of “No David” books. I showed the kids how funny the illustrations are. These would make good puppet faces! Then we brainstormed all the “How To” titles we could come up with. Each student had to choose one of the categories. They did well brainstorming…..
1. How to Be a Pirate
2. How to Be a Fairy.
3. How to Fight a Dragon.
4. How to Play the game of _______.
5. How to Build a ________.
6. How to Make a ________.
Some kids wrote serious How To instructions. Some did funny mythical fictional ones. We started with a rough draft “sloppy copy”. It seemed like everyone had a great idea. Then I edited them and had kids add sentences, better describing words, more enhanced “settings” for their how to’s.
 |
| I think this one was “How to Catch a Dragon” |
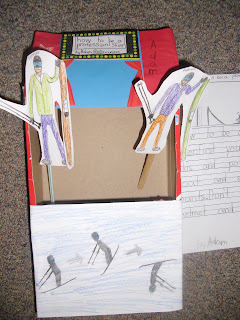
After rewriting our stories on nice paper, we all collected cereal boxes. Then we did a “front of the box” 1/2 sheet illustration on white paper of our most important point in the how to writing. Then we cut a top square out of the front of the box and a bottom square out of the back of the box for puppetry.
 |
| Making a puppet theater from a cereal box |
I used a steak knife and cut across the middle of the front…then used scissors to cut up both sides. Then I folded
up the top and taped it to the top of the cereal box with book tape. This is where their title went.
 |
Then on the back about the bottom third I used my steak knife again and cut a slit. Then used scissors to cut down the sides and across the bottom leaving about an inch around the edge. I wanted them to be able to lay their puppets insde
and they wouldn’t fall out. |
 |
Here’s the top folded up and ready for the red or yellow paper we glued on with the caption
and the cute little foam ditty I found at Hobby Lobby for a buck. |
We decorated the bent up top portion of the box with a curtain and a sign made out of foam. I had found them on a clearance rack in the summer for $1.00 and there were 30. WHAT A DEAL!! They had some religious slogan I covered with the rectangle of white paper.
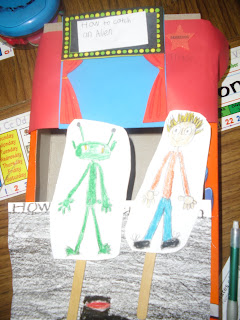 |
| Cereal Box Puppet Theater… “How to Spot an Alien” (this one was soooo hysterical! “use twinkies to lure the alien…” |
Here is the finished cereal box theater…red paper at the top and a half sheet of white illustration paper covers the bottom. The sides just stayed looking like cereal. We used the other half sheet for puppets and I gave each student 2 mini popsicle sticks or straws or wooden skewers to use for puppets. I kinda cleaned out my supplies….
 |
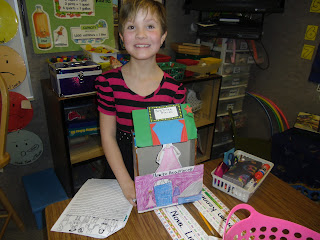
| Here is a finished writing after the edit and rewrite were done…..I wish I had snapped more pics! |
 |
They were very motivated to do their theaters so everybody got their rewrites done before
working on their puppets….I find that an art project really motivates kids to get a writing done quick. |
 |
| The kids got to choose their own stationery from my collection….some chose some cute dragon paper… |
 |
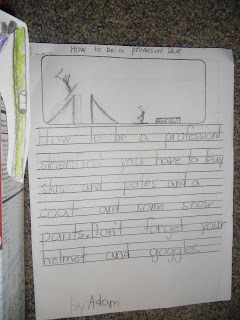
| How to be a Professional Skier…..Such great illustrations too! |
 |
| I loved this “Jump” illustration…so cute! |
It is cute how they included a glittery star that says “starring”. I told them to write their names under their stars. So cute, right?
 |
| Cute paper for the raspberry ice cream How To…. |
 |
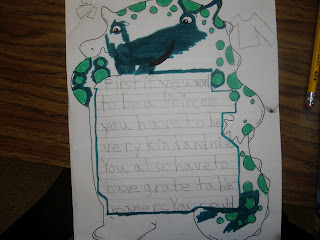
| How to Be a Princess…..so cute…Did you know you MUST be KIND? I loved that…. |
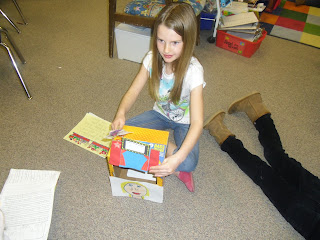
Then we started our puppets. Then we each were allowed two long, wooden skewers to tape onto 2 puppets we made from the other 1/2 sheet of our white paper. They had to have everything finished in 4 hour-long writing periods this week. Try editing 30 papers in an hour. That is not so fun.
 |
| Reading the How To Be….with friends at the microphone…. |
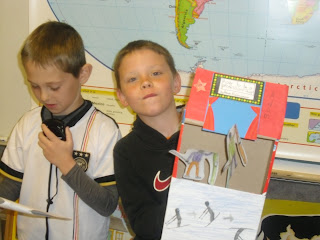 |
| Then the author read their “How To Be a” and got help from friends in the puppeteering department… |
 |
| It was fun to hear all the unique How To writings the kids came up with… |
I wish I could show all of them. . There was such a huge variety!
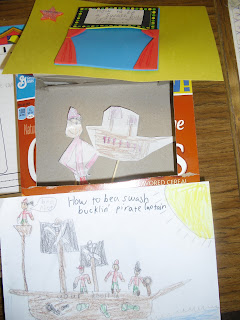 |
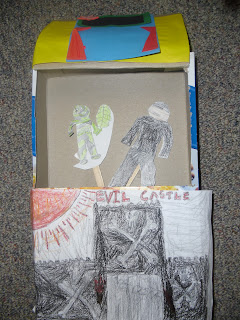
| How to be a Pirate was popular….This was such a great illustrator too! I think How to Spot an Alien was also popular… |
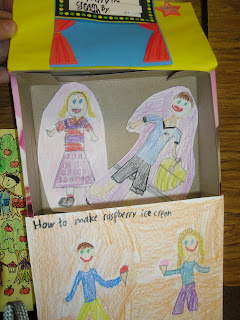 |
There were quite a few that were very instructional…..How to Make Ice Cream and How to
Potty Train your Pets were both very interesting, and informative! |
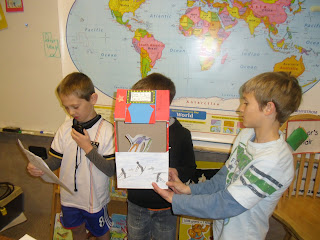
So first day writing, next day rewrite and illustration page. 3rd day box and puppets, 4th day finishing day. The last day we entertained each other. We got in groups of 4 and did the puppet shows for each other. It was so fun to watch them read with expression for each other.
 |
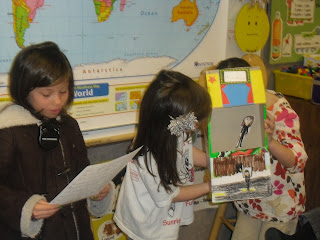
| We practiced first with a partner…. |
 |
| They got to choose 3 friends to match up with for 3 swaps…You read to me, then I’ll read to you…. |
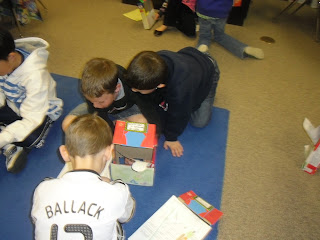 |
| I think the kids really got into this fun buddy reading activity the most…. |
 |
But they were also proud of their puppets and their theaters….Nova did How to Be a Princess…
I loved that she included the fact that you MUST be very NICE and KIND. Good advice all you “would be” princesses! |
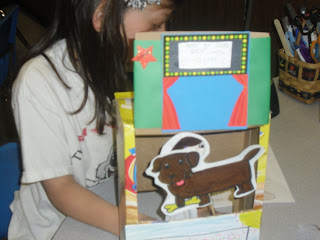 |
| These Puppets were my very favorites….There were quite a few kids who did How To Train Pets….so cute… |
 |
| This was a lot of fun and surprisingly not as much work as you would think! |
Here are our finished puppet theatres, and our finished “How To” writings, and our puppets. This was a fun and creative enrichment project. I loved how they all turned out and how engaged the kids were throughout the week.


