Valentine Kids Cards and Valentine Card Holders…

This week is Valentines Day.  We’ve been busy doing Valentine Cards for parents and relatives and making our Valentine Holders for Tuesday’s Valentine Party.

Here’s our finished Valentine Card Holders for the party Tuesday…

We used big squares of butcher paper in pink, red, lavender and purple for our Valentine Card Holders……..

Mrs. Kenner, one of our mom helpers had spent an hour punching out die cut hearts for us last week….
We also added some Mrs. Moss had cut out (scrolled looking pink ones) and she copied some on pink colored paper…the ones with the faces….

Here is how to start….take a 24 inch square and fold up the left and right bottom corners to the middle. (bottom of heart)

Then use a stapler and staple them a bit overlapping in the middle…I use 2 or 3 staples so they are secure.  (Just
staple the top level, not all the way through…so you have a pointy cone shaped pocket….

Then cut around the top of the back side of cone…make it a heart shape on the 2 top sides….like this…..
Then cut some white poster board 2 inch by 15 inch strips for the “handles” and staple them to the top and the inside front….

Like this handle here….then let the kids decorate….I also passed out heart stickers then could use….

I stapled them up and down the hallway outside our door….that way they can go around on Tuesday
and deliver all their Valentines to the different Valentine Holders with the names on the tops.

 Then we made some parent cards and wrote on cute stationery some Dear Mom and Dad letters and also a buddy letter to our 6th grade buddies.  It took us 2 days to finish both letters but they were really cute.
I forgot to take some pictures but they were really sweet and heartfelt letters….

I had a big Tupperware bin full of hearts and cut outs and things to decorate the cards with. 

Kids Valentine Cards were all pretty unique!  

The parent letters and cards got a chocolate heart wrapped in silver attached.  The buddy letters
and cards just got a sucker attached and we sent them down a package of red licorice for their class.
They had just finished performing the play Macbeth. So it was a wrap party snack.  

Cute buddy cards….I forgot to take a picture of all the parent cards but they were even prettier.  Who knew
they would take more time and effort on mom and dad’s card?  Yeah….I knew they would…..mmmhmmmm…..

Then we made mom and dad a woven heart with some silvery purple or red “kiss lips” attached.
They were not easy for the kids because they had to weave in and out on the pink and red. 

This is what they start out looking like…..

And this is how they turned out… really cute!  I hope the parents will hang
these cute hearts from a chandelier or light fixture….super cute!  
And here are my little valentines.  We went to the Thanksgiving Point petting zoo on Saturday. 

We fed the animals…rode the tractor hayride…..

And did the pony rides….it was super fun being together with family! 

I found an awesome link to a tutorial on those paper roses I’ve been seeing on craft blogs and on T.V. morning shows.These would have been so cute on our parent or buddy cards too!

The link is HERE at Kids Baristanet for the tutorial.  We may have to use this idea for a Mother’s Day card in May.

Barista Kids cute paper roses….
She had a really cute way to make an envelope out of a heart too….

 We made up poems later in the week. I will post those soon.  In the meantime….here are some fun ideas for Valentines activities next week.

Make up a silly “Roses are Red, Violets are Blue” poem.
Decorate a card with thumbprints and
write “Thumb”body loves you!
Write cards where each person shares 1 thing that they love
about every person in their family.

Send home sidewalk chalk. Have kids turn the driveway at home
into a giant Valentine’s Day card by decorating it with chalk.
Write an acrostic poem using the letters L O V E.


HAPPY VALENTINES DAY EVERYONE! 

The 7 Chinese Brothers & Chinese New Year Fun

HERE is a great link from Learning to Give with multiple lessons plans using The Seven Chinese Brothers. There’s a section where they created banners depicting each of the 7 brothers and their talents.  I found a cute video on how to make the Chinese “Paddy” hats they wear in the rice paddies and in the story. I’d like to make hats and list acts of kindness you could do for others in a spiral inside each hat.

How to make a Chinese “Rice Paddy” Hat…..

So for CHINESE NEW YEAR this year we had many wonderful activities. I think it is important to read multicultural stories of the many cultures represented in your classrooms each year. I have Asian students and so I like to teach the other kids about how Chinese New Year is celebrated in the Asian parts of the world.

 And we try to make a little celebration of it in my classroom too. Here we are just before our school parade to the other grades singing the Dragon song and showing them our Chinese Dragons we made….
Chinese New Year Dragons…..

 Here are some of my students showing off their artistic dragons. Peter’s wearing traditional Korean clothes.

Our finished Chinese dragons…..They did their own lettering with black markers….

This is a VERY cute story we read about Sam who gets Chinese New Year Lucky Money to spend on anything he wants. In the end he buys socks for a homeless man who he sees on the streets of the dragon parade so he can keep warm. Very touching story! Check it out above (Sam and the Lucky Money).

You can barely see the tail here but it is very colorful!  
We used lots of colorful crepe paper for the tail streamers and the “fire” coming from the mouth of the Chinese Dragons..
Peter’s mom, Mrs. Kim, came and showed us some Asian Cultural items after our parade! Here’s the Korean Flag.
She is explaining the black markings mean things like fire and water….brother and sister….opposites….
Here is Peter with his mother and all the things they brought for us to see….
Traditional Korean clothing….so pretty!  
Asian foods their family likes to eat….Sushi! 
Thanks for coming in to teach us Mrs. Kim! We loved it! 

More festival costumes of Korea…..
Peter showing us an bow he learned to do…..
Wedding dress clothing represented by these Korean Wedding Dolls….Girls would
wear a dress looking similar to this one in red and green….
More traditional Korean clothing…so beautiful!
Tae Kwon Do is the Korean martial arts…the only one
that is an Official Olympic Sport….
Peter shows off his black belt and martial arts bear…..
Korean money….$10,000 in Korean money means $1,000 in our money…
The top picture shows the famous Korean who did their alphabet we learned….
Here’s Peter showing us a kid’s favorite book Where The Wild Things Are…printed in
the Korean language. It was wonderful to see so many things from Korea! Thanks Peter! And Thanks to
Mrs. Kim who did an excellent job teaching us about some of the customs of Korea. 

We started with a   MAKING WORDS activity using THE YEAR OF THE DRAGON to try and make as many words as possible. I set the timer for 3 minutes and the kids came up with as many as 32 words in that time. It was a lot of fun to see them get into the competition!  Then we looked at a Chinese Calendar (the animal calendar in the round) and figured out what year we were each born.
                               THE YEAR OF THE DRAGON!
Then we Read some fun literature. The first one we read as a play while I put up the book pictures on the document camera. I just typed up the text of the book and had 4 narrators (each table became a narrator) and the 7 brothers, the Emperor and the Guards. I must say Allie and Emma had the most memorable expression as they acted out their parts!

We did a Readers Theater Play of The Seven Chinese Brothers.….

HERE at Loveland K12 is a list of activities to go along with the story The Seven Chinese Brothers.
 Between the two I found word searches, a word jumble (unscramble) and some maps of China. HERE at Vaiden.net  is a downloadable story about the 5 Chinese Brothers that would be a good compare and contrast against The Seven Chinese Brothers too. Or HERE at Apples 4 the Teacher are some other fun printables for Chinese New Year.

I made The Seven Chinese Brothers Puppets for them to color and put on thick popsicle sticks to use
 while we read the Reader’s Theater version of The Seven Chinese Brothers….It was lots of fun!

Another Book we read to Celebrate Chinese New Year is Sam and the Lucky Money.  A fun lesson plan to use with the great book about giving to those less fortunate than you is HERE.

We also read this book The Seven Chinese Sisters and compared and contrasted the two stories and
what the sisters did in theirs versus what the brothers did in their story.
In The Seven Chinese Sisters book there is a dragon that causes trouble. 
For Chinese New Year we made DRAGONS to use in our first and second grade parade around the school.  We bring small gongs, cymbols, and drums and sing a song while carrying around these awesome dragons we created. HERE at Craft Jr.  is a link to a dragon puppet on chopsticks that is very pretty. 


I freehand drew a dragon head and we colored it and glued it on a red dragon outline…..
The body and tail are made from 1 foot by 4 foot of yellow butcher paper folded every 8 inches
Then we added 2 foot length streamers to the tail….all colors of the rainbow….so pretty!  
We decorated the heads with marker and glued them on the body of the Chinese Dragon Craft 
Then we painted chinese lettering on our dragons and made paper decorations for them….
We cut 1/2 inch strips of  red, orange and yellow “fire” streamers and stapled them to the mouth…..
Then we added Red, Yellow, Orange, Green, Blue  streamers to the tail in about 2 foot lengths stapled….
HERE is the Learning to GIVE link was a list of activities that I really loved too. Here was one I might have to use next week as we get ready for Valentines Day.
Get out a giant piece of paper and, as a family, make the longest list you can of small ways to say “I like you” to family and friends. Here are some ideas to get you started: bring someone a cookie, rub Mom’s back, offer to weed your grandma’s garden, sweep the floor, bring Dad a drink of water, offer to play your sister’s favorite game, smile at your brother, etc.” 

GUNG HAY FAT CHOY! 

HAPPY CHINESE NEW YEAR….

THE YEAR OF THE DRAGON 2012! 

Groundhogs Day Activities


This February 2nd is Groundhog’s Day.  For fun we are going to be doing some Groundhog Activities for the day. I thought of writing comic strips or puppet shows. But for a fun activity after math I passed out some Groundhog Gameboards. I told them to design their own Candy Land-Type game for Groundhogs Day using 10 Math Facts in Multiplication, 5 cards, 4 positive and 4 negative situations to land on.

       Here’s a cute VIDEO and SONG about Groundhogs Day that my students will LOVE!

They made up their own Groundhogs Day Games!
They needed to use their groundhogs  in colors to match their Groundhogs Day Gameboards….
With cards telling  Groundhog consequences….super cute! 

We started making Groundhog Gameboards using math multiplication facts.  We copied some ideas from Candy Land (using bridges and colored groundhog cards to move to different locations on the board) but overall we made up our own fun boards and wrote out fun things as they land on colors and pick a Groundhog color card. Here were some of the CARD consequences they came up with today…. PICK A GROUNDHOG CARD GAME….1. Fell into a snake hole, miss a turn.2. Snowy avalance ahead, hop forward 3 spaces.3. Chased by a bobcat, run ahead 2 spaces.4. Go over the Groundhog Bridge.5. Fell into Shadow Swamp, skip your turn.6. You saw your shadow, stay in your den for 1 turn.

We had poems and songs on the back of our Groundhogs Day games that we read and sang too…..
And they all put 10 multiplication math facts into their games….

A CUTE art project and prediction chart I found at this Mrs. Williamson’s Blog.

We made a prediction on weather the groundhog will see his shadow or not. There were 12 votes YES he will and 9 votes no he will not.  We’ll see the results tomorrow in the news! 

A cute PATTERN for a Groundhog Art project is HERE at Finally in First.

Groundhog Day ART- This would also make a cute HAT with just a brown strip and the hands just to the left
and right of the head like he’s peeking out of his hole. I LOVE the teeth! 
These were the first few that got finished with their Groundhogs Gameboards…..we haven’t played them yet….
They will be excited to play each other’s games on Groundhog Day, February 2nd! 

They added math facts on their boards. It was fun seeing the kids color their boards and add matching groundhog colored cards with questions of all kinds on them. These kids are very creative!

We got these blacklines out of the January Teacher Helper Magazine….

 HERE at ARTIST HELPER is a website where you can get a printable gameboard and some little groundhogs to copy off if you want to make your own.  I got mine out of the monthly teacher helper magazine for January.

Groundhogs for consequence cards or multiplication math facts…. Everybody got 10
Isn’t this the CUTEST cupcake you ever saw? Groundhog Cupcakes would be a sweet treat today! 
I showed the kids an old Candyland gameboard…to get some cool ideas….

Another site that has lots of Groundhogs Day Activities is HERE at Artist Helping Teachers.

Then we brainstormed some fun things we could write up on cards or spaces on the Gameboards

We Sang this Groundhog Song to the “I’m a Little Teapot” Tune….

          Geoffrey Groundhog Predicts The Weather (Turtleback School & Library Binding Edition)               

We read a few stories about Groundhogs too. And we read some funny poems about groundhogs and sang  songs. We also had a vote on if the groundhog will see its shadow tomorrow or not. I’m hoping we don’t have 6 more weeks of WINTER! Brrrr…… We will  watch the youtube of Punxatawny Phil to find out. HAPPY GROUNDHOGS DAY 2012! 

I found this Darling video about Groundhogs. Did you know they were Woodchucks? They are so cute!  

Snowglobe Stories & Art

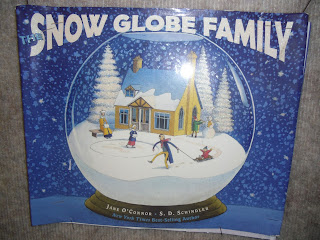
Just for fun we did some activities with Snow Globes! I have a collection of Snow Globes I put out in the wintertime at my house. So  I bring a few into class the day we read 
The Snow Globe Family.

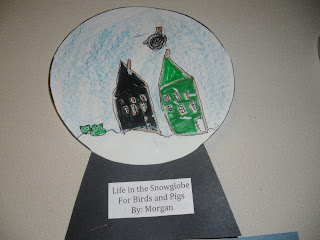
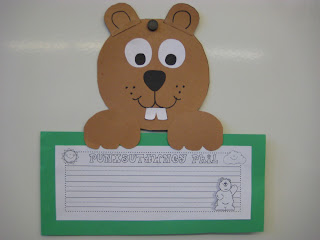
This cute picture had an “Angry Bird” flying overhead….hehe….so cute! 

 Some of my snowglobes are large and have snow scenes inside  but others are just snowmen  I have a Valentine one that has a heart inside and snows red glitter.

 We all brainstorm and come up with ideas on the board for characters to write adventures in a snowglobe for writing workshop.

 And we watch the PIXAR Youtube about a poor snowman stuck inside a cold snowglobe. It is really cute.
I added it a little further down this post.

Description under our  Bulletin Board….

This author does the “Fancy Nancy” stories and Nina Ballerina series too…..

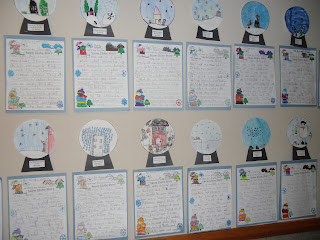
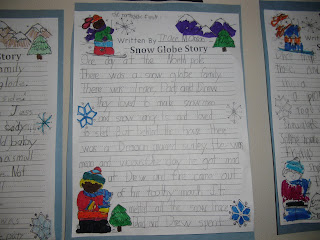
Here are our finished Snow Globe Stories….out in the hallway ….I typed up their titles and
we glued them onto the Snowglobe black  bases….

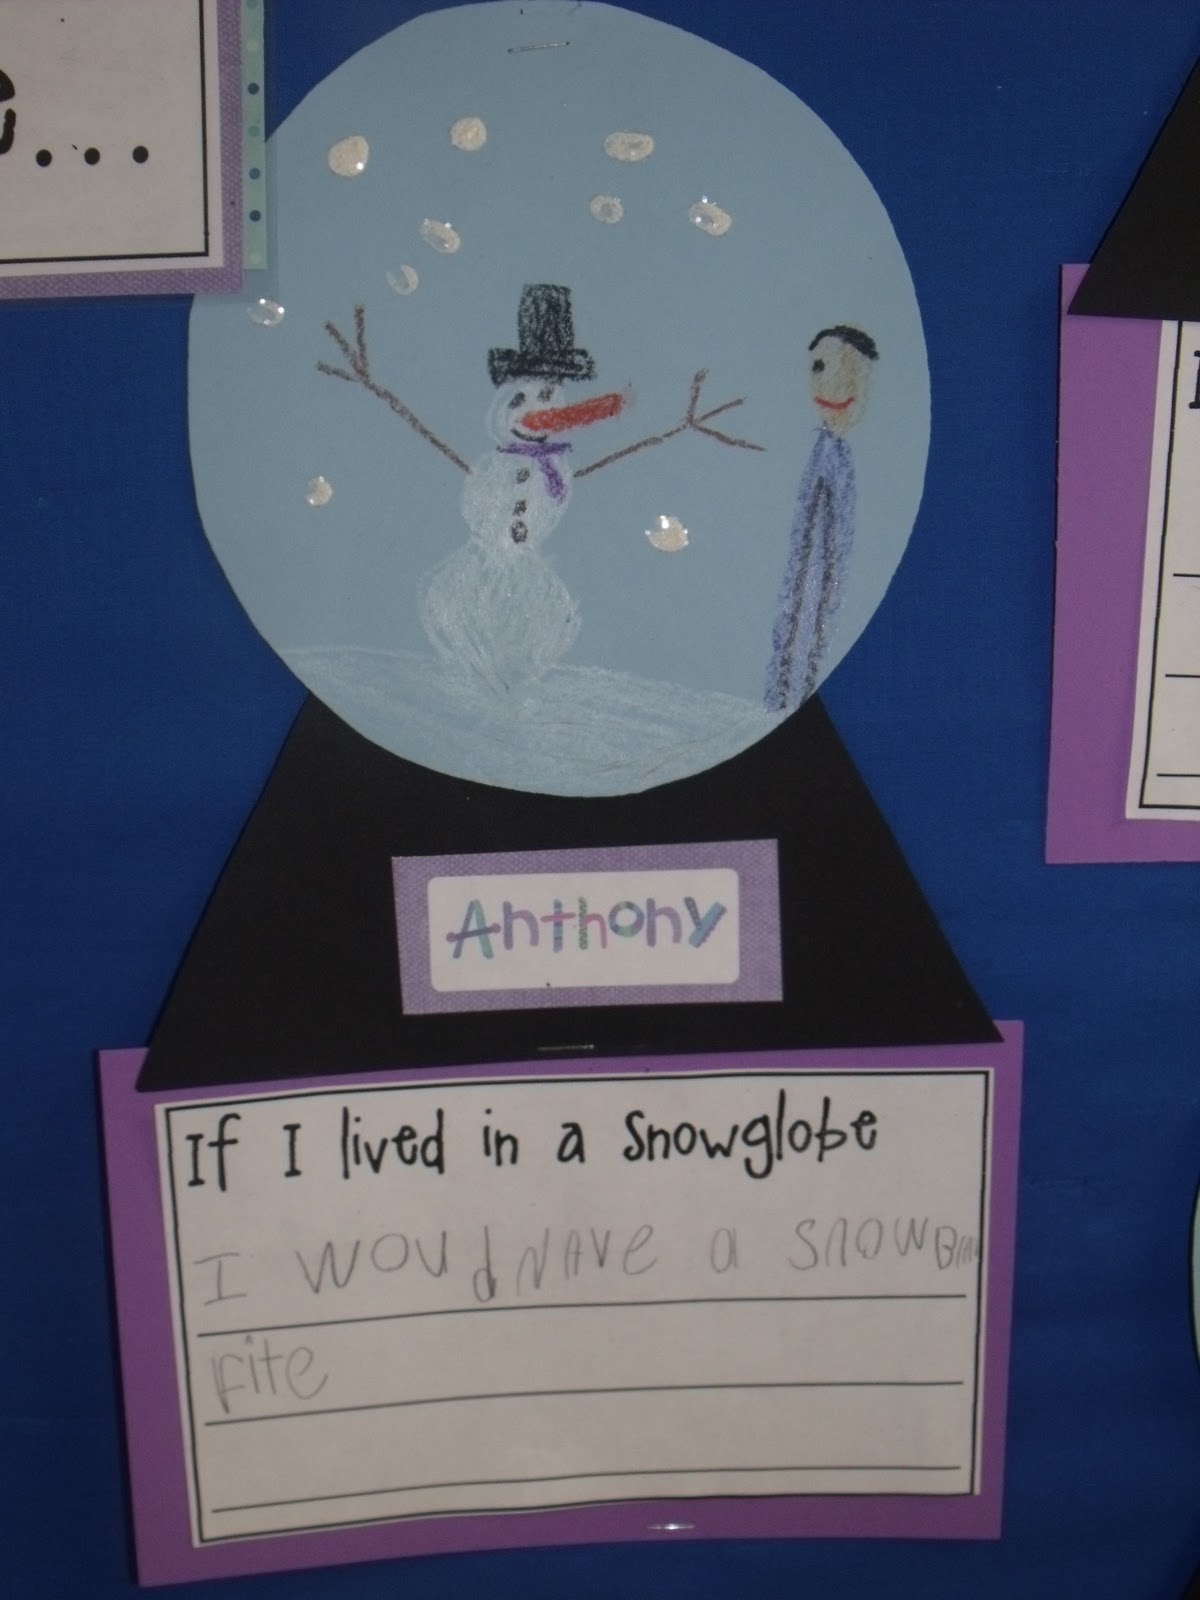
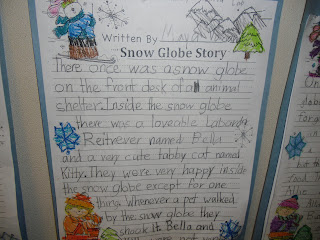
Creative Snowglobe stories for writing workshop…..

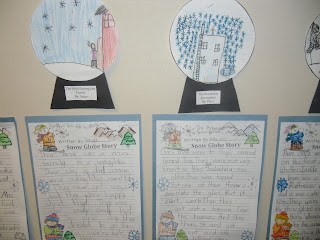
I loved some of their cool illustrations too…..

We shared our stories after we were done…..and used our best expression….

Lots of stories were about winter activities….some were about  the
character wanting to escape his snowglobe…
Here’s a snowglobe sticker art project from  Oriental Trading

This will be Super fun! We will start by reading The Snow Globe Family by Jane O’Connor who also wrote the Fancy Nancy and Nina Ballerina series of stories.   Start out by having the kids talk about their own families and who they want in their story.   Then we’ll do a brainstorm and list the main characters, and of course the setting of their story will be inside a snowglobe. But there must be some sort of problem that happens. Write a list of 12 different kinds of winter problems that could happen inside of a snow globe.

The snow globe family [Book]
Reading The Snowglobe Family is where we will start the activity…..

A great website that had lots of neat pictures of kids’ snowglobe art was HERE at Faithful Attempt Blogspot.

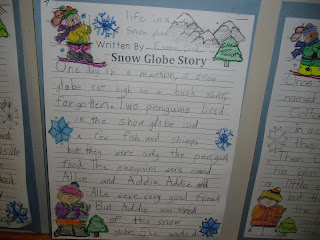
We are working on using really interesting describing words….and some adverbs too! 
Can you find some $100 dollar words in any of these? 
We went through the entire writing process….
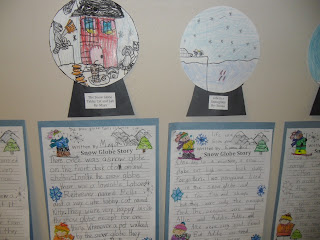
I forgot to have the kids add some silver glitter glue for snowflakes….
That would add a lot to the artwork I bet…

Now, the problem will have to be very creative… as a class we brainstorm problems a child could have being stuck in a snowglobe…boredom, snowball fights, ice skating or skiing competitions, making a new kind of hot chocolate drink, sledding down a too-steep mountain, building a snowman that comes alive, reading by the fire that keeps going out, or maybe getting sick of winter?  Maybe the problems could be something they want that they see outside the globe, but they can’t have it….kind of like how the Little Mermaid wanted legs to go live on land. Then the kids will have to come up with their own solutions.

The kids also learned that they can capitalize Title Words…..

So they all made up Titles for their Stories…..
You should have heard them discussing and sharing creative titles….so funny! 
I definitely have the best job in the world….I get to crack up hourly at the
funny things they say and do…..gotta love em….
Great job by everyone! 
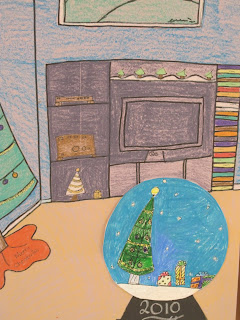
Pretty Snowglobe Art projects…..
They all worked hard. going through the sloppy copy, editing, and  then
doing their final copies and illustrations…..
We have 28 cute snowglobe stories out in the hall with darling art…..We used sharpie markers to outline
to make our artwork stand out a bit more…that is a trick I learned from an art teacher….

We drew a favorite scene from our stories cut from 7 inch circles on white construction paper. Then we put a black “holder” on the back which is just a giant black triangle.

A Pixar Youtube short movie we’ll watch to get our creative juices flowing. It is very cute.  

 I encourage the kids to write about something funny that actually happened at their house (losing something important, a mess that was made, a family outing to a favorite place, somebody’s special day, etc.)

Finished stories with Titles typed up and glued on the black triangles of the snowglobes….

 This is a great winter bulletin board. And it’s a lot more fun than the January “Here are our New Year’s Goals” bulletin board.

A craft I thought was cute but kinda too much work I saw on the Martha Stewart Website HERE. It is a snowglobe made from small baby food and olive jars, glitter, glycerin and distilled water.

Ideas are from the Clever Feather Art blog
Baltimore snowglobe
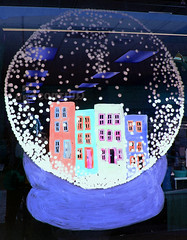
These were pictures I got inspiration from….but I liked our class’ snowglobes the best….


 Happy New Year everybody!

Pop Up Books

We finished our Ocean Animal Pop Up Books awhile ago and I forgot to post them here on the blog. So although they’ve been done a few weeks, here are the cute pop up books we made.

Ocean Animal Pop Up Books….

We read books, made lots of lists of facts…..

Then made the covers for our books…..

Then we colored a page of ocean animals and started to write up some of the facts….

Everyone chose different animals…..

And wrote up whatever facts they found….

We got lots of cool information from these Weekly Readers and Scholastic News Science Editions….
The best money your education dollar can buy in my opinion…. 

Then we did backgrounds for each of the 4 to 5 pages…..

Some did 7 animals….some did 10 …..

They turned out nice I thought…..

Our Ocean Animals Pop Up Books….

Whales, dolphins, sharks, octopus, jellyfish, sea stars….etc……

Hope you enjoyed them…..

Martin Luther King Day

We honor a great American hero today; Dr. Martin Luther King, Jr.  
My students learned about him, wrote about him, and drew pictures of him…..
Martin Luther King pictures….

2nd graders imagining Dr. King as a pastor giving a sermon in church….

Dr. King giving a speech for America….

We all think Martin Luther King was a great man…

We read a big book on Martin Luther King….Read a timeline of facts about him… and read 3 Scholastic Newspapers about him….then we wrote our own dreams for the world…..

Here  are some activities we did last year for Martin Luther King’s birthday.


So we do a portrait of Dr. King and put it on the bulletin board along with writing projects by the students about  what their “dreams” for the world would be.  It’s always funny to see things like: “I dream that there will be no more bad guys”….and stuff like that.  But it’s good to get kids to synthesize what they learn in a new way. So I do it for that reason.  Hey, world peace isn’t just for the Miss America Pageant you know! 

Kids don’t like littering, war, or bullying…..there are some things we can do at 7 years old to make the world better!  

They can stand up to bullying at school…..they can pick up litter where they find it….they can make the world better! 
A picture of a sign during Martin Luther King’s time….they kids all see how unfair it is….why didn’t the adults see it? 

It is always amazing to me that the kids are shocked by the unfairness they see in actual primary source photos of the time. When I show them the pictures of “colored bathroom only” signs in the book, or the “blacks sit to the back of the bus” signs, and I ask them, “Do you guys think this is fair?” they always will unitedly chorus in the negative. It is amazing that the adults of that time didn’t think it unfair. 

I like this pretty stained glass window in the background of the church….and notice Dr. King holding a flag?  Cool! 

Kids know what the problems in our world are, it shows up in their own creative writing….

We wrote about the example Dr. King set for us and how we can all make the world a better place too.

This student thought “puppy mills” should stop…..I think that is  cute….we didn’t talk about puppy mills per se,
but it goes to show that kids really do think, and learn from topics of the day they hear on the news.  

Happy Birthday Dr. King.  You showed us that one person in this world really CAN make a difference.

Making Giant Paper Snowflakes

A Tutorial is HERE at Paper Zone Blog for how to do a cool, giant paper snowflake.  I used 8 1/2 x 11 copy paper sheets and had each student do 1/6 of the snowflake. Another one with cool photos is HERE at A Cup of Calm.

A Cup of Calm had cool pics to guide me through it! 

You start by using a perfect square of paper, just like in Japanese paper folding, or doing a square snowflake.
Then you fold twice.  The side where there is a single fold you cut 4 lines almost to the edge, that line up with the side with the long side of the triangle.

Don’t these snowflakes turn out awesome? 

Fold the square diagonally to form a triange. Then fold that triangle in half again to form a smaller triangle. Unfold carefully. Attach the 2 outside tips of the square to each other in front. Then attach the next tips in back with tape. Then the next tips in front with tape. That the last inner tips in back with tape.  Do this 4 or 5 more times.  Attach the ends together with a stapler. You will have a 5 sectioned star snowflake or a 6 sectioned snowflake.  hang up in the center of your room for quite a breathtaking display.

Just staple all the 6 parts together to form the snowflake!  All Done!  

A fun interactive snowflake making website with magic scissors that cut a new snowflake every time is called Snowflake Barkleys.com HERE is the link. It’s a cool and fun website for the kids to get an idea how to cut a snowflake.

Penguin Acrostics and Penguin Footprint Art

Well, we are done with our cute footprint Penguins.  They turned out so hilarious looking. Here’s a sampling of our Works of Art ….

The kids added all the embellishments….

We used washable poster paint for most everything…..

Then we added some PENGUIN ACROSTIC POETRY to our penguins.  I think the easiest way to do
Acrostic Poems is to do a brainstorm on the board.   Then they have a brainstorm of words to choose from to do their poems.

Using P at the top…then an E….then an N…..and separate each letter with a marker line.  Then have the kids come up to the whiteboard and add words or you write the words they call out…….(interactive writing). It’s quick and fun.

Here’s our Acrostic Poetry Bulletin Board…..I’m going to add the footprint penguins to it on Monday…

After the footprints (and black thumbprints) were dry….we added white bellies….

We carefully painted on “potato shaped” bellies and  painted our fingers white then stamped them onto the black
thumbprint for the baby bellies….

Then we did the scarves and hats….and when all were dry we used black and orange markers for the babies’ faces and waddling feet…..The penguin beaks are orange construction paper triangles….and the wiggly eyes we glued on too….

Here we are painting our feet at a center table…the kids really helped each other! 

It took about an hour to finish just the black footprint of each student…..

  It was a fun art project. But painting feet and then washing them off was no picnic.  And they all said “Wow, that’s COOOOLD!”  I guessed it would be…..hehe……

Put a piece of butcher paper or drop cloth under the painters…..and have a  bin of water for stepping into to wash off…. and paper towels for trying off those little cold feet!  

Others were writing while finished writers were painting…while finished painters went to centers….
It was controlled chaos for an hour!  

I’m going to back these cute Penguins with black paper.  I added glitter glue snowflakes, and the kids added orange, triangle beaks and wiggly eyes after painting on their hats and scarves.

I thought the gold paint turned out pretty…..as did the little thumbprint baby penguins…..

The feet were hard to paint and print…some of those toes got a little squished….
And they had to let them dry before painting the white bellies (or fingerprinted bellies on the babies) but they did a great job I thought…..I just let them do their own thing with the paints….and nobody really went too crazy!  
I set up a “PENGUIN BOOK CENTER” Where kids can read all about the many different types of
Penguins found mostly in the South Pole.  They thought it was interesting that none are found in  the North Pole.

A site with lots of Penguin Activity Pages is HERE at Kidzone.

RIDDLE: What’s black & white and goes round and round?
A:  A penguin stuck in a revolving door.

The kids painted their own designer hats and scarves….from red and gold to  purple with polka dots!  

Then they wrote their Penguin Acrostic Poems……

They turned out lovely…..

 We also read a play from the book TACKY THE PENGUIN.  It is my favorite Children’s Book….
Even after the hundreds of books I’ve read.  It teaches kids that even though somebody is different, they
can be special in their own way.  Tacky becomes a hero in his little Iceberg village….. Link HERE at Reading Lady if you want a copy of the Reader’s Theater Play.  The kids loved being the characters.

My Favorite Children’s Book…..Helen Lester has written a series of Tacky books for kids…..all are darling and
send a great message about accepting others as they are and being a good friend…..

A unit using Tacky the Penguin and some story frames for writing your own Penguin Story with a problem and solution can be found HERE at Trinity Education. I used some of the ideas last year when the kids wrote their own penguin stories.  Link HERE for Penguins on Parade if you want to see some of our finished Penguin Stories.

I told them great effort in handwriting would be rewarded…….
They got a Sparkle Sticker or a Gummy Bear for Excellent Handwriting…….
The kids did really great handwriting too!  Do you think bribery works well?    hehe…..
Penguin Acrostic Poems
Foot Print Penguins with babies too! 
Aren’t they just the cutest little Penguins?  

 And we just got some fresh snow today in Salt Lake City!  Let’s go skiing!  Woo HOO!