Mardi Gras Day…Make a King Cake

IT’S MARCH 8TH   HAPPY MARDI GRAS EVERYBODY! 

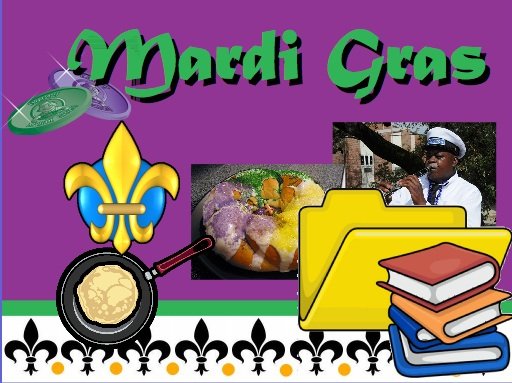
Mardi Gras is a day of carnival. Mardi Gras means “Fat Tuesday” in french. The name “Fat Tuesday” comes from the ancient custom of parading a fattened ox through the streets on the day before Lent. Mardi Gras is celebrated in many places around the world, including: New Orleans, Louisiana, USA; Rio de Janeiro, Brazil, (where it is called Carnaval); Nice, France; and others. The traditional New Orleans Mardi Gras colors are purple, green and gold.


Happy Mardi Gras!


We are starting our study of mapping and the 7 continents and 4 oceans of the world.  As part of this study we look at some areas of the 4 corners of the United States.  I like to teach the kids something about each continent, but something about the North, South, East and West of our country too. Nothing speaks about the South like Louisiana. And one of their holidays they are most known for is Mardi Gras.


Now I think it is a crazy New Orleans holiday too, but I think it is fun to use it as a cultural springboard to discuss the new term “King Cake”  and craft a mask and maybe write a story about a boy or girl who found the little plastic baby inside their own King Cake.

King Cake….who’s gonna find the baby inside?

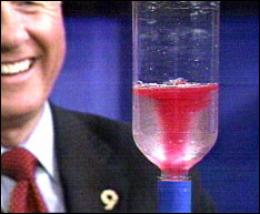
In our study of the South, we will mention that  Louisiana is where Hurricane Katrina happened in 2006. And how lots of Americans went to help out where they were needed when people had their homes flooded. We will talk about what a hurricane is  and compared and contrasted Tornados versus  Huricanes in bad weather. (Since we are just starting our weather unit in Science!) Steve Spangler the Science Guy has a cool 2 liter bottle Tornado Tube demo. It is on his website.  The link is   Right HERE.

Cute story about a Hurricane…
Tornado lessons are fun with visual aids….

http://www.prometheanplanet.com/en/Resources/Item/35975/ This website has a great math powerpoint using terms from Mardi Gras for standard measurement questions. We have computer  too so it will be fun to get on there and play it.  I like that kids in my class will become exposed to all thestandard units of measurement even though it is not required core anymore.

 We will make our own 12 inch “kings  feet” to go with the book I read called “How Big is a Foot” about a king who needs to figure out now to measure a new bed for his wife and they use his “feet” as a measurement tool. We then add them together to make 3 feet into a yard. Then we will hang the decorated  “feet” and “yards” from strings in the ceiling for our Mardi Gras decorations. The KING’S FEET  story kind of goes along with the “King Cake” too. There’s a method to my madness….hehe….

Elementary grade Measurement Lessons are easy with this book….


King’s Cake

 Here’s a picture of our “feet” and “yards” all decorated up and hanging from the ceiling. We did this activity in table groups of 3. It was lots of fun and I think it helps them learn the vocabulary for standard units of measurement….inches, feet, yards…..


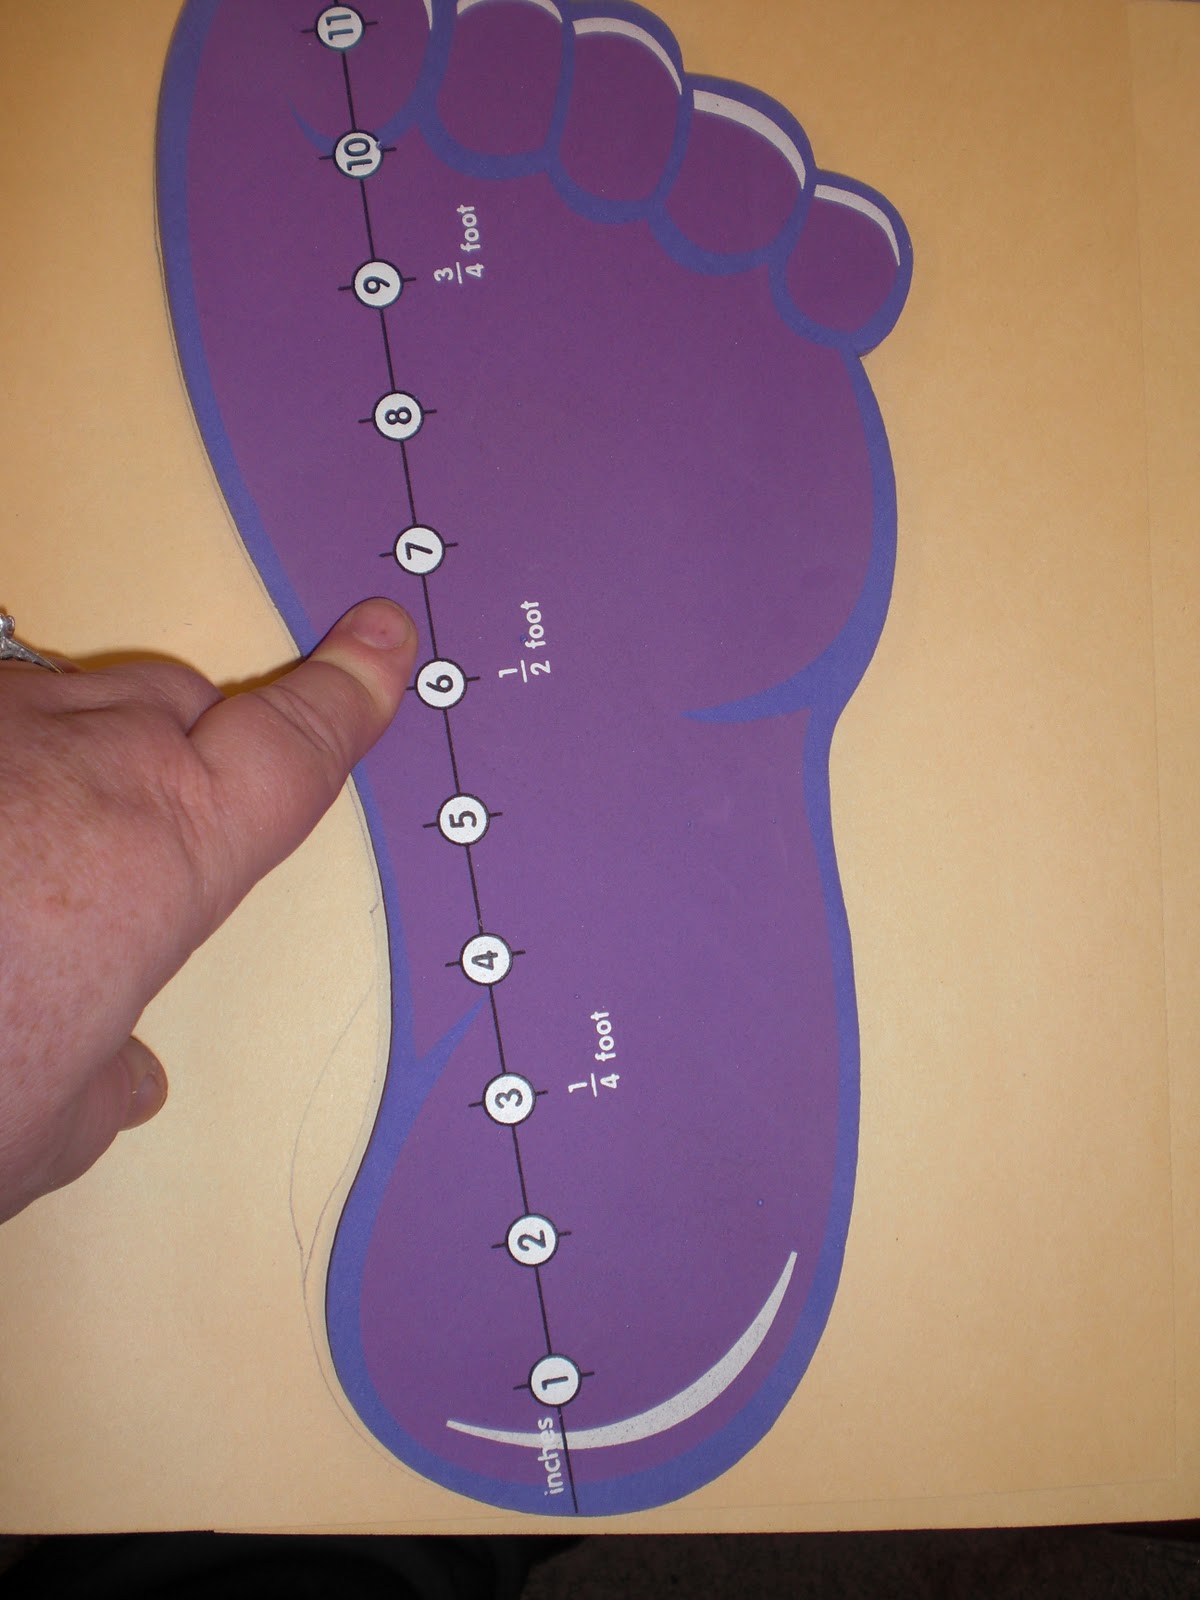
We used these 12 foam “feet” I bought at a Teacher Math Seminar a few years back…..


They traced them, used rulers to put 12 inches on each one….


We added toes to each one of course…..


Then we got in groups of 3 and glued our 3 feet to a “yardstick” made from paper strips.
Here’s our “King’s Feet” and Yardsticks all hangin around the room….


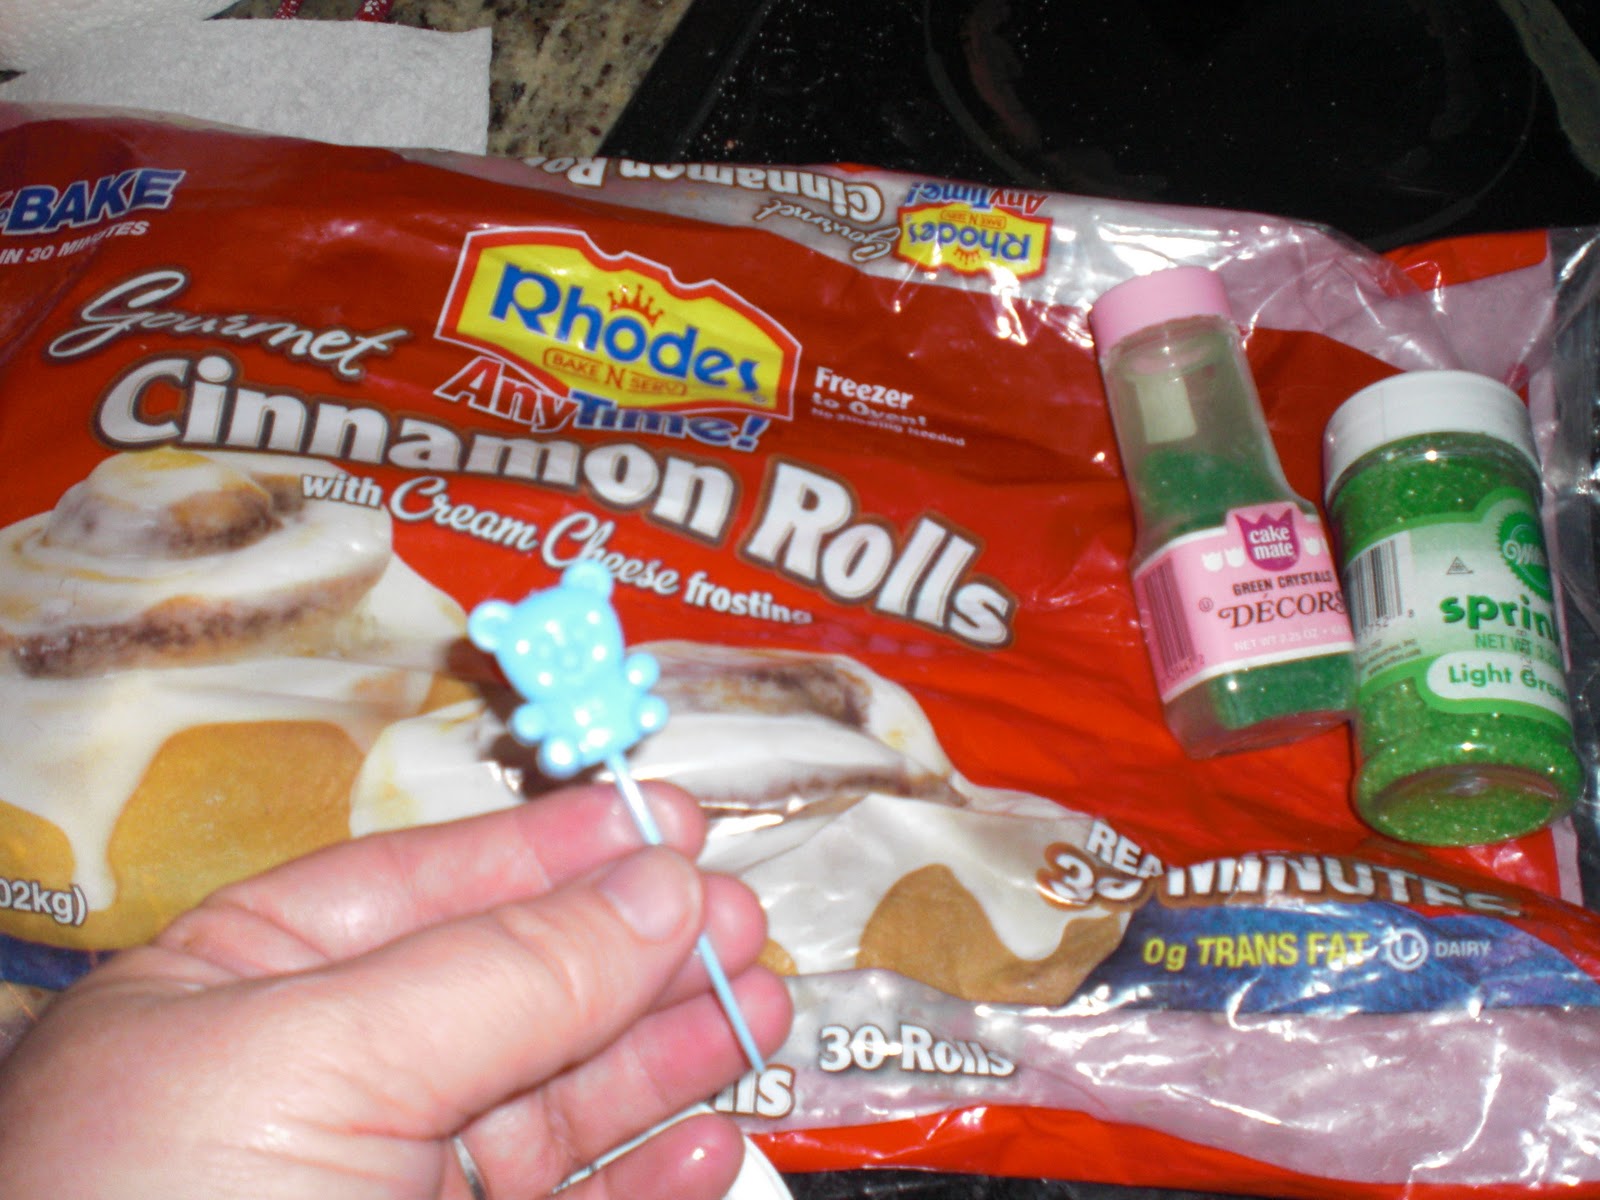
This is a King Cake….ours were invidividual cinnamon rolls from Rhodes Rolls
frosted and sugared with the baby bear hidden inside..

 
 The student with the baby inside their king cake gets an extra set of  Mardi Gras beads.  I just used a baby bear pick I had leftover from a baby shower I hosted last year. So funny to see the winner scream when they got the baby!

Little King Cakes…. This was before I baked them…then we ate them before I took a pic

Here are our yummy “little” King Cakes. I used Rhodes frozen cinnamon rolls and let them rise. They were perfectly big for all the kids to eat. I hid a little “baby bear” pick inside one of them for the “mardi gras baby”.  It was a lot of fun. When they were cooled I frosted them with icing and green sugar.

Mini “KING CAKES” for First Graders..I only had green sugar….mmmmmm!

J found the little baby bear inside his cinnamon roll. So he got the extra cinnamon roll and a “Celebrate” crown to wear all day. It was a fun snack for the day.


After our daily seatwork the kids did masks instead of centers


They turned out very festive looking!


 And here are our masks……don’t they look cool? I passed out feathers, sequins and cardboard metallic mosaic tiles for the masks.  The kids colored them with markers, cut them out and cut out the eye holes, and then just did their own thing for a center. For the noisemakers I put macaroni into paper plates and stapled them on the back of this circular design I made on cardstock and had copied. The masks and noisemakers turned out pretty festive.  

I did my own mask design but I found a free design from Skiptomylou.org and the link is HERE She did a pretty cute one that is downloadable and printable. Just embellish however you want to for “bling”.  We used feathers, pom poms, sequins, etc.

Noisemakers out of paper plates and macaroni stapled to the back of the jester.

And the “feet” and “yards” hanging all over go right along with our measurement unit we are doing in math.
I think when kids do an art activity and they’ve read a story about “feet” and “yards” they will have that unit of measurement pretty much in memory. Art, music and stories, are all such good ways to internalize vocabulary you want the students to remember.  Happy Mardi Gras!

Hooray for Dr. Seuss Day!

Click to play this Smilebox scrapbook
Create your own scrapbook - Powered by Smilebox
This free scrapbooking design customized with Smilebox


HOORAY FOR DR. SEUSS DAY! 


Every time I read the book One Fish, Two Fish, Red Fish, Blue Fish, it brings me back. I am back 20 years ago sitting with my kids around me reading a bedtime story. I still remember the funny little rhymes we all laughed to because they still make me giggle, and I so enjoy the giggles I get from the first graders.  Dr. Seuss, you were a master author and illustrator. The books are still timeless fun. I remember calling my daughter a Zizzer, Zazzer Zuzz when she was 3 years old. The name stuck for quite a few years.  Who didn’t love the Foot Book, or Green Eggs and Ham, or Sneetches?

My cute class with their hats and “Cat” rhymes…

Well, today was Dr. Seuss’s birthday and we celebrate every year in school in a national Read Across America day. We wore our jammies, brought pillows and Dr. Seuss books of every kind. I think our class had about 25 different books and several book collections. The kids enjoyed reading to each other and laughing at the funny pictures.

One of MY favorite Dr. Seuss Books!
Sunrise “Characters” at Dr. Seuss Night!

We made our hats, did a cool crossword puzzle and a maze and then had some contests to see who could write the most “at” words to rhyme with Cat in the Hat. Then we wrote our own “at” rhyming poems. We tried to be as silly as possible. They turned out pretty funny. Here are a few of them….

Cute and Wacky Rhymes….
I made the Giant Cat….my contribution…

Then we voted for our favorite Dr. Seuss book in our weekly graph.

The Top 5 Dr. Seuss Books were voted on…Winner was….?

I try to get the kids to graph something every week….It’s easy!

 I think the winner was The Cat in the Hat! I thought Green Eggs and Ham might be the winner, but NO! And, by the way, guess what we had for lunch……yeah….you guessed it…..green eggs……..and ham! EW!
Thanks cafeteria ladies who make it fun to go to lunch!  But….. they really didn’t look that appetizing,  the kids liked them……I actually forgot my lunch today but luckily I had lunch choice number 2.   : D

We actually had Green Eggs! Mmmmmmm?
We read this in a choral reading…Green Eggs and Ham….VERY NOISY!

Then we came back from lunch and did a funny choral reading on Green Eggs and Ham. Each table had to read a line going around the room over and over and they started to outdo each other in the expression department. It got quite loud and funny by the end.  “I DO NOT LIKE THEM SAM I AM! 
I DO NOT LIKE GREEN EGGS AND HAM!

Yum! This Ham and Eggs is better than my waffle!
Lots of Grinchy people everywhere…. at the Dr. Seuss School Celebration!

Dr. Seuss Cake…yummy!

Then tonight our school had a party. There were Grinches, Sneetches, Thing 1 and 2 and the Cat in the Hat. We had giant slides and jumping rooms and face painting and fun confetti looking cake. The kids could write on murals about “The Places They Were Going….” or fish at the Red Fish, Blue Fish Pond, or go get a glow in the dark bracelet or exchange a used book for another one. 


Thing 1 and Thing 2…..I wonder if they are related?


There were lots of slides and fun in the school gym….


Mrs. Neilsen had to cut LOTS OF CAKE!  She’s one
of the nicest parents at Sunrise…


This was a colorful mural all down the wall with kids drawing favorite places….

 They also got to go to an Oobleck booth and pick up some green, slimy OOBLECK!  Fun.  The recipe is HERE.To make your own mix 2 cups of cornstarch and 1 cup water in a bowl. If you want to color your oobleck like the PTA ladies did, add a few drops of food coloring to the water before adding to the cornstarch. Then mix the water and cornstarch…it’s hard for a few minutes but keep adding little bits of water till it’s smoother consistency and a little runny. Then of course you’ll have to read the book about Oobleck!

Oobleck is a fun kids activity too…..

This was my booth, I’m around the corner painting stars on faces….
Dr. Seuss Activites for kids…..Face Painting is fun!


Cutest Cat in the Hat I saw…..


Lots of fun games with “The Cat in the Hat”


Fun Seussical Musicals…..


It was a great day.  I was in the face painting booth. I loved painting little “Sneech” stars on all these cute little faces.  One little 2 year old came up to me and lifted up her shirt wanting a sneetch star on her tummy, too cute. Her mommy must have read her the Sneetches. She knew the story.  Then one of the dads came up dressed as a Sneetch! Too Funny! I wonder if I could ever get MY husband to wear yellow tights? hmmm….
NOT in a million years……: D 


Fishing Booth….one fish…two fish….or Face Painting Sneetch Stars….


Going fishing at the fishing pond…One Fish, Two Fish, Red Fish, Blue Fish….

It’s amazing that one man’s (Dr. Seuss) creativity and imagination can bring about MAGICAL fun so many,  many years later and for ALL AGES! . He had over 40 books published in his lifetime. He is still my very favorite children’s author. Thanks Theodore, for all the good fun that is funny.

Dental Health Week

February is Dental Health Month and I usually do a small 3 day unit on keeping our teeth healthy. I had so many cavities as a kid that it is my personal mission to help other kids by teaching them how important it is to brush morning and night, and to not eat too much candy and soda pop. 

These hippos turn out cute…notice the 20 baby teeth and the “tusks”

So I kind of combine it with a nutrition lesson and we talk about things that are healthy to eat all the time, and things you can have as a special treat once in awhile.  We start off like usual, reading a few books on the subject. Here are a few of my favorites. We also get the Weekly Reader or Scholastic News and it usually has a February Dental Health issue to read. We read one of those every day. Some have just animal teeth. We put up some vocabulary words like primary teeth, molars, dental floss, cavity, 32 Adult teeth, etc. and put the definitions in the pocket chart to play with for the week. Then we do a few fun worksheets to fill in the blanks and some math to find the hidden messages. We sing some songs too.

BOOKS TO READ:
Arthur’s Loose Tooth 
The Tooth FairyTells All
Make Way for Tooth Decay
The Tusk Fairy
The Lost Tooth Club
Tooth Trouble

This little tooth fairy box I made using the tutorial on Martha Stewart’s website LINK HERE
For the tooth fairy box in the picture above I just made the Martha Stewart design a lot smaller. It is easy to do. Kids can even make it, although it takes too much time. It’s a good parent project though. And the kids would love to take their teeth home in it when they fall out at school. 🙂

Class bulletin board…The kids listed facts they learned on the “tooth”

ART/CRAFTS
This gray Hippo  has a big mouth full of 20 baby teeth. His 4 tusks are made of marshmallows. We put a Shel Silverstein poem on “How to Make a Hippo Sandwich” on the back as well as hippopotamus jokes. That’s always fun reading jokes to each other…. I always combine art with shared reading. Shared reading can be songs or poems or jokes, that type of thing….just to practice READING together as a class!

he haw the kids laughed at most of these…some they didn’t get I think !?
We glued this poem on the back of our Hippo Art…

Another of my favorite arts is watercoloring on a Tooth Fairy blackline.  We add glitter to her wand and wings,  then cut her out when she has dried. We back her with pastel butcher paper in yellow, pink, light blue and lavender. Then we write her letters asking questions.  It’s always a hit.

Tooth Fairy Watercolor art project 

We added glitter to our tooth fairy watercolor art 

These Tooth Fairies will go in our portfolios….

WRITING:

Brainstorm as a class what you’d like to ask the Tooth Fairy. My students have usually lost at least one tooth so they know what it’s all about. We then write letters to the fairy and go through the whole writing process, editing and rewriting on “Tooth Fairy” paper. We are going to see if she writes us back…do YOU think she will? We are leaving the letters on top of our desks for the whole weekend….we will see….

Letters to the Tooth Fairy…very nosy indeed!  hehe

Tooth Fairy Letters 
When we came in on Monday…We got fairy letters back! 

Well, after we wrote letters asking the tooth fairy questions we left them out on our desks all weekend. And guess what? She came and visited over the weekend sometime.
I think this was Em’s  fairy…very cute!
Allie did such a great job! I loved her painting!
And she left little letters in tiny envelopes to the kids. She was so sweet to answer all their questions! It was totally cute seeing the kids all excited to have a tooth fairy letter!
We graphed how many teeth we had lost, and then flossed our own teeth

Some had lost 8 teeth and some had lost NONE!

Dental Health Week 
FLOSSING

That red thing is a big set of wind up clacking teeth, floss and a giant toothbrush.

Past years I have found individual flossers at the dollar store with like 30 in a package for a buck. Then I use 2 white pillowcases and have 2 kids put them over their heads. Then I use a rope to go between them as they stand very close together representing 2 teeth. It is funny for the kids, they all want to take a turn being a tooth. Or you can do the same thing with white styrofoam egg cartons. Using the bumpy backs as teeth the students use white yarn to go between the egg holders to”floss”.  Then I pass out individual floss to practice.  After lunch they can see what kinds of “materials” they floss from their teeth. Mmmm.  

We read the Dental Health Weekly Readers and Scholastic News all week
BRUSHING
Some years we have a dentist in our class and they come in or send someone to teach brushing. Sometimes I just have to use my clackety clacking teeth model and a giant toothbrush. Some years Crest has sent me fun sticker charts and individual stickers and sometimes individual toothbrushes and tiny tubes of toothpaste. They haven’t done it the last 2 years. Maybe it got too expensive. So sometimes I look at the dollar store for toothbrushes to go home with a chart I make up and some stickers to go home encouraging  weeks of perfect brushing for a fun certificate.

If kids want they can add to my Lost Tooth stories when they lose a tooth in class.
MATH AND SCIENCE   CAROUSEL
A carousel is a strategy where each student visits a learning activity for a short visit (8 to 10 minutes) doing the activity on a “Theme Day”. Ring a bell after 10 minutes and kids move to the next station in a round robin fashion. Kids love it. Then a few of them can be left out all week for centers.

  1.  Roll a Tooth -Take turns rolling a die and fill up the 32 teeth in the mouth with mini marshmallows. , 
  2.  Tick Tack Toe with teeth counters. Play with a partner.
  3. Graphing. Talk about your graph with the teacher using ONLY math words (greater than, equal, least etc.).Then Graph your favorite toothpaste or teeth lost. 
  4. Flossing -practice flossing on the egg cartons with yarn. Then floss your own. Brush the model teeth.
  5. Check out the 3 types of stains on the hard boiled eggs… coke, grape juice, brush off with toothpaste 
  6. Math – Add up 3 numbers on the 3 cards. Write an equation.   Use the giant smile as a counter vehicle if you need it to do the adding. We used paper folded 4 times into 16 square

A math game, make equations using 3 number cards…use the teeth for counters
Adding up 2 to 3 addends from cards chosen and put the equation on a 16 slot grid. 
Use the giant smile for counting up the teeth in your equation. 
Above is the math game….put the counters on the teeth as you go…then count it up…

I made the counters from 1 piece of 99 cent foam…it was easy!

Another game…See how many of each number you roll…by graphing it!

For Center 3 You can use little erasers from Oriental Trading to graph.   They are only 3.99 for 24 and that would last for years for game counters or graphing counters. See them HERE.This year I ran out of money so I just went to Michaels and got some white foam for 99 cents and simply drew teeth shapes one night while watching TV. I might also try dry lima beans with little faces on them next time. 🙂 The fun part was when they had a pretty good sized graph I’d wander over to that center and ask… “Now tell me about your graph using math words like, equal, greater than, less than, least, most, how many more, how many less.” They are getting pretty good at describing the class graph. We try to change it every week.

I think my one sheet of foam made like 60 little teeth counters/graphers…

Here is a finished graph by Trace and J. and they descibed it to me perfectly.

CLASS GRAPH – HOW MANY TEETH HAVE YOU LOST?
 I always have my GRAPHING pocket chart up so it would be a fun to graph their favorite toothpaste flavor and see which one is the class pick. In the past I have cut out the front of boxes of toothpaste with their colorful labels to put in the pocket chart. But this year we have graphed how many teeth we each have lost. 
  

A “Just for Fun” center…Tooth Tic Tac Toe

The girls really got into the game….

Center 2 – The fun Tick Tack Toe game  can be found HERE at About.com.  It was made by Beverly Hernandez. It’s very cute. I changed the counters to some cute tooth stickers I had in 4 colors that I liked better. I backed them with cardstock and had the game and counters laminated.

Tooth Tic Tac Toe  HERE 

Center 1 – It’s a math game where you roll a dice and count out the marshmallows to place on 32 round circles in a mouth.  I found it at A to Z Teacher Stuff in a fun unit called “Let’s Talk Teeth”.  The link is HERE and Susan Payne is the author. There are lots of fun poems and chants also on this cute unit website. There is a cute poem entitled “The Tooth Fairy Came Last Night” I am attaching to the backs of our tooth fairy art projects. It will be fun for the kids to read and fill in the blanks with coin money.

These eggs pretty yucky when you pull them out of the coke & juice!

Center 5 –  Looking at the experimental hard boiled eggs we put into Coke, Grape Juice and one in plain water. If you do this a day in advance like we did,  it is a fun center for kids to see how food “stains” our teeth and for them  to try to “brush” away the stains.  You could also use some permanent marker on white bathroom tiles. I also have my red, plastic, clacking teeth they can practice brushing with my giant toothbrush. That is always fun.  

The kids are trying to brush the stains off with toothpaste…it was hard…they said.

Scrub a dub that stained egg and pretend it’s your teeth! 

Each Center has several books on teeth for fast finishers to read while they wait for me to ring the bell. This is always a fun week in school.   

We skip listening post this week and just have teeth books there instead…

  I sent them each home a monthly brushing calendar, some toothpaste, and one of those little pink pills you chew up to see where you forgot to brush. And hopefully they will all earn their certificate for filling out their month-long brushing chart!  Parents, you’ll have to get right on that.  🙂 Love,  Mrs. Moss


Presidents Day

This week was Presidents Day holiday. Every year we study President Washington and President Lincoln. And we write a letter to the current president in writer’s workshop on…. “Dear Mr. President” And we are going to send them off to Washington to President Obama! Maybe he’ll send our class a note back! Wouldn’t that be exciting? Here’s his address…. 


    The White House
    1600 Pennsylvania Avenue NW
    Washington, DC 20500


After Reading lots of neato books on the subjects of Presidents….

And reading poems and weekly readers….

And MORE books and Scholastic NEWSPAPERS….

 BOOKS:

A Picture Book of Abraham Lincoln by David Adler
A Picture Book of George Washington  by David Adler
Abe Lincoln’s Hat by Martha Brenner
Arthur Meets the President by Marc Brown
A. Lincoln and Me
Celebrating Presidents Day


We guessed how many pennies  there were in the jar….

For spelling we did a making words activity to see how many words we could come up with out the  letters in ”Presidents Day” And we did a secret code with our double digit addition math….the secret code word was LINCOLN!


We guessed how many pennies were in the jar for a prize….


Did you know he was on the $5.00 bill AND the penny? Cool! We knew it too…And Washington is on the quarter and the $1.00 bill.

HERE is a link to all the biographies of past presidents from the White House website. It’s interesting and informative for some background info.
We memorized and recited poems on Friday….
We wrote about Washington in our own words…on sloppy copies, then we made our Washington art projects, then final copies after Mrs. Moss had edited them for spelling boo boos.  

We are learning coin money so here are Mrs. Moss’s tips…. Nickels have a building with a bump on the back, pennies have a flat topped building. Dimes have oak leaves and olympic torch on back, Quarters have an eagle on back, Washington on Front. Pennies have Lincoln on Front.

  1. Nickels are worth 5 cents so they get 1 leg. (Draw a small line coming from your nickel)
  2. Dimes are worth 10 cents so they get 2 legs. (draw 2 small lines coming from your dime)
  3. Quarters are worth 25 cents so they get 5 legs. Each leg is like a nickel. (draw 5 lines)
  4. Pennies get no legs.  
  5. Then count by 5s and add feet to each leg as you count (just an oval shape) as you count by 5s. When you get to the pennies, count only by ones.  You can add a group of coins on a page this way. Easy peasy lemon squeezy!  Put on the legs 1st, put on the feet as you count by 5s, then add pennies by ones.
Here are our finished Mr. Washingtons with our finished writing projects! Aren’t they so presidential? We wrote some things we had learned about George Washington.  And how about those cute flags he’s holding?
Patriotic bulletin board for February…
Didn’t we do a good job?


We wrote first about President George Washington…since he was the FIRST!

Barack Obama

We had a contest to see who could print the neatest on our President Washington writing. The top 3 winners were…..Well we are ALL winners, so Mrs. Moss gave us all cool Presidents Day Bookmarks for doing such a good job.   AND these cool flags on a little stand to put on our desks.  School is so cool! 
Mrs. Gleave’s class next door made Mr. Lincolns. They are cute too! 

These books are fun and easy to read and colorful too!


This is a directed drawing we are doing Friday….I’ll add pictures of them soon…


We will write facts about Lincoln on Log Cabin paper.  He lived in a log cabin, don’t ya know? He would keep reading books inside his tall hat.  Yup, he liked to read just like all the first graders!

We’ll count the pennies on Friday…..to see who won a giant pixie stick!
How many do YOU think there are……?
 Hope you liked our Presidents Day Bulletin Boards and activities! We sure did!

Writing Reports on Mammals and Reptiles

We watched this video and sang along to the song when we were doing our Lion art. I typed up the words for the kids to attach to the back of their lions as a shared reading/singing. It was fun. There is also a utube of cartoon characters dancing along with this rendition of the Lion Sleeps Tonight.

The past week we have been doing research reports on animals.  We started with mammals and then moved on to reptiles.  This is the way I start the unit. 

Owimoway…The Lion Sleeps Tonight…
These Lions are only about 5 pieces. We traced and cut out the yellow pieces, paws, body, round face, 2 oval ears. and then backed them with orange mane. I used orange and brown crimped wrapping paper stuff that I bought at Michaels for the hair and a brown pom pom for a nose. Some kids added stripes on their lions. We added wiggly eyes and then brown chenille stems wrapped around a pencil and taped them on the back for a curly tail. This one must have lost his tail….OH NO!

We read several fun books on freaky looking animals and all about their habitats and features, whether they are born by an egg or alive, what they like to eat and where they are found.  We talk about what makes a good non-fiction book.  We decide which books are more interesting than others.  The kids make all the decisions.  Then we go to the library and pick out our own non-fiction book on any mammal or reptile of their choice.

I read a non fiction book or parts of one each day and we added facts to a little mini book. Then we usually did our report writing and some shared reading with art.  Then we finished our illustrations and added to our individual tables of contents.  The kids learned a lot of new vocabulary going through these books. They all know what an adaptation is, what talons, gills, habitats, scales,  illustrators, author, dedication, glossary, camouflage, and of course the 5 animal species we are studying.  I’ll post pictures of our finished reports in a few days. 

Lucky for us our library has a great selection of animal books and Zoobooks and magazines on animal life. 
Then we come back and we try to look through our glossary or index to find pages where the animal habitat, eating habits or size and weight are found.  I ask them to find a good fact in their book and share it out. There will inevitably be the one who talks about “this picture shows a mom giving milk to her young” or something like that.  I ask them, “Would this be good to put in your research report? Why or Why not?”

Some are always right on top of it and explain it to the class for me.  So we give examples of good facts to find and write.  I tell them DO NOT write down anything you don’t understand.  I tell them that most of the sizing will show inches or feet as well as meters or centimeters, and to choose the non-metric system of measurement because it is more common.  They all know inches and feet, not so much on the meters.

Each week we studied a new type of animal and checked our new books from the library.

Then we pass out sloppy copy lined paper and go at it, finding facts.  The next step is I put them into groups after about 7 or 8 minutes.  The kids with similar mammals are grouped together.  Some that have the same can share facts with each other.  Otherwise they just share the file folder I give them that has an internet clipping, a card with facts or a magazine or book on their animal. My favorite website for internet clippings is Enchanted Learning.  I tell them, “All good researchers get their facts from lots of sources, and not just one, that isn’t the best way to do research.” So they get more facts from other sources.

 Many of the kids go home that night and get an internet printout of their animal with the help of mom or dad. The get a gummy bear or a sticker the next day for doing it, and I get to add to my internet clipping collection for next year’s class.

We painted these turtles (after stuffing a round stapled circle pocket with tissue paper to represent the turtle body) and used dot painters and bingo markers from Walmart for the colorful turtle shells.  So cute!
We sang songs and did shared reading of these turtle poems when we were done with our turtles. I usually mix art with a reading activity OR a writing activity. I never do art in isolation. Mix it with a Language Arts activity ALWAYS!  It’s an engaging way to get kids to read and write more….

Then we write 3 more facts or so.  Altogether these are short reports only about 8 sentences, just a page and a half.  But they ARE in first grade.  Then we find a picture we want to trace, draw and color.  I pass out white art paper and have tons of books on how to draw animals.  Most of the kids do an extremely good job on their art projects.  Nobody was done so I’ll have to post later the resulting  reports and art they came up with.

The next day was “Snake Day”. So after reading snake books, we made these cool snakes. I cut long strips of butcher paper, about 3 feet by 5 inch lengths. Then I told the kids to fold a square on one end and glue a tongue (red 1/2 inch strip) to it and cut a fork in the tongue and I gave them 2 small black circle stickers to put on for eyes. You can see some did “girl snakes” with eyelashes. 🙂 . Then I told them to accordion fold the square back and forth leaving the tongue on the end.
Then we cut a little triangle out of each of the 4 corners of the folded accordion square, which cut all along the snake (kind of like you do with snowflakes).  Then we opened them up, used dot stickers from Walmart and colored masking tape and designed our own snake.  On the back we glued a poem called BLACK SNAKE. And we ended by reading our snake poems and chanting them to a snapping rap beat! You could use multiple colors of butcher paper for yours. Maybe next year I’ll use black to go with our “Black Snake” poem….

Lastly I do editing on their sloppy copies with a purple marker.  Then after they go do their art they rewrite their reports nice and neatly on final copy paper they have chosen.  There are 6 kinds of stationery to choose from, and all of them are cool looking with pictures to match the animal. 
This is one of the most motivating things for kids is to rewrite their edited reports on THEIR CHOICE of cool stationery. Here is a picture and the LINK I’ve bought 3 different stationery books from Scholastic. It’s one of the best purchases I’ve ever made as a teacher!

The third day we did alligators. I LOVE this poem by Dennis Lee.   NOT Jack Prelutsky. I get them mixed up. Anyway we did an “Innovation” on his poem and made up our own verses to Alligator Pie. They are hilarious.  The kids did sloppy copies from a sentence frame. Then I typed up their final copies and we made alligators to go with them. 
______ pie, ______pie, If I don’t get some I think I’m gonna die!
Take away my _____, give away my ______, but don’t take away
my ________ pie!   This is a sentence frame.

We keep adding to our animal matrix the features on each species of animal; mammals, reptiles, birds, ocean animals, and amphibians.  It is a wonderful and fun way for kids to start learning researching skills.
I LOVE the finished products. Each child has a book of 5 reports and illustrations, a table of contents and a glossary of vocabulary words we have studied in the unit and been tested on…4 words each week along with their spelling tests.  And a mini book of all the animals we did as a whole class. Fun!

Animal Matrix…older classes could fill in their own individual matrix.  
Our finished “snapping” turtles. Those dot painters last for years! I love them!

Next week we will start and finish our ocean animals unit and reports. We will make some seahorse and starfish puppets and of course read Rainbow Fish and Commotion in the Ocean, 2 of my favorite books.  I found this fun video to show the kids in real time.  It is from the SEA WORLD website.  How many kids don’t love SHAMU? The Link for watching SHAMU the whale is HERE

The funny thing I learned about teaching kids about animals.  The 5 weeks we do the animal species reports,  they have to check out library books according to our animal species of the week.  The 6th week I tell them, “Guess What? You can choose any book from the library this week, we are done with reports!”  And the eye opener was when 85% of the class still go check out a book on another type of animal.  Kids do love science. They need to be fed lots of it too. It’s inherently interesting to them and a good way to get them hungry for knowledge enough to go out and learn more on their own.  And to me, that’s one of the most important reasons that I teach. 

My principal just gave each teacher $100 to spend on classroom books. Guess which kind I’m buying? Mmmhmmm…

Along the way I give art projects and poems and songs as daily work for kids to do to learn about animals of the week so they can get an idea of which animal they are most interested in doing a report on.  We studied snakes, monkeys, alligators, lions, turtles, frogs, parrots and the sloth and did an activity with them.  I’ll post next our bird unit and ocean animal unit projects. Last is amphibians, but everybody does a frog report for that. 🙂

Rainsticks are another fun art that goes well with rain forest animals.  Children paint or use markers or oil pastels on paper towel rolls or pringles cans. Fill with folded twice rectangles of cardstock and rice or beans. Cover each end with wax paper or pringles lids and tape up real good with masking tape. I’ve covered mine with african designs xeroxed strips from an African Hat book. The kids color in the designs.  We won’t have time this week to make them. Maybe the last week of school we will!  

This book is on my list.  Kids love to trace, but some like freehand illustrating too. I had some great artists this year!

I think our finished book of 5 reports with illustrations, glossary and table of contents is going to be a cool project for the parents to see at parent conference time!  And it makes a really neato rainforest bulletin board too!

Valentines Day Party!

Friday was our classroom Valentines Day Party. Everyone was very excited when they walked in the door with their bags of paper and candy valentines to pass out.  We had worked so hard on our cute Valentine holders!

We always decorate a heart shaped cookie. Thanks to the PTA for providing the sugar cookies and pink icing. I add lots of different types of sprinkles.  I have so many different sprinkles that everybody is sure to make a masterpiece! 


Then we HAVE to play some Valentine Bingo games using markers made of conversation hearts.  Then the fun part, passing out our Valentines to each other.  First graders are really into this part of the fun and they love to look for everybody’s Valentine holder to match the names up with their card.

 Here is how we make our Valentine Holders.  They are really sturdy and always turn out pretty.

Cute Valentine Holders…kids decorate  them with cut outs


I gave them die cutouts of valentine hearts, stickers and foam peel and sticks…

Another fun thing I do is to play Valentine Hot Potato using a stuffed heart about 10 inches in diameter.
I play some fun rock and roll music and we pass the stuffed heart around till the music stops.  Or another fun game is musical chairs. When the music stops if you are the one without a chair, come out and get a little lollypop, so nobody feels bad when they get out.


The Valentine Bulletin Board turned out so pretty…We wrote about the “Things and People we Love!”
I love the last line of this one…too funny!

We make crafts too. An easy and fun one for little kids is to make a red, white, pink and purple bracelet using a pipe cleaner/chenille stem, and some kind of valentine beads.  I usually find what I’m looking for at Oriental Trading in the foam beads section. Link HERE These cute hearts are easy for little kids to put on a pipe cleaner.  Or if you want to take more time, use lanyard plastic string and make necklaces. It is stiff and easy for little kids to bead with.  You just have to tie it in a knot when you are done. This year we decorated and made parent cards. They turned out pretty too but I forgot to take a picture! There was a lot going on…

Playing Valentine Bingo with Conversation Hearts

A fun favor is to make popcorn treats using white chocolate melted and drizzled over warm popcorn. It is really cute with red and pink white chocolate disks, melted in the microwave. It makes a very pretty popcorn ball too.  Wrap them in little clear plastic lollypop bags you get from any craft store, and top with these cute bag toppers.  Just staple one on each bag. These gals Chica and Jo are real crafters and have lots of fun ideas. Link to the  Popcorn Bag Tag HERE.  I’ve never done these because of the cooking part,  but it would be fun to do for neighbor gifts!

Making our cookies…I found these cute melamine plates at Smiths for 99 cents!
We frost them all with pink icing and have fun going crazy with the sprinkles!


The more sprinkles the better…yummy pink icing…


Addies mom and Js mom came to help us with the party!


Hey I just got a Bingo! Hip Hip Hooray!


cute decorations…


Some fun books to read…
We sing songs…read some cool books…

My very favorite Valentine Book…it has such a sweet ending…I love it!


Here’s my cute granddaughter eating one of our homemade cookies…isn’t she a doll?


I had to throw in a cut pic of my grandbabies makin’ cookies with me at my house too!


Aren’t they just the cutest kids?  : ) I’m just sayin….


Our classroom finished works of art…almost too cute to eat!

HAPPY VALENTINES DAY EVERYONE! 


Hooray it’s 100 Days!

Woo Hoo! Thursday marks 100 days of school.  Well, not really, Friday marks 100 days on our calendar but since we have Valentines Day off on Monday, we celebrate Valentines on Friday.  It’s complicated. 

So we started out the day reading our “100s Day BAGS”. These are a fun homework project I sent home on Monday. Each student had to count out 100 edible items into a brown bag I provided.  Then on the outside they were instructed to write 3 clues about what was inside. They couldn’t tell anybody. Here’s an example….

  1. It is yellow.
  2. It is shaped like a sphere.
  3. It is sour          WHAT IS IT?

Note home we attached to brown bags for our 100s Day snacks…


100s Day trail mix…yummy snack!

 Then 3 kids can take a guess. The one who figures it out gets a gummy bear.  Or if you stump the class YOU get the gummy bear.  Anyway, we had a lot of kids stumped today.  But the clues were excellent!  We rip open the bags one by one and pour them into a giant bowl.  Each student gets to dump their own and then stir the bowl with a scoop.  It is all very exciting.  Do you know what we are making?  100s Day Trail Mix of course!!! After everyone shares their clues we all get a giant scoop of it to eat for a snack! Yum.


This poem has 100 words!


Then we read a poem about 100s Day and Sang a 100Days in School Song to the tune of “The Ants Go Marching 1 by 1 Hoorah!”  Next we do a math activity on a 100s chart.  I call out about 20 math problems such as; mark an X on even numbers between 45 and 51, or mark an X on 5 tens and 6 ones, or 60 take away 10.  Then we X out that number on their individual chart and color that square in.  When we are done it makes a very clear 100. Fun!


Our tens and ones math activity clearly makes a 100!


Next I pass everybody out a crisp, clean, green $100 bill. I tell them all that they can buy whatever in the world they want with the money.  They all ask me if it is real money and I lie and say, “Of course it is!” snicker snicker…   We brainstormed for about 5 minutes and I wrote down everything from “A human clone” and “Teleporting Machine” to “A trip to Mars”.  They have vivid imaginations. 


Aren’t we cute?


Our 100 Days badges…we wore them around school all day!

After I talk them down about it not really being $100 bucks, and they get over their disappointment, (hehe) they all get in the mood and write what they would buy with $100 dollars.  It is very  funny to see and hear them plotting their Disneyworld and Seaworld trips and their teleporting here and there, the discussions going around just about cracked me up.


Awesome brainstorming…who wouldn’t want a teleporting machine?Oops I spelled puppies wrong..don’t look at that… 


  “I think I’d get a human clone for me so then I could make him do all the chores my mom makes me do”  That was from J.  He is so cute and super smart. “Well, I’d get an alien from Pluto, after I took a trip there.” I think that was from Andrew. He really liked our study of Space.  I forgot who wanted to teleport, but I’d actually like to try that one myself! Ever seen the movie Jumper?! What a great idea!


What would YOU buy with $100 bucks?
It goes a lot further in the mind of a 7 year old 🙂


Next, we passed out giant 100 signs and inside were 100 little doo dads to color. These we made into 100s Day Hats. They looked pretty cool when the kids cut out the holes inside the zeros so they could use them for cool glasses.  Here is a picture of the kids sporting their cool 70s giant glasses look.


Groovy hats that also make glasses…100 items inside the one and zeros…
part of my class showing you almost 100 fingers!


  While they were coloring I read them 2 books; The 100th Day of School, a cute book in rhyme, and 100 Hungry Ants, another rhyming book that divides 100 ants, many different ways.  The kids enjoyed them both. 


Very cute book in all rhyme dealing with multiplication


While we ate our cool trail mix made from lots of cereal, M &Ms, marshmallows and chocolate chips, I asked them what they think they will look like in 100 years.  There were many funny comments like, “I’ll be super bald!”  I gave them each an oval shape and told them, We ran out of time but I will have them “Draw it!”.  We will scrapbook paper shirts or dresses, buttons, glasses out of wire pipe cleaners, cotton ball hair, and funny faces.  I know we will have some hilarious results!
Happy 100s Day!


Woo Hoo!  75 Days to go till Summer!


Super Bowl Time! Let’s Party!

Every year I have the kids do a class graph. And here is the question I ask.  Which team will win the Super Bowl on Sunday?  There are always some sports fans amonst the first graders who know the score. They know the players and the teams. This year it was Trace. He knows the teams and he was certain of the winner. 


We each cut out a football to “VOTE” for our Team! Go Team!

 Well, we shall see.   I have a fun little challenge for the kids.  Those who predict the winner correctly will win a football sweatband for their wrist.  Those that predict incorrectly get to do 12 pushups.  We decided on the number 12 because I told them I also have to do pushups if I lose.  And I have lost in years past. It wasn’t pretty watching me trying to do more than 12. So we keep it at 12 pushups. (oh and all the kids will win the wristbands…they don’t know that yet though…I like to keep the competition going…)

The Pittsburgh Steelers against the Green Bay Packers

Here is our graph.  Wish me luck. I’m rootin for the Steelers. Don’t ask me why. I’m not even a football person. It’s just because the kids made me choose.  Fair is fair in the game of life…or football!  

 I can’t wait for the funny commercials. I’ve heard the Doritos ones are hysterical….But my favorite is the Darth Vader VW commercial.  SO CUTE!!!   .Happy Super Bowl Partying!

Darth Vader Commercial

Happy Groundhog’s Day!

Nothing is more fun than telling the Legend of the Groundhog to a bunch of first graders. They are amazed that this little hairy rodent, correction……large hairy rodent is in charge of our weather! It’s hysterical to hear their conversations to each other about if he did or didn’t see his shadow and how that will affect the future.  I had to talk them down, reminding them that a legend is not equivalent to science. But they think it IS all very scientific. I don’t know if they got it. At the very least they think groundhogs have some close family ties to Mother Nature!

Most of the kids predict an early Spring…I hope they’re right!

We all started the day doing a groundhog play and making our “props” (i.e. cool, buck toothed rodent hats)
Everybody wanted to be the star of the show of course.  Luckily Addie’s mom was my mother helper for the day and she had them just trade parts. Problem solved!  Then we made our predictions and wrote them down.  I told them the Groundhog is only accurate 80% of the time, he could still be wrong! So most of them went with his advice anyway…. You know kids and their animals…..:) Then we graphed our preditions on our giant class graph using little groundhog cutouts.  Yup, Spring won out.

Ricky the Rodent….I mean….Gregory the Groundhog!

Then we read all about the Legend of Groundhog’s Day.  I forgot to show them the utube of Phil in Pennsylvania, but I’ll do that tomorrow. It’s fun to see the actual little guy popping out. I wonder how old that dude is by now… like 200?  He always looks very well fed, like a little portly for a rodent!

The Legend lives on…..


Today was a freezing day to go out and check out sun shadows! Ugh! But we did it anyways!

Then we made some cute little pop up groundhog puppets with the groundhog’s “house” being a cut in half paper bag and the 2 predictions on either side. I found some cute songs that go along with spring is early, or 6 more weeks of winter so we attached those to the bag and got out our instruments and sang songs. Then I passed everybody out a tatoo for Groundhog’s Day.  We just took those home to try them out.  

Groovy tatoos of the groundhog.

Then we wrote our predictions out. They were really cute.  We will have to wait and see who is right and who is wrong.  We talked about sun and shadows and how they are made.

 I’m finished now with my teaching the whole first grade about space. The last lesson was on the power of the sun.  We made little sunclocks and put a piece of red string around them. Then we went outside to check out the sun. It wasn’t as cold as yesterday thanks goodness, it was only about 20 degrees though. EEK! Super chilly. They also loved my little solar robot. We watched him walk around the playground. The kids would make a shadow over him and he would immediately stop. Then everybody would laugh. And they would hop out of the way so the sun could hit his solar cell and he’d start marching again.


I’m predicting I don’t last much longer in these single digit temperatures! Ugh! Bring on the sun Mr. Groundhog!

 I found these very cute cupcakes in a magazine and I so wanted to bake some and make these too! But I forgot to bake them the night before. It is really the fault of my favorite show. It happened to be on last night and I get really glued to the t.v. when it comes on. (The Good Wife on CBS at 9:00). Oh well, maybe next year….

Aren’t these just the cutest things?


Not as cute as these girls! Their hats turned out so cute too…


My kids really loved doing the fun Groundhog’s Day activities.  I hope his prediction is right this year. I’m slowly beginning to tire of shoveling snow off my car. I’m missing the beaches of sunny California. And so I can hardly wait for an early Spring.  Happy Groundhog’s Day!

Pop! Goes the Groundhog!