Bony Skeletons “Crack” Me UP!

Candy corn and skeleton Art

We’ve been working on some cool art projects for our Halloween Bulletin Board.  We did some tissue paper CANDY CORN.  The kids designed their own piece of corn, then I cut out 2 inch squares of tissue paper in yellow, orange and white. Then they twisted them on their pencil eraser tops and glued them down in rows. They turn out fluffy and pretty.

Woven Skeletons 

Then our whole 2nd grade makes these cute SKELETONS.  We finished the candy corn last week and finished the Skeletons this week during art.  So Here’s how to do the skeletons.

Cut 1 x 18 strips of black and white 8 of each color for each child. Then glue 2 whites together at the ends and 2 blacks together at the ends to make 4 long of each color. Then glue the white top edge to the black top edge at a 90 degree angle, like the picture below.

 Then comes the fun part. Cross the white over the black in front, then the black over the white turning it a little as you go. It will always look like an L.   Some kids crossed it behind and some kids crossed it in front. It doesn’t matter as long as you are consistent.  It was pretty easy for them, they got into a rythm.  When they got to the end of the strips they glued the last 2 bits together.  Each of these make an arm or a leg.

Weaving the arms and legs for the paper skeleton….

We did a fun science matching the bone names to the picture of the skeleton parts of the body. It was fun!

Then they made the body with 18 x 2 1/2 inch strips, just 1 white and 1 black. You can see some kids doubled it and their body (belly section) is longer. We all decided the shorter looks better.  Lastly we cut out heads, hands and feet that we had copied and glued them to the body. We added a brad to the head and connected it to the body so it could swivel around. Kids loved that part, as you can imagine.

Here’s our finished Candy Corn Art

We put the skeletons in all kinds of poses….

 So here are our finished skeletons.  We then learned about some of the bones in our skeletons and did a matching activity, and read a book on Skeletons.  I also put together a take home bookbag for home reading called “THE SKELETON BAG” with 3 books inside on our skeletons, our bones and a book of Xrays of our bones. There is also some fun glow in the dark skeletons and some fun activity pages in a folder to do.

They look so funny on the bulletin board….One of their heads fell off today…. those bony bodies “crack” me up! 

Then we wrote mini reports.   I read them a non-fiction book on spiders and we wrote reports on spider stationary. I had collected 2 Weekly Readers and 1 Scholastic News on Spiders. We read all of them, then brainstormed facts about spiders on the board. Here’s our finished reports.  They turned out great.

Then we wrote mini reports on Spiders…..

Ty’s report on Spiders

Flint’s was a great report…..

Andrew did a good job too! 

Lots of cool spider facts…..

Great Job guys! 

Gavin’s report…..

Allie’s report….

Our finished Halloween Bulletin Board….

 Hope you love Halloween like I do…. The knee bone’s connected to the….leg bone….doo-dee-dah…..

Kids Learning Keyboarding

We were cleaning out our garage and storage room for a trip to the thrift store to drop of some of our old junk. We happen to come across John’s old low tech college typewriter in the suitcase. Our grandkids happen to be spending the night and they didn’t know what in the heck this old dinosaur, piece of machinery was!   
This is how I learned to keyboard…..typing on an old Royal typewriter…age 16

It is so amazing that my  little 2 year old granddaughter in the picture below can play on an Ipad better than either of her grandparents combined. But I can type 90 words a minute on this old machine! (Oh yeah, I’ve got skills!)

 I learned to type in high school many years ago on one even less streamlined than this one. It was the noisiest class you can imagine! They would play a cassette tape really loud over the speaker system and it would tell us what keys to type in succession to a rythmic beat.  There were probably 50 kids typing in that class.  Such a ruckus we all made!

Here’s my granddaugter Megan, age 3….she is a wizard playing games and learning programs on the Ipad.

Now kids are learning keyboarding as young as 5  in schools using  portable mac laptops, alpha smarts and the other minis. It is amazing the technology out there and how fast it can change. When I watch kids changing the font, the color of text and highlighting and deleting their text so quickly, skills that took a long time to learn in computer classes years ago, I’m always surprised by the things kids “pick up” on their own without any training. None of them are afraid to go poking around to see what this thing can do!

Now here we are, many years later, teaching computer keyboarding to young kids so they can master computer skills at an ever earlier age.  It is a new generation of little people who are not afraid to putter around with high tech machines.
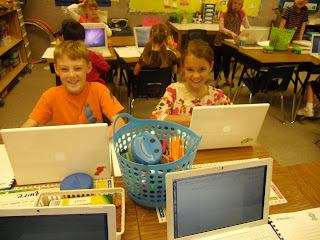
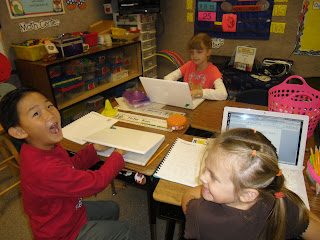
Keyboarding kids….

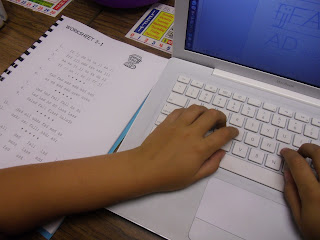
They are learning the home row….

  I was always afraid I would delete something when I first started word processing at age 21. I was a legal secretary with an Associates Degree in Secretarial Training from Ricks College. (Don’t laugh…I can almost hear you snickering now!)  and my patent-lawyer boss went from a Correcting Selectric model of typewriter to a Panasonic word processing typewriter. It made the job of a legal secretary soooooo much easier! You could actually type up the patent applications without white out or carbon paper. It was so easy to remedy mistakes. That was back in the late 70s. Yeah, I’m feeling old today!
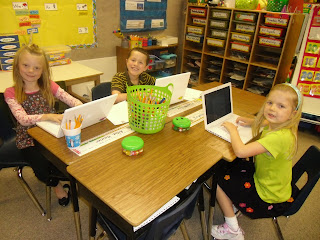
Keyboard Chatter is the curriculum they are using….

  I used to have to type up patent applications from my boss’s scribbling on yellow legal pads. Then he’d make changes with a black felt tip to my 1st draft, and we’d go from there to many more typed drafts. After new technology invaded our law office, thanks to Panasonic,  I could go in and change just a few sentences here and there and reprint new copies super easily. It was the precurser machine to a computer. It had a tiny screen that only showed you 2 sentences of type, but you could back up whatever you had typed with ease too.  What a time saver it became.
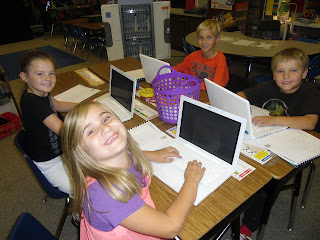
I know they are learning new technology at exponential rates…

Learning Keyboarding at age 7….who would have thought?  

 When I left that job to go have my first baby, they replaced me with another Panasonic. Such is the speed of technology. I wonder how long before teachers will be replaced with computers? I don’t even think a decade will pass before teaching looks vastly different than it is today. We shall see.  In the meantime, look at what these kids can do with our mobile computer labs here at Sunrise!
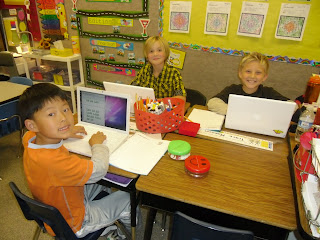
We’ll be typing up our stories very soon! 

Halloween Story Problems

We are learning the “key words” for addition and subtraction. I made up a pocket chart with the different words we have come across as we do our story problem for the day.

Here’s our cute Halloween Bulletin Board with our story problems under the cute art…..

I love these little ghosties flying around….

The kids got really good at making up their own. So we used some cute Halloween themed paper and started writing word problems using some of the characters seen on Halloween.

In this story the skeletons “sprout kitty wings!” So funny! 

Word Problems….mixing math and art….

 Then we had the kids take turn reading their story problems to the class. Everybody got out their whiteboards and tried to figure the problems.

We put some cute Halloween Scenes on top and made a cute bulletin board.  See more of them HERE on an earlier post.

They turned out really funny. Some are very challenging too. When we had at least 5 hands raised we picked somebody to tell the answers. If they were correct they got a gummy bear. Then they got to come up and read their problem. And on we went.

Halloween Story Problems

It was lots of fun. And everybody got a lot better at understanding the difference between IN ALL, HAVE LEFT, ALTOGETHER, HOW MANY MORE, AND TOTAL. YUP!

Halloween Art

HALLOWEEN SCENES IN MRS. MOSS’ CLASS

My favorite Halloween Scene in my living room at home….

We made a cute Halloween yard scene using white picket fences on black. We curled 1/4 inch strips x 5 inches into circle curls and then glued them sideways into pumpkin shapes.

Here’s our Halloween Bulletin Board….we wrote word problems underneath…..


 It was tedious for little fingers so we only worked on it for about 20 minutes each morning right before recess. We finished them in about 3 days.

 The Spiderwebs we cut out kind of like snowflakes. We got the template from Martha Stewart Crafts on a special Halloween decorating edition she did. I found it last summer when I was perusing craft websites like I do in the summer to plan for the next year’s art projects….(being an art minor I have an obsession kind of….snicker).  The link to her tutorial and template (just click on the word template in her first paragraph) is HERE at Martha Stewart Crafts.


 Then we made different moon shapes. Some made full moons, some shaped like bananas. Saige and Trace have some neato scenes too! 

Then we added black yarn spiders and glittery pom pom spiders with colorful wiggly eyes. It was kinda hard to glue the eyes on because of all the glittery tinsel sticking out of the pom poms, so I might not buy that type of pom pom again next year. 😀

Matt took a lot of time on his…it looks great too! 

I got my supplies from Joannes Crafts.  Wiggly eyes come in all sorts of colors, as do the pom poms.
The ones I had were glittery looking pom poms. Maybe next year I will use regular ones, without the tinsel spikes all over.

 Colorful wiggly eyes make those spiders POP! 

We used plain black yarn….I liked the longer spider arm lengths better than the shorter ones. Next time I’ll give kids maybe 5 inch lengths with 4 pieces each instead of the 3 1/2 inch lengths. Longer spider legs looked cooler I thought.

I loved Gavin’s spider…..longer yarn  length was a better look! 


Hi Addie! Yours is cool too! 

 There was a little frustration on having eyes fall off over and over before they finally stayed STUCK! It turned out really cute.  

Allie is proud of her scene….


My kiddos are really proud of their Halloween Scenes!  

Oh yeah….these turned out cool! What do ya think?  


RULES IN SCHOOL

AT OUR SCHOOL WE HAVE A SCHOOL WIDE BEHAVIOR PLAN CALLED SOAR.

 S stands for SAFE INSIDE AND OUT.  O stands for ON TIME AND ON TASK. 

A stands for ACCEPT RESPONSIBILITY. 


And R stands for RESPECT SELF, OTHERS AND PROPERTY. 
I thought of a way to use an art project to get the kids talking about the SOAR RULES and what they really mean…..


First we read a story called “How Do Dinosaurs Go to School”.  It has lots of dos and don’ts that kids need to have retaught again and again. 


If you want to check out the book I read…..The LINK is HERE.


Then we made our own  speech bubbles and little buses made from egg carton tops to show SCHOOL RULES. We added wheels of black and white construction paper with brads for the metal part.  We made stop signs from a yellow pattern block hexagon…. (Easier than trying to make octagons)


Then we had our pictures taken by Brynlin’s mom with a yellow paper backing. I kind of had the kids sit like they would in a bus, looking to the right.  I copied those off in the computer lab on the color printer 10 on a page (2 x 3 setting) and cut them out. 


Then the kids picked pictures from a big pile on the table of their “new” friends to add to their own bus, up to 5 friends each onto a strip of black construction paper.  Then we painted the egg cartons yellow and added our “Sunrise School Bus” signs and SOAR signs, the buses and wheels.  They turned out fun. 


But the best part was the writing activity we did afterwards.  This is how they interpreted the rules of school.  I thought they came up with some really great thoughts about how to respect things and others and to do their best at being safe and on time and on task at school.  We have some really creative kids here don’t we? 

Favorite Football Teams! Go Team!

Click to play this Smilebox scrapbook
Create your own scrapbook - Powered by Smilebox
Make your own scrapbook design

Today we wrote about our favorite football teams. We have a little rivalry in the 2 colleges nearby where we live, BYU and University of Utah. And they had their college rivalry game this past weekend.

Kids’ favorite football teams…..

There were cheerleaders with pom poms 

And football players with cleats and footballs…

 The boys had to have some footballs and cleats, the girls made pom poms and they all put together their stretch legs and arms. Aren’t they fun?

And look at all those footballs!

Everybody wears red or blue for the weekend BIG GAME!  (I guess the University of Utah Utes slaughtered the BYU Cougars, sniff, sniff) (I bleed blue…alma mater)

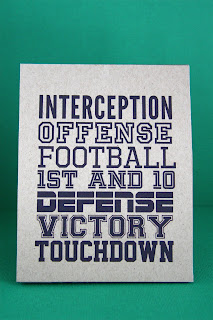
Don’t you love all our football “vocabulary?” 

Then I took their pictures and we glued them to helmets or “hair” and put numbers or letters on our football or cheer jerseys. It turned out really nice.  So did their “Football” writing.

Ty and Trace are really good friends…..but definite rivals  when it comes to football teams! 

 I think looking at all the colors that there is a definite winner in our classroom, UTAH UTES! We’ve sure got a lot of red football players and cheerleaders here!

Gavin isn’t into the college teams as much…he likes the PROS! 

 There is so much community involvement here and it is fun to watch. I am not that fond of  football, but even the kids around our school get into it! They all were wearing their “Red Utah” or “Blue BYU” t shirts on Friday sporting their favorite teams.

Flint liked a team from Wyoming….

Se we decided it would be fun to do some Football player and cheerleader art to go with writing about our fav teams.  They turned out funny and cute.

Our FOOTBALL AND CHEERLEADER BULLETIN BOARD…

HERE is a Football Printable

football helmet printables football helmet printables HERE

So who do you think will be in the Super Bowl this year? Hmmm?

Fossils

A poster I made up of how a fossil is formed….using dinosaur bones as our topic….kids LOVE  dinos so much! 

 In our Science rotation our class is learning about Rocks and fossils from Mrs. Bray. The students made conglomerate “sedimentary” rocks by adding sand and pebbles to a clear cup and adding glue. It was really creative and fun!

This week we made plaster of paris fossils of dinosaurs and shells. 
Product Details
Fossils of Long Ago book on Amazon is HERE.
Here’s a close up of our fossils…..

 On online interative game with dinosaurs and fossils and how a fossil is formed can by played HERE at ABC Net.

I’ve collected lots of fossils and books on fossils and dinosaurs  over the years… 

 A cool website for fossil activities is HERE at Valdosta. They have lots of good info on fossils.

Some books and microscope slides I have at our fossil center….Students love looking through our mini microscopes….

Everybody’s fossils look a little bit different…

 Mrs. Moss has real fossils and tons of dinosaur and fossil books at our Science Center.

Doesn’t it look like a lot of fun? Well…yeah…it was.   

Skiing for Teamwork

On Thursday we did a teamwork exercise for P.E. We used the school “skis” and had teams of 2 try to work together to get from one side of the gym to another.

As you can imagine is was hysterical to watch.  Some kids got pretty good at it by hollering “left, right, left right”.

 Some others had fun trying it alone….. even if their partners gave up. 
It made us all laugh because if is pretty challenging…..

It was tough at first! 

Brynlin and Andrew got pretty good at it! 

So did Saige and Nova…..

Peter and Flint were going pretty fast! 

We switched partners about 10 times.  It was a fun time.  And it made us all laugh! It’s hard to be a great team….but practice makes anything easier!