Turkey Craft and Thanksgiving Writing

Our Thanksgiving Turkey Craft  and Thanksgiving bulletin boards…..

HAPPY THANKSGIVING EVERYBODY!!! HERE ARE SOME THING 2ND GRADERS ARE VERY THANKFUL FOR THIS HOLIDAY SEASON…..

The kids brainstormed things they were thankful for…

Then we did sloppy copies….

Then I edited them for spelling and punctuation….

Then we made this CUTE Thanksgiving Turkey Craft

We made EASY turkey feathers from strips of butcher paper in 9 colors..

And then we wrote them on cute “Let’s Give Thanks” paper…

I added a sparkly sticker to them…

We are thankful for lots of things…

pets, teachers, family, video games…home, school…

Giving Thanks Bulletin Board….Happy Thanksgiving! 

Hey, I’M EVEN IN THERE!  COOL! 

Lots were thankful for turkey dinner…snicker….

My friend Jan’s bulletin board…one of the most colorful and cute I’ve ever seen! 

Thanks to Ty’s mom for putting up our Thanksgiving bulletin board….she did a great job! 

Thanksgiving Bulletin Board….so cute! 

Well, it will be very nice to spend a few days off with my family and my kids and grandkids. Happy Thanksgiving BREAK! I’ll be busy making pies and homemade rolls. Check out my Thanksgiving recipes at my other blog Weekday Chef! In the meantime, enjoy those Take Home Reading Backpacks!

Veterans Day Activities

Veterans Day Bulletin Board on 11-11-11

This week is Veterans Day. We will celebrate the day by honoring soldiers who have died in the line of duty, protecting Americans in the U.S.A.  I will teach the kids all 5 branches of the military; Army, Air Force, Coast Guard, Navy, Marines. We will also share that they all have their own song (with lyrics) and their own cool uniforms. We listened to them and watched them march out with the flag on utube.

Click to play this Smilebox scrapbook
Create your own scrapbook - Powered by Smilebox
This free digital scrapbook created with Smilebox

Then we wrote  about what Veterans Day is For. We wrote about soldiers who are always protecting America around the world. I want the students to really remember how each branch of the military protects us in different ways; the Air Force with planes and helicopters, the Navy with ships and aircraft carriers and submarines, the Coast Guard with boats and divers,  and the Army and Marines on the front lines of battle. We will talk about the elite Navy Seals and Special Forces and how tough and brave they are.

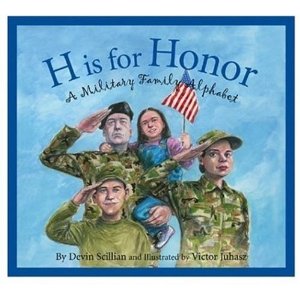
A cute ABC Book with a Military Theme I bought and read with the class is H is for Honor

After writing, as a fast finisher, kids will do a Veterans Day crossword puzzle.  We will discuss some of the vocabulary in the puzzle too.  The link is at homeschooling for Veterans Day Crossword.

Veterans Day Crossword 

Then I found a few neat handprint art projects I wanted  to try. Both look very patriotic! Also I found a fun wordsearch for fast finishers I will put on the back of the crossword puzzle. It is HERE at Family Fun Shop.   

I
Veterans Day Art Project – we decided to do a variation of the American Eagle below…saving the flag for Memorial Day!!! 

http://homeschooling.about.com/od/holidays/ss/veteranprint_3.htm   I also found a neat way to make free WRITING stationery.  I put an eagle and stars on the borders to make a cute page for our writing project.  Make your own stationery is found here at DLTK Kids. Just look on the left side for Veterans Day.

We did a mural of all of the 5 branches of the military for Veterans Day after the kids were done with their writing. I read and edit every “sloppy copy” and then they rewrite on the cute paper. It is time consuming but I can help them correct their individual mistakes that way. 
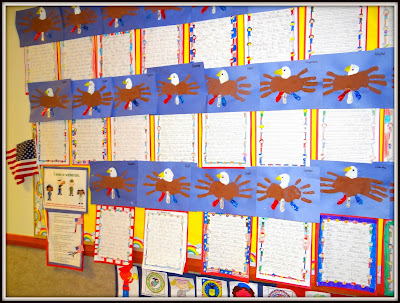
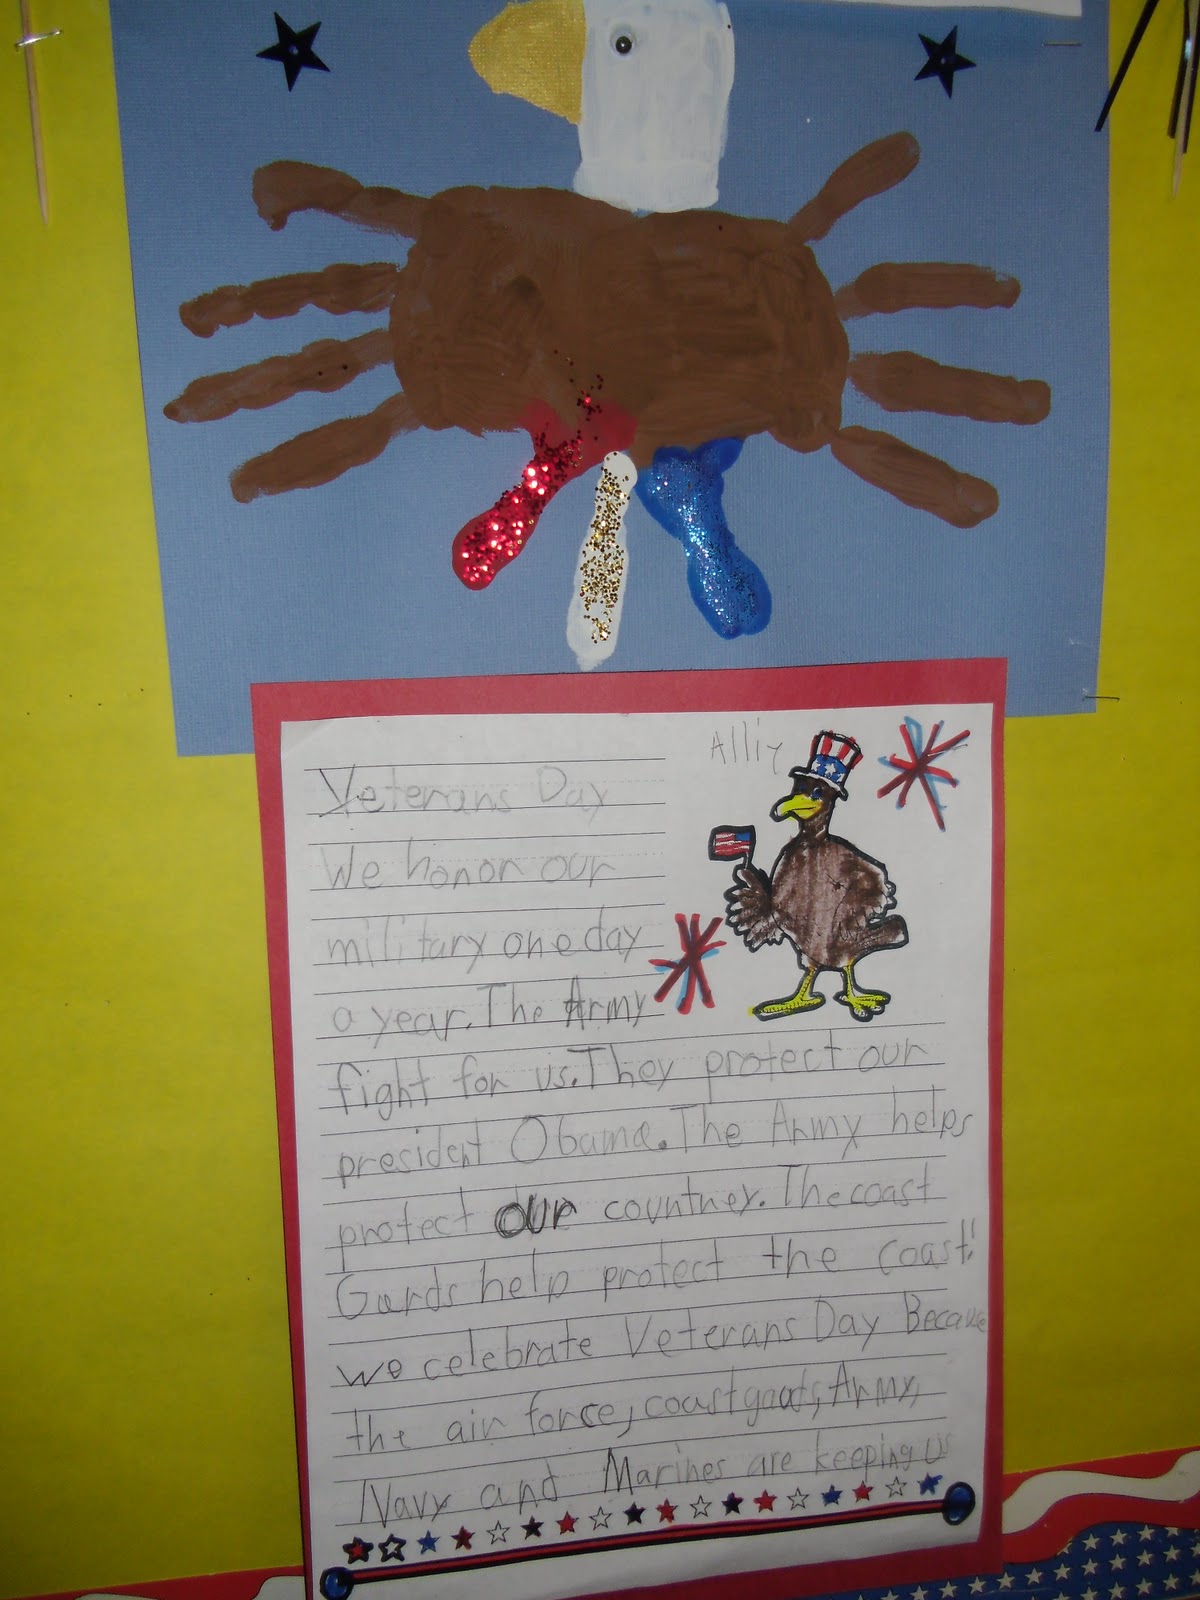
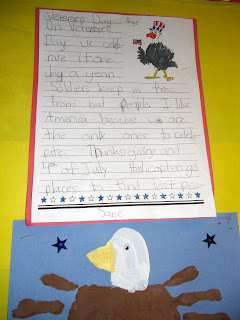
Our Veterans Day Writing and American Eagle Handprint Art Projects….and our mural. 

And to honor the memory of all our departed soldiers in the military we will be doing an art project using  the American Eagle …..symbol of the U.S.A.  I like the colorful tail feathers on the bottom of the American Eagle, so I would change those white ones to red, white and blue  just for a more colorful bird. Then of course some red, gold and blue glitter on those tail feathers will add a lot. The tutorial for Painting an American Eagle is HERE. handprint-patriotic-eagle-craft-kit 
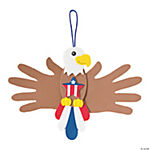
This kit for a Handprint Eagle is HERE at Oriental Trading. We didn’t do this one, but it’s really cute too.

Lastly I will show the kids a video song from Tim McGraw honoring fallen soldiers in the line of duty called “If You’re Reading This”.  It shows my students the sad part of the job of protecting people, and how some give the ultimate sacrifice, their lives in defense of America. That’s why we honor them at Veteran’s Day.

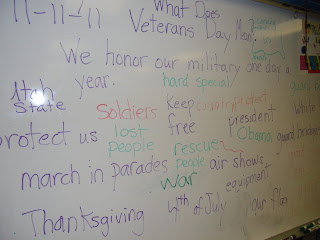
We brainstormed all we knew about what Veterans in the Military do….

 After watching the Utube videos we talked about what a Veteran is. We talked about how they protect the president, bridges, dams, airports and tall buildings as well as doing Toys for Tots at Christmas, marching in parades, flying on helicopters, jets, and manning boats, aircraft carriers and submarines. Most of the kids had gone to air shows and seen the military tanks, weapons and men there. We talked about places where there is war in the world and how our military helps protect us overseas.

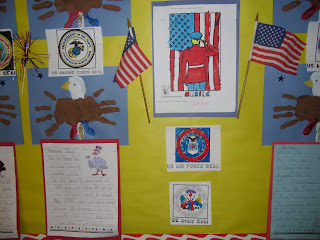
Here is our finished bulletin board on Veterans Day 11-11-11
We made American Eagle Handprints…

While the kids started their writing I helped 2 at a time handprint paint. First we painted our left hand brown with a blue thumb. Then we painted our right hand brown with a red thumb, washing hands in between these steps. The prints overlap in the middle a bit. Then we painted our pointer finger white and did the middle tail feather. While they washed hands, I glittered with red, then blue glitter, then the white feather with gold glitter. Then the kids painted a head and beak after I lightly traced the shape with pencil on each bird. Lastly we added a wiggly eye with glue and 2 stars. They turned out great.

I told the kids about my dad, Mr. Russell, who was a marine in 2 wars. He is burried in a military cemetery in Southern California. He was a great soldier and marine for the U.S.A. I’m very proud of him.

We wrote about Veterans we know….

 I told the kids about my kids’ other grandpa, Mr. Moss’s dad, and how he was a flying navigator in the U.S. Air Force. He flew bombing missions in several wars.  He is still alive and retired. I will also share a picture of my nephew Garrett, who was in the army and shares my birthday with me.

We wrote about the Air Force, the Marines, and all the other branches of the Military for Veterans Day 11-11-11….
We wrote about being Americans….

I always send home a note asking for military memorabilia or a grandpa or dad or mom who wants to come and share with us. I was surprised how many of them had grandparents and dads in the military. They sent all kinds of things for us to share; dog tags, helmets, army blankets, aircraft jumpsuits, cloth maps for directions on the ground, photographs of men in uniform, lots of military memorabilia. It was very patriotic to me.

We are proud of our Veterans on this 11-11-11 Veterans Day
Lots of kids brought in military gear and photos for us to share! 
Some kids wrote about their grandparents…..
My kids’ grandpa was a navigator in the Air Force…Thanks Grandpa! 

 HERE at Military Coloring Pages  I found the neatest pictures of the 5 military branches’ seals in blackline master and some other cool coloring pages. I copied them, and then put 2 on a page and copied each of the 5 seals (Army, Navy, Air Force, Coast Guard and Marines) for the kids to choose one and color as a fast finisher during our writing time.

The Bulletin Board looks great…so patriotic! 
Cool Eagle Handprint Art Project
This was a fast finisher Coast Guard Seal coloring page…we had all 5 to choose from when they were done with their writing and centers…
We wrote about Veterans Day
I did not know the Marines are part of the Navy….did you? 

 I’m very proud to be the daughter of an American Veteran. He’s gone now and I miss him. But I honor him and all who served and still sacrifice for me and my family this very special Veterans Day 11-11-11. Thanks for sharing all your military memorabilia and precious photographs of men and women in uniform. Happy Veterans Day from our class to you!

Halloween Party

Mrs. Moss…..the ladybug…..

First and Second Grade parading through our classroom

Then we paraded through the First Grade classrooms…..

Cute Nova….I think she was a lady vampire….

And Meow! Maya the cute kitty cat…

Pretty Princess Emma…we made Halloween treat bags….

And Royal Purple Allie…we had candy corn bags, witches and Dracula bags and Frankie bags…

Yo Ho, Yo Ho….I think Trace was a Pirate….

Ninja Alien Andrew

Flint loved being an army man…with REAL dog tags! 
Mario and the witches showing off their Halloween necklace making skills….

Pin the spider on the web and hot potato pumpkin….

Boo Bingo was fun! 

Ty was an indian

Zach was Harry Potter…..

Morgan and her mom were some COOL cats! Cute Dracula bag Morgan! 

Mrs. Moss and her little bugs…..

Megan and Marisa my granddaughters came to trick or treat! 

It was a fun party…..

We also had a pumpkin bean bag toss and donuts and juice from the PTA! 

Mario Matt….

Cute witch Brynlin….

and Addie was a cute version of the  Bride of Frankenstein 

Saige’s mom sewed her costume….so cute! 

And who ya gonna call? Ghostbuster Gavin! 

 We had a fun time.  Thanks to Mrs. Kenner, Mrs. Neibaur and her sister, and Mrs. Carr for helping us at our party! You ROCK! And thanks to Jamie Sandstrom and Mrs. Kim for sending some cute Halloween cookies, and to all the parents who sent bags of candy! Thanks sooooo much for supporting our party!

And if you want to see a cute utube of me and my family doing the “Thriller Park City” flash mob, check out my personal blog post from Saturday night.  It was super fun!  Click HERE.    Happy Halloween!

Halloween Art Projects!

    I LOVE the fall season the very best. Mostly because I LOVE Halloween, the decorations, the parties, the costumes…I love it all.  So the fall craft magazines when they come out are some of my favorites.  I have stacks of them I’ve saved over the years.  I’ve made so many different crafts over the years too.

Here are some that I think would be fun and easy and cheap for teachers to do in their classrooms. They don’t take a lot of materials, mostly paint and paper.  And some recycled things.
But hey, that’s good for the environment, right?

This Frankie craft is from Inspire Me Crafts


Milk Jug Ghost Halloween Decoration
These milk jug luninaries are from Family Fun
Jill Dubien always has some cute art ideas….


Halloween Gift Tags for free at Click Party HERE.


A link to a cute Halloween Bingo and Match Game is HERE.

I like to do a few weeks at Halloween of each of the different fun icons of Halloween and make up a day for each one and do some thematic fun and educational activities.  I do a ghost, pumpkin, witch, Frankenstein, bats and skeleton days.    Most days have a math game, a poem, a writing project, an art and some kind of word work too. Sometimes our math has an element of “witchiness or a Frankie or two….”

Then since I ALWAYS connect writing to whatever art we are doing we decided to do some Slogan poems
on Red Ribbon Week using these fun gravestones.  We all want to be drug free, that’s for sure.  Here are our funny SLOGANS FOR STAYING OFF DRUGS.  

Red Ribbon Week Activities

Staying Away from Drugs Slogans….

We added some Halloween punch outs to our Red Ribbon Week Gravestones….

The students had their choice of ACROSTIC PUMPKIN POEMS, or APOLOGY POEMS this month too. The apology poems turned out quite hilarious.  We saw apology poems on some teacher blogs and decided to try them. We read through about a dozen and the kids had lots of ideas.  The Acrostic poems are some I do every season. They are always great and easy to complete.

Halloween Apology Poetry….

So Funny! 

I read a few to them from another 2nd grade blog…..they got the idea….

Apology Poems sure were funny….

It was easy to do too once they had read a few examples….

HAPPY HALLOWEEN!  I found a link to a huge cache of Halloween poetry and songs. You can fine it at kidnkaboodle.

Funny Sayings…..

Time for a coffin break.

Have a beary scary Halloween
Gone haunting.  Will return at midnight.
I witch you a Happy Halloween
May our best witches go with you
Mummy’s little monster (under child’s picture)
You’re so boooo-tiful!


Remember the gh’oul times!
Time for a coffin break.
Have a beary scary Halloween
Gone haunting.  Will return at midnight.
I witch you a Happy Halloween
Trick or Treat! Give me something good to eat. Give me candy. Give me cake. Give me something sweet to take!
May our best witches go with you!  


Mrs. Moss’ 2nd Graders October 2011


Halloween Jokes and Mad Libs

Halloween Mad Libs are a great way to teach Nouns and Verbs in a fun way. 

I bought a Halloween Mad Libs book to help my students learn verbs, nouns, and adjectives and the differences between them.  I copied the story frames back to back with the lists of ideas for each of the categories of nouns and verbs. The kids then did a sloppy copy, I edited them for punctuation and spelling, and they rewrote them.

My Halloween costume this year….

Then they can choose a cute Halloween Stationery and print their funny story on it for everybody to share.  Here is a site that has lots of cute stationery HERE.

Halloween bat frame
Halloween Stationery  it is great for story writing….

I found a fun website for some Halloween Jokes and Sodoku activities to use at our Halloween Party next week. The link for jokes is HERE.

My “BUGS” and I…ladybug costumes…

Halloween Bingo is a great party game for kids! 

Halloween lunch box notes
Halloween Jokes

 The link for Sodoku is HERE  and HERE.  We always make and decorate bags to fill with “loot” as they go around to the 5 centers and play the games and fill their bags with trick or treat candy.One is a Candy Corn, One is a skeleton face, one is a Frankie, One is a Witch. They always turn out cute attached to a white bag with black and orange yarn or ribbons.

Colored Halloween Bingo Printable Game Cards
Halloween Bingo Game

A fun kids BINGO song with free downloadable text and pictures I found from Deanna Jump. The link for her free song is HERE.  Another one I found is HERE at Family Crafts.  Have a fun Halloween Party! I know we will! 

DRIED APPLE HEAD WITCHES

We are just about done with our DRIED APPLE WITCHES.  Here is Part 2 of the TUTORIAL on how to make them.

Here’s a good close up of the faces, we used wiggly eyes this year, and added 2 rice for teeth to the red marker smile….

Buy a bag of small apples, peel and dip in lemon juice. Push a clove into heads for each eye (OR add wiggly eyes after they are dried). After a week poke a 1 inch piece of toothpick for the nose.  Also push in a popsicle stick into the bottom of the head when it is kinda mushy and partially dried out. Dry under a desk lamp on paper towels or marinating tray for 2 1/2 to 3 weeks, rolling them over every day.

We had 3 colors of hair, rings, chenille stems and lots of different necklaces and fabrics….
Gavin and Peter’s witches….

Morgan and her mom’s witches and Matt’s witch…..

Our newest student Zach liked doing witches too! 

Saige and Nova….The kids LOVED MAKING THEM! 

They couldn’t wait to get their pictures taken with them…here’s Ty’s and Brynlin’s witches….

Then my lovely parents donated Halloween fabric. We need 1 square foot per student. Make a 1/2 inch slit in the middle of the square foot and place the popsicle stick & head through it. Then secure around the “neck” slit by winding the chenille stem around the stick AND neck fabric twice. Put a spider ring or bat ring on one of the arms made from the chenille stem.

Get a variety of 1 foot squares of Halloween Fabric….then let the kids choose theirs. 

Cut a 1/2 inch square slit right in the middle. 
Popsicle stick head slides right down into the slit in the fabric…then wrap a chenille stem around twice.
Notice my cute spider ring?

Next is making the witch broom and the witch hat. I had a lovely parent helper, Mrs. Kenner come in with a glue gun and helped me one day last week for an hour or so and one day this week again for an hour. We tag teamed the body and the head. Kids went from her station to mine. Here is how to do the hat and the broom.

The broom is from 1/3 of a wooden skewer with black crepe paper layered and  snipped
on the bottom and then tied around the skewer with black yarn.  Raffia works great too.

Mrs. Kenner helping us with our witches…THANKS SO MUCH! 

Here were the 2 shapes cut from black felt, cone and circle…roughly 4 inches each. 

Put a strip of hot glue down one of the 90 degree sides, then roll a cone…

Then glue the cone to the circle….It was pretty quick…I added a skinny triangle of material
to tops for a bow, topped with a yarn bow.
The black crepe paper was 2 1/2 inch squares layered, snipped & wrapped & tied on skewer pieces

Or you could use pieces of raffia 4  of the 5 inch pieces folded in half and tied on skewers….

Here I am tying the yarn around the crepe paper layers…

You can tell the kids are very proud of their witches! 

They all look a little different with hair color and material all chosen by the kids….

They also chose their arm color and “spider ring” colors and made their own necklaces out of
Oriental Trading Halloween beads  Link HERE to see and orange pony beads on string. 

I think the most popular hair color was green yarn, but they chose from purple and yellow too….
also the necklaces all turned out different… 

One hand is wrapped around the “rings” and the other around the brooms, but they are also glue gunned down to the front of the dress.  I also trimmed just a little triangle off the fronts of the dresses to round them out a little. The kids made the faces, added the wiggly eyes and I added 2 rice teeth to the smiles.

I think these Allie and Emma tried to make twin witch dolls? Don’t you think they succeeded? 

Probably the 3 most different looking apple head witch dolls in the class! 
Here’s how I did the hair…wrapping around my hand, then tie in the middle, then clip the round ends
& attach to top of apple with glue gun. Then hat over that….

I think this one was my favorite.apple head witch doll……so WITCHY LOOKING with those rice teeth!  

We’ve been singing “FLY FLY WITCHY” in music so I could hear kids singing it off and on while we were  making our witches while writing Halloween Puppet Shows (next post). I have read them most of these books for read alouds after lunch too. My favorite is Witch, Witch, Come to My Party! It has the most gorgeous full page art of any book I’ve ever seen! The kids gasped in awe as I turned the pages. Just look at the cover to get an idea!

Fun Witch Books to get us thinking about our puppet shows we are writing….Characters, Settings, Problems and Solutions…

More Witchy Literature books….and Here’s my sample witches, past and present….

 Hope you loved seeing our witches as much as we’ve loved making them! Happy Halloween!

Apple Head Witch Dolls

We have a cool apple tree in our backyard. And every Halloween I pick a few dozen apples so my students can make dried apple head witches! Here is one from last year’s class.  This year’s heads are still drying out. 
Dried Apple Head Witch Craft

Here is the FIRST INSTALLMENT of my TUTORIAL ON APPLE HEAD WITCH DOLLS. My 2nd graders are making them this week. The trick is to peel your apples and then dip them in lemon juice, or else they will grow mold before they dry out!

Dried Apples peeled and dipped in lemon juice

I always get a lovely parent to peel the apples. This year Morgan’s mom Mrs. Kenner did them for us on a little apple peeler. I’m sure it was time consuming. Thank you SO MUCH Mrs. Kenner!

I got all of these apples from my tree, which is abounding in apples this year! I get like 3 peaches and 5 apricots and 6 nectarines, but I get a gazillion apples! So it’s a fun thing to do for Halloween, dried apple witches!

You can see they are already starting to pucker and dry out!

The body is made from a popsicle stick pushed into the apple. The dress is just a 1 square foot of material rolled around the popsicle stick in a cone, or you could put a small slit in the middle of the square and slide the popsicle stick through the slit. Then I use an orange chennille stem wrapped around the “neck” of the popsicle stick OVER the material and the ends are curled into small loops for hands. Wrap the broom around one of the hands.

 Sometimes I put a plastic “ring” on one of the hands. I have found spider or skeleton rings at the dollar store. The necklace is made from a candy corn shaped foam bead. I got a mega set from Oriental Trading LINK HERE that has lasted for like 5 years worth of my classes.  Every year everybody makes a Halloween necklace with the beads.

Fly Fly Witchy Witchy Fly!  Freaky dried apple witch.  

 I usually make the witch’s broom out of raffia and a 1/3rd piece of a wooden skewer (I got a package from the dollar store). This year I made black ones out of black crepe paper cut into 3 inch squares layered into 3 squares, and I used scissors to cut the broom “fringe”. Then I wrapped black yarn around the top and tied the 3 inch squares with a piece of skewer inside for the broom handle.

 You can gouge out a 3 little impressions in the face before it hardens for 2 eyes and a mouth.  But this year we didn’t and they still look good. They eyes can be made with  cloves or glue gun some wiggly eyes like we did this year. The mouth has a few pieces of rice glue gunned on after using a red marker for a smile, and the nose is the pointy end of a skewer piece or you could use toothpicks….just break off an inch piece and push it it. Have the kids use green and make a “wart” on the nose from a marker. The mouth and eyebrows the kids do out of red and black marker.

I’ll GET you my pretty and your little dog too! 

Here’s a close up of my witch sample from last year.  The hat we made with black felt using just a circle cut out and then the pointy part was just a cone shape. We glue gunned the 2 pieces together and then used a wacky green yarn I found at the craft store for the hair. This year I bought purple and yellow yard for hair too. I’ll post more pictures when we actually put together our witches next week.  Those shrunken heads should be ready soon. :O

Field Trip!

We had so much fun on our field trip….and learned A LOT! 

Learning from a geologist….

Learning how to pan for gold….

This was as much fun to watch as it was to do! 

We got to take home a bag of rocks with a match quiz

panning for gold was fun! 

Learning from the paleontologists….

Saige in a dinosaur footprint! 
Being taught by a real geologist….

More rocks ….

They looked through microscopes, had black lights tests on rocks…acid tests on rocks too…

They had to guess what type of rocks these were….

Looking at hardness levels of rocks…diamond is last of course. 

She was showing an acid tests on rocks…

Close up of the panning for gold tanks….I think this was the kids’ favorite! 

Lots of dinosaur bones…real ones and plaster castes that were painted…

She was showing the kids all types of fossils….

This was the EROSION lesson…super cool! 

They loved watching this bridge capsize when the hose rained down too hard! 

Andrew got quite a catch of rocks panning for jewels and gold! 
Close up of the minerals they got to keep and take home from panning for gold.

He tested us on the 3 types of rocks….it was hard! 

Lots of fossils everywhere…..He Mrs. Moss has one like this in our classroom! 

So many cool exhibits and things to touch, horns, teeth, jawbones…

Each area was hands on and had things to discover and read….

Then we had lunch at a fun park here in Sandy.  What a great day. The best part was they gave each student a bag of 12 rocks and a page describing each rock to try and match up definitions and colors. How did you do on your little match quiz?   All the teachers were given a Rock Poster too! So cool of them!  We had a great day at the Utah Geological Survey. Thanks for doing Earth Week once a year.

Bony Skeletons “Crack” Me UP!

Candy corn and skeleton Art

We’ve been working on some cool art projects for our Halloween Bulletin Board.  We did some tissue paper CANDY CORN.  The kids designed their own piece of corn, then I cut out 2 inch squares of tissue paper in yellow, orange and white. Then they twisted them on their pencil eraser tops and glued them down in rows. They turn out fluffy and pretty.

Woven Skeletons 

Then our whole 2nd grade makes these cute SKELETONS.  We finished the candy corn last week and finished the Skeletons this week during art.  So Here’s how to do the skeletons.

Cut 1 x 18 strips of black and white 8 of each color for each child. Then glue 2 whites together at the ends and 2 blacks together at the ends to make 4 long of each color. Then glue the white top edge to the black top edge at a 90 degree angle, like the picture below.

 Then comes the fun part. Cross the white over the black in front, then the black over the white turning it a little as you go. It will always look like an L.   Some kids crossed it behind and some kids crossed it in front. It doesn’t matter as long as you are consistent.  It was pretty easy for them, they got into a rythm.  When they got to the end of the strips they glued the last 2 bits together.  Each of these make an arm or a leg.

Weaving the arms and legs for the paper skeleton….

We did a fun science matching the bone names to the picture of the skeleton parts of the body. It was fun!

Then they made the body with 18 x 2 1/2 inch strips, just 1 white and 1 black. You can see some kids doubled it and their body (belly section) is longer. We all decided the shorter looks better.  Lastly we cut out heads, hands and feet that we had copied and glued them to the body. We added a brad to the head and connected it to the body so it could swivel around. Kids loved that part, as you can imagine.

Here’s our finished Candy Corn Art

We put the skeletons in all kinds of poses….

 So here are our finished skeletons.  We then learned about some of the bones in our skeletons and did a matching activity, and read a book on Skeletons.  I also put together a take home bookbag for home reading called “THE SKELETON BAG” with 3 books inside on our skeletons, our bones and a book of Xrays of our bones. There is also some fun glow in the dark skeletons and some fun activity pages in a folder to do.

They look so funny on the bulletin board….One of their heads fell off today…. those bony bodies “crack” me up! 

Then we wrote mini reports.   I read them a non-fiction book on spiders and we wrote reports on spider stationary. I had collected 2 Weekly Readers and 1 Scholastic News on Spiders. We read all of them, then brainstormed facts about spiders on the board. Here’s our finished reports.  They turned out great.

Then we wrote mini reports on Spiders…..

Ty’s report on Spiders

Flint’s was a great report…..

Andrew did a good job too! 

Lots of cool spider facts…..

Great Job guys! 

Gavin’s report…..

Allie’s report….

Our finished Halloween Bulletin Board….

 Hope you love Halloween like I do…. The knee bone’s connected to the….leg bone….doo-dee-dah…..

Kids Learning Keyboarding

We were cleaning out our garage and storage room for a trip to the thrift store to drop of some of our old junk. We happen to come across John’s old low tech college typewriter in the suitcase. Our grandkids happen to be spending the night and they didn’t know what in the heck this old dinosaur, piece of machinery was!   
This is how I learned to keyboard…..typing on an old Royal typewriter…age 16

It is so amazing that my  little 2 year old granddaughter in the picture below can play on an Ipad better than either of her grandparents combined. But I can type 90 words a minute on this old machine! (Oh yeah, I’ve got skills!)

 I learned to type in high school many years ago on one even less streamlined than this one. It was the noisiest class you can imagine! They would play a cassette tape really loud over the speaker system and it would tell us what keys to type in succession to a rythmic beat.  There were probably 50 kids typing in that class.  Such a ruckus we all made!

Here’s my granddaugter Megan, age 3….she is a wizard playing games and learning programs on the Ipad.

Now kids are learning keyboarding as young as 5  in schools using  portable mac laptops, alpha smarts and the other minis. It is amazing the technology out there and how fast it can change. When I watch kids changing the font, the color of text and highlighting and deleting their text so quickly, skills that took a long time to learn in computer classes years ago, I’m always surprised by the things kids “pick up” on their own without any training. None of them are afraid to go poking around to see what this thing can do!

Now here we are, many years later, teaching computer keyboarding to young kids so they can master computer skills at an ever earlier age.  It is a new generation of little people who are not afraid to putter around with high tech machines.

Keyboarding kids….

They are learning the home row….

  I was always afraid I would delete something when I first started word processing at age 21. I was a legal secretary with an Associates Degree in Secretarial Training from Ricks College. (Don’t laugh…I can almost hear you snickering now!)  and my patent-lawyer boss went from a Correcting Selectric model of typewriter to a Panasonic word processing typewriter. It made the job of a legal secretary soooooo much easier! You could actually type up the patent applications without white out or carbon paper. It was so easy to remedy mistakes. That was back in the late 70s. Yeah, I’m feeling old today!

Keyboard Chatter is the curriculum they are using….

  I used to have to type up patent applications from my boss’s scribbling on yellow legal pads. Then he’d make changes with a black felt tip to my 1st draft, and we’d go from there to many more typed drafts. After new technology invaded our law office, thanks to Panasonic,  I could go in and change just a few sentences here and there and reprint new copies super easily. It was the precurser machine to a computer. It had a tiny screen that only showed you 2 sentences of type, but you could back up whatever you had typed with ease too.  What a time saver it became.

I know they are learning new technology at exponential rates…

Learning Keyboarding at age 7….who would have thought?  

 When I left that job to go have my first baby, they replaced me with another Panasonic. Such is the speed of technology. I wonder how long before teachers will be replaced with computers? I don’t even think a decade will pass before teaching looks vastly different than it is today. We shall see.  In the meantime, look at what these kids can do with our mobile computer labs here at Sunrise!

We’ll be typing up our stories very soon!