Salt Crystals Experiments

We did this fun experiment in our classroom last week and let the crystals grow for a week. It was fun and it goes along with our unit on Rocks and Minerals. Here are some samples of our cool Salt Crystals experiment.

I used a briquette and then we cut little evergreen tree shapes out of cardstock and glued them on bowls next to the briquettes. Then we added solution and food coloring to both. And let them sit for a few days. This is after about 2 days.

We sent home the directions for our experiments too. We also looked at salt crystals and sugar crystals under viewers on black paper and did some Water Jelly Crystal experiments too. Fun!


I have this book in my class. I tell the kids all about this old timer photographer who took old fashioned photos
of snowflakes and proved that no 2 were exactly alike when their crystals formed. I also have a copy of
his book, where he photographed hundreds of snowflakes. It was interesting to share. Our crystals kind of look like snow or snowflakes.

This one turned out the prettiest with all the colors of the rainbow and some pretty good growth. All the kids made one and took it home.  

I searched for lots of experiment ideas on the internet for this newly developed unit. I’ve not had to teach rocks before. But I think we learned a lot about them.  Check out my 3 Types of Rocks Flapbooks we made too. They are cool.

Here they are ready to take them home after a week. They looked pretty cool. We talked about gems 
and crystals and how they are found in metamorphic rocks which are under a lot of heat and pressure. That’s how
diamonds and many expensive gem jewels are made. 

 This was right after we had mixed the solution and added food coloring to our salt crystals experiment. It is salt, ammonia and laundry bluing.

Here they are after about 24 hours….lots of stuff growing and a little liquid still left….. We just left them on the
counter and kids could view them several times a day. Everybody had their own. 
Here they are after a weekend….a few still had some sediments in the bottom.

 But most of them were purely crystals by then….really interesting to see all the different colors and formations…..

This salt crystal formation was really freaky looking. Lea ended up with a really pretty purple and blue one. I think they look a lot more interesting growing on the cardstock “tree” instead of on the charcoal briquette. Next year I think we will do trees in a clear cup. That would be maybe better for transporting home too. 

Check these flap books out HERE. There is also a cool video on The Rock Cycle check it out!  HERE.

It was a fun bunch of experiments. We still have to do the layers of the earth in clay. That will be our last bit of the ROCK UNIT. It’s been such a cool earth science unit to study. The kids learned A LOT! 

The Rock Cycle and 3 Kinds of Rocks


THIS IS A FUN VIDEO/SONG DESCRIBING THE ROCK CYCLE “WE WILL ROCK YOU!”By Cassidy and the Band Queen.

What is the rock cycle?  The Rock Cycle is  a continuous process by which rocks are created, changed from one form to another,

 destroyed,and then formed again into a different type of rock. The rock cycle occurs in the different layers of the Earth. The 3 types of rocks are: SEDIMENTARY, Metamorphic and IGNEOUS.  Here are our ROCK FLAP BOOKS we made and illustrated to show the 3 kinds of rocks. 


Igneous rocks flap book pages.  We drew a Cool volcano and shiny, black, volcanic mica rocks. 

For igneous rocks we drew volcanoes of course….and Andrew and his mom came in
and showed us a fun model volcano using the baking soda and vinegar experiment…..it was enjoyed by all! 

Sedimentary flap pages…. we learned that sedimentary rocks include fossils of dead animals and plants and pebbles and shells, because they are found in sediments leftover from water areas of the earth. 
For Sedimentary Rock we drew a canyon  or an arch near a lake where you might find fossils,  and sedimentary types of rocks..

Here were some “fossils” we made with plaster of paris to go along with what you find in sedimentary rocks.
Metamorphic rocks….we drew models showing the inside of the earth cut open and a type of
rock that would have some crystals inside of it from all that underground heat and pressure.
Metamorphic rocks used to be either igneous or sedimentary. 

Rock Flap Books – Metamorphic Rocks page….

A cool lesson plan and free worksheet on  layers of the earth can be found HERE at Volcanoes Alive.
Another one I liked is at aktsunami.com. It had a downloadable fill in the blank diagram that looked fun and both of these will go along with my clay lesson plan. Another great resource for Rocks is HERE at mjksc teaching ideas. 

We also made crystals from ammonia, salt, bluing and some charcoal briquettes. 

We learned about the Rock Cycle – mostly from this THINKQUEST and a few books and posters on Rocks, Volcanos, Crystals. I have posters like these in my classroom, plus we watched the Magic School Bus video on Volcanoes.  Thanks to one of my mom helpers and Andrew, her son, we had a cool demonsotration of a Volcano erupting using baking soda and vinegar and a model volcano. At Teaching Ideas there is a fun matching activity that kids might like to do at a science center.

ROCK FAMILY SONG Check out this song about the different types of rocks HERE.

A fun wordsearch and a little quiz on layers of the earth to go with it can be downloaded Share PDF.net. It is a little tricky to figure out how to download it, just follow the directions (type in the code) on the upper left hand side of the page. If you go anywhere else it is all advertising tricks. Another one she had was giving each student a mini snickers bar unwrapped in a baggie. They press and sit and stand on the snickers bar and it becomes “changed” like a metamorphic rock, with heat and pressure. What a great idea!

Here are one of our crystals close up. It was very colorful. The top shows the “tree” we made out of
cardboard and how it really grew a bunch of cool crystals. The bottom is a rainbow looking, charcoal piece. 

HERE  is a cute printable SONG about the 3 types of ROCKS!

Check out ROCKY’s Rock Cycle. Also HERE  at Have Fun Teaching is a Rocks ABC Order Worksheet we also did. It has many of the vocabulary words we studied this week.This KIDS GEO.COM website is SUPER GREAT  because it has  cute songs to go along with  WONDERFUL pictures of all 3 rock types.

I ordered this book from Amazon along with another one called “The Rock Factory” by Jacqui Bailey. Both were great for introducing rocks to kids.

CLICK ON THE BOOK ABOVE to order one. Another cute activity I wanted to do this year too is to have the kids paint a Pet Rock. I collected smooth river rocks from Bear Lake this past summer for that very purpose, since I knew I’d be teaching rocks and minerals.

A bunch of fun worksheets I found HERE at School Express. There are word scrambles and word searches with ROCKS as the theme. A cute song I found at  at Beakers and Bumblebees  as well as some fun, edible experiments we could do. I think I’ll try the one with red, chocolate disks, melted like hot magma or lava, and then reformed when cooled into “igneous” rocks.  We could add some chipped candy canes to the hot magma like gems and crystals which are sometimes found in igneous rocks. We looked at photos of Mt. St. Helens the volcano that erupted in Washington, and we looked at Calderas in Yellowtone National Park.

ROCK RIDDLES

  1. Do you know what a rock wants to be when it  grows up??   
  2. What do you call a dog who collects rocks? 
  3. What do you do to a baby rock? 
  4. What is a rock’s favorite kind of music? 
  5. Where do rocks sleep? 
  6. How do rocks wash their clothes? 
  7. What is a rock’s favorite transportation? 
  8. What is a rock’s favorite cereal? 
  9. Where is a rock’s favorite golf course? 
  10. What is a rock’s favorite television show?

Answers


  1. A Rock Star
  2. A Rockhound 
  3. Rock it 
  4. Rock ‘N Roll 
  5. Bedrock 
  6. On the rock cycle 
  7. A rocket 
  8. Cocoa Pebbles 
  9. Pebble Beach 
  10. “Third Rock from the Sun”

We also did “Layers of the Earth” with models in crayon and clay (with a BB for the solid core). Check them out HERE.

VOCABULARY WORDS 
We did our spelling list using these words as well as vocabulary this week.
1. Igneous rock- rock formed from cooled magma or lava.
2. Sedimentary rock- rock that formed when sediments were pressed and cemented together.
3. Metamorphic rock- rock that formed when another kind of rock was squeezed and heated deep inside Earth’s crust.
4. Rock cycle- the process of rocks changing into other kinds of rock.
5. Fossils- the remains or traces of an organism that lived long ago.
6. Volcano- a mountain built up from hardened lava, rocks, and ash that erupted out of Earth.
7. Lava-melted rock that flows out of the ground onto Earth’s surface.
8. Magma- melted rock below Earths surface

9. erosion – when bits of rock and sand are taken away by wind or water and packed as sediment somewhere else. 
10. crystals – a mineral having a clear structure with cut faces. (like quartz) 
We are almost done with our unit. It’s really been fun to teach earth science to my students. 

Water Jelly Crystals

We had fun this week making jelly crystals and growing crystal gardens in science. We are studying all the properties and types of rocks and the rock cycle, so minerals and crystals were a must!

I bought some water jelly crystals from Steve Spangler Science and we followed the directions in the video above. The students started by doing the experiment in a fat test tube. Nobody knew what would happen when they added water to the crystals!

Then after an hour the crystals had sucked up all the water and had turned into jell crystals. Then we added food coloring and waited. They filled up the entire test tube from 1/4 teaspoon of crystals! Very cool!

 After the test tubes were almost overflowing with crystals we dumped them into a zip lock bag and added some flower and vegetable seeds. I had about 20 packs to choose from. Then we made our “crystal” gardens out of cardstock, colored and cut them out.

Here are our water jelly crystals before we put them in the baggies.

And here they are after adding the seeds and stapling them to the cardstock “Crystal Gardens”.

It was a very exciting and “colorful” experiment.  Most of the kids predicted correctly what would happen to the crystals. 

We had blue, red, green and purple and yellow crystals.

We also did experiments putting sugar and salt water on black paper and letting it dry. We saw the different crystal shapes of salt and sugar. 
Then we looked at the crystals through our magnifying viewers. 

Here are the 3 colors that were the most popular. The purple ones were cool too.

Then we looked on the internet and found a few websites where they had pictures of different types of crystal minerals. They were very beautiful. Here is a cool Pinterest Page HERE.

Here is a Pinterest page that had lots of cool minerals and crystals too, right  HERE.

Next we will be doing some salt crystals using charcoal briquettes and bluing and ammonia. It always grows some pretty spectacular crystal gardens.

Here we are with our beautiful crystals. And below are our crystal “gardens”.  I hope they will sprout!

Here is the link for the Water Jelly Crystals at Steve Spangler Science. I bought a pound for $16 and I’ll have lots left over for next year. It’s a very cool experiment for kids to experience.

If You Give a Mouse a Cookie Circle Stories

Laura Numeroff books helped us invent our own circle stories

This week I got out my collection of Laura Numeroff Books. They all start like this; “If you give a _____ a ______. I told the kids to be thinking of what animal they were going to use for the star of their story (subject). Then we brainstormed things you could give the star that would lead to their wanting something related.

 Then we did our own innovations or Circle Stories on the cute books by Laura Numeroff.  They copied the alliteration titles a bit by coming up with a similar pattern;”If you give a _____ a ______, both words starting with the same letter.  They turned out very cute!

This was another funny one…..If you Give a Bird a Banana…..these circle stories were darling! 

This one definitely had some cute artwork here…..the story is down below…..

The kids followed the story frame and then I typed the rough drafts up after school. 

If you give a Pig a Pancake and If you give a Moose a Muffin are two more of Laura Numeroff’s popular titles…..

We read a variety of the books and then I made up a sentence frame for them to try to write their own

circle stories. I encouraged them to add some adjectives or describing words to each page.

Here is the story frame we used.  They were supposed to try and add some really good adjectives, or describing words
for each of the pages. 

Then I typed up their stories for them using the page numbers to help them keep the story in order from beginning to end. And it helped them cut the pages apart to glue down on their paper.

Then they cut and glued the story pages on half sheets of white construction paper.
Then they illustrated each page and added speech bubbles.  The last thing they did was add a
title page with a dedication. They were really sweet dedications, many of them were to the moms.  

If you give a Tiger some Toast…it was really cute with all the speech bubbles….

Then we made appointments and went to read our stories to all 3 of the other 2nd grade classrooms.
Each child got to read to 3 or 4 other students in the other classes. So they reread their story at least 5 times. 

They also read their finished stories to our class, in the author’s chair, after they had illustrated them.

 Then we put them all up on the bulletin board in the hallway. Everybody loves them! They are really cute!

The Laura Numeroff Books such as “If You Give a Pig a Party” are really cute springboards for writing your own circle stories. I was pleasantly surprised how well the kids’ creative writing turned out.

I think these stories should be published in the city library. They are fun and creative too!  Good job everyone! I loved reading your Circle Stories!

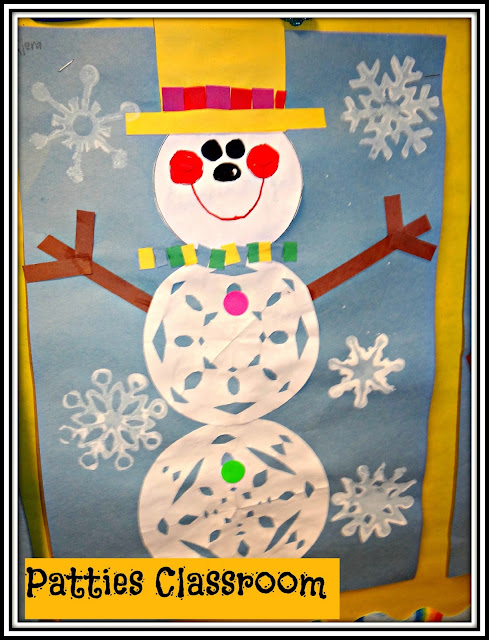
Snowflake Snowmen and Winter Poems

We’ve had a lot of snow in Utah lately. It is fun to write winter acrostic poetry and make Snowflake Snowmen,  on a particularly snowy day.

Our cute Snowflake Snowmen turned out great! 

Have you ever heard of Snowflake Bentley? He did a book in the early 1900s of snowflake pictures from an old fashioned camera. He found that no two were ever alike. I showed the kids the book about his life and the book of pictures he published of hundreds of snowflakes. I own both of these books. They are awesome!

I have a monthly WORD BANK I put up with words the kids might use in their winter writing…..Each month the shape changes as well as the words. 

Word Work Activities and Poetry/Songs
At ABC Teach  there are some cute snow similes to start everybody thinking about great words to describe the winter season.  It is a great warm up. Here’s a poem we read as a chant or rap using drums and bongos and snapping our fingers.

Snowflake Poem we rap to…..


ACROSTIC POEMS: 
Then after that we make a giant list of W words, then I words, then N words on the board as the kids help by brainstorming. Then we start writing the acrostic phrases or sentences (depending on how you want to differentiate) or lower grades could just copy the word.

These 2 songs are really fun to sing. I have percussion instruments and 3 xylophones that the kids can play to the songs. It’s a good way to do some shared reading with an element of fun in rereading the text. 

This song is fun to start out standing in a squat and then growing as you sing “tall, tall, tall”, and then when you are melting go back down to the squat slowly while singing “small, small, small….”. 
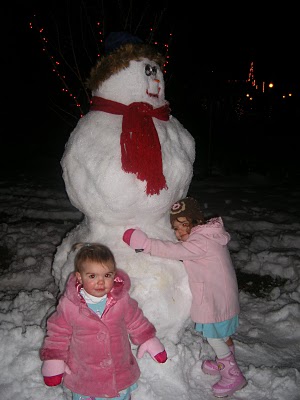
I had to include this cute picture of my grandbabies with their daddy constructed snowman. Cute right? 

SHAVING CREAM FUN:
Then after recess I bring out shaving cream and press about a golfball or bigger sized lump on top of everybody’s desk. Then I read them Katy and the Big Snow. They are the snowplowers (using their fingers) as we travel to Geopolis and do North, South, East and West using a N or S or E or W written in the
“snow” which is the shaving cream. They smooth it all over their desks and then draw a map of the city using fingertips. I wish I would have snapped a few pictures. By the time the story is over the room smells great and the desks are really clean. We wipe them off with a paper towel (not much cream is left after mooshing it all over for 5 minutes!). It is always a fun winter activity we do. I just ordered the Fancy Nancy winter book. It looks like fun too.

Here are some of my January classroom decorations I put out in place of all the cute Christmas ones. 
Cute Snowflake Snowmen….made from handmade paper snowflakes…no two are ever alike! 

January Snowmen decorate the classroom today…..

After everybody has the WIN of winter, we move to T words, then E words then R words. I write them horizontally and then write the words the kids come up with vertically under each letter. My class make their own sentences after choosing one of the words to start the phrase or sentence.
Cute bulletin board set I love…..

Here is my Winter bulletin board with just a few of the songs I put up to sing throughout the month of January.

Then we do a fun art project using a 7, and 6 inch cut out circles of white, and a 5 inch circle head for “SNOWFLAKE SNOWMEN”. After showing the kids how to fold the snowflake circle into a pie shaped piece and cut the edges into SNOWFLAKES we make our snowmen on LIGHT BLUE  paper.

The hat for the SNOWFLAKE SNOWMAN is 31/2 square in black with a 1 x 5 inch brim for the cute little  craft. 
We had lots of fun making snowman art and stamping snowflakes with white paint…..
Cutest winter bulletin board of the year I think…..now we just have to write our Snowman Stories!  

Here is a sample!! Then we add snowflakes using white paint and some stamps we got at Lakeshore Learning    Oriental Trading  also has some cute ones Here.

Lastly the kids did a pattern on the scarf using small squares of construction paper about a centimeter size. And they added buttons from the same squares and colored in the cheeks on the face. They also added the twig arms and a strip of color on the black hats. This year I got some metallic colored squares and I think that might make a more glittery look

.Here are the CARDSTOCK MOSAIC SQUARES or just cut your own out of strips of centimeter sized construction paper. Then have the kids snip their own squares….they can do it.

Then lastly we do snowman stories just for some creative writing fun. Each snowman must have a personality. So they have to be really good at some kind of snowman talent. Then they have to also have a problem, a solution, a setting (city somewhere in the U.S.) and lots of describing words.

I’ll post our stories  soon. They are always very fun to read.

Folk Tales

In our Reading Streets selection for the week we read One Good Turn Deserves Another and another Selection The Lion and the Mouse. Both are folktales. So we decided it was Folktale week. We read a reader’s theater of The Little Red Hen. I told the students that in each folktale there is somebody who does something bad and another character who chooses to do something good. And there is always a problem and a solution, and sometimes a moral of the story. Folktales are similar to Fables.

 They had to come up with a fun problem that some animal characters might have and one is going to be kind of selfish and mean, and he will get punished somehow in the end. Their job was to come up with a problem, a solution, and a fun setting. Then they had to have one character be selfish and choose to be mean. Another had to be kind and choose the right anyway. So some of their problems had some pretty good consequences.

 We have been comparing and contrasting the different types of reading genre’s we have been reading in Reading Streets. Then we always try to do a writing project to go along with that genre.

 Last year I did a whole unit on The Little Red Hen and we rewrote the story our own way. It was really easy for the kids. The art project was really fun too. But this year I thought we’d try doing our own individual folk tales. It was more challenging but they turned out equally creative.

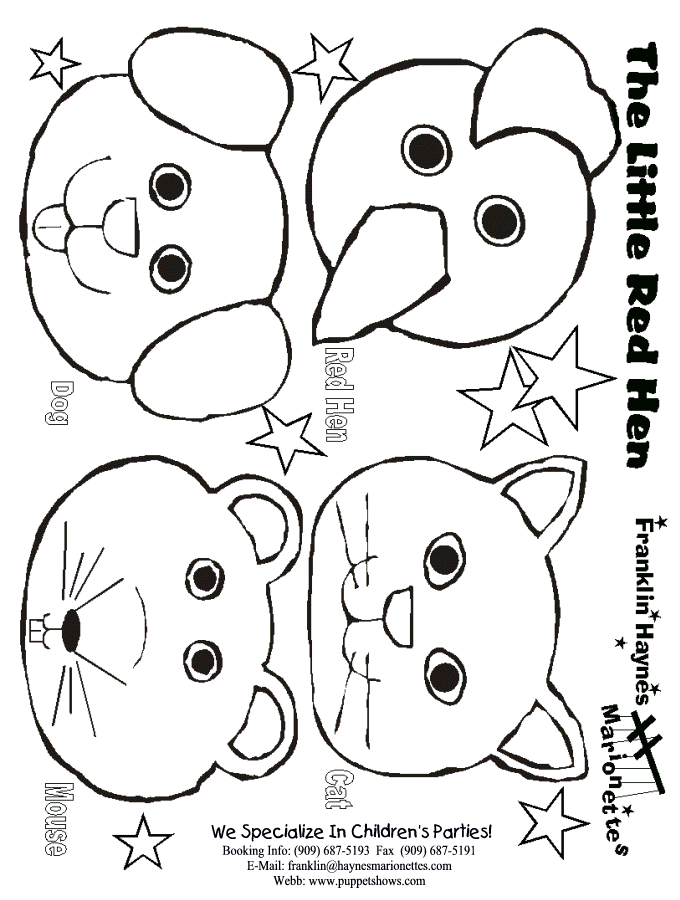
Our Little Red Hens made from a paper plate.
Puppets we made to go with our Little Red Hen readers theater. I just passed out
tongue depressor sticks and the kids colored and glued them on.

This year we decided to use the Reader’s Theater of Little Red Hen, (check out lots of readers theaters HERE at Grandview Library) and then we read another called The Gingerbread Girl, and The Gingerbread Baby all together reading parts.  Then the following week we rewrote the Gingerbread Man. I’ll post those next. They were wonderful!

These Folktales turned out really creative and funny. I was really amazed at how good this year’s class are at creative writing. They all are superior readers and I think it makes all the difference. They have read lots of very good literature, and so they can write pretty good as well. 

Then we had some pretty good illustrations too.  This was a space folktale. 

Most of the students chose characters from the animal or insect kingdom…but there were some aliens in the bunch. 

I think this was such a great creative writing lesson we did. Each student did a fine job.

Gingerbread Man Fun

We made Gingerbread Man Cookies in class the other day.  It was super fun!  And thanks to all the parents who sent icing, candies, plates, napkins and zip lock baggies. We appreciate it!

 Thanks to Mrs. Murrill for coming to help and bringing the cookies for us to decorate.

I know the kids all loved doing the gingerbread men and playing with all that CANDY! 
They frosted their own men with white, green or pink icing……then we dug into a pile of little candies….

Here are a few of the finished ones….some are really LOADED! 

Brody just lost his 2 front teeth, but he is still getting ready to  bite off an arm or a leg! EEK!
It was a very fun time. 
Twin brothers….but not twin gingerbread men! 

Here’s a loaded up gingerbread man!

The girls loved it as much as the boys did.

The gingerbread men turned out cute and yummy. 
I bought these veggie and dip plates from the dollar store, and they work great for sorting the candies….

I put one on each table of 4 kids and they decorated their gingerbread men from that way….so easy! 

It is a whole unit I’m doing with the many stories that have been written about The Gingerbread Man, Girl, Baby, etc. We even read a Gingerbread Man play.

Hi guys!  Good job everybody!

 I think Liam had a great time, what do you think?

 Some years I do “green trees” with upside down sugar cones.

It’s the same idea….lots of candy on an upside down sugar cone and green frosting and they look like little trees decorated with little ornaments! Here are some Christmas Tree Cookie fact family activities HERE at Differentiation Station.
But I found that nobody really wanted to eat the sugar cone, just the candies. 

 Now we are writing our own stories using the basic plot but changing it a little and coming up with our own innovations! They are quite hysterical.

Here is our Gingerbread Man Story house to top our stories. I’ll post the stories really soon. They should be done in another day or so. 


Here is the gingerbread house I designed and we print it out on brown construction paper and some little gingerbread men in brown. A fun puppet set can be found HERE at DLTK-Teach. It is a favorite site of mine with lots of free downloadable stuff to enhance your lessons. Many more  Gingerbread activities here.

Candy for gingerbread men….

For MATH we did some Gingerbread Man magic squares. They are very challenging but the kids got them correct. I was very impressed! Here is a sample at Kidzone.  On the back we did a subtraction sheet like the one HERE. I just added a few triple digit computation problems to the mix.

At my house recently my grown kids made some gingerbread people for the grandkids to decorate. Notice my 27 year old had to make his a gingerbread “girl” but alas, she melted in the pan….hehe….

I just bought the Costco cookie mix and used only 1 packet. It comes with 4 packets. Each one makes about 15 to 18 cookies depending on how large or small you make them.

And we made a few gingerbread houses too with the 3 little granddaughters, aged 5, 4 and 2 1/2.  They loved making the cookies too. Who wouldn’t love it? 

My little granddaughter Meg, age 4, made this one….isn’t it sweet?

Here she is telling Santa all the good things she wants for Christmas. 

This one was done by Josie, 2 1/2 with a little help from her mommy, my daughter-in-law Wendy.

Here they both are with Mrs. Claus….so sweet! I love those girls….
I’ve started decorating my house for Christmas too. (My gingerbread man is in the background) been a busy week! 
Christmas sugar cookies we made today. I’ll can’t decide which I love better, the sugar or the gingerbread. Either way, it is a fun activity for the kiddos. I always enjoy seeing them having fun with it.
PATTIE

Santa Handprints and Letters to Santa

 We wrote letters to Santa. And we made Santa Handprints.

The 2nd graders had lots of questions for Santa in their Santa Letters….HERE  is some cute writing paper from Activity Village to use for Letters to Santa. .

 We have all been trying to be “pretty good this year”……

We painted palms pink, fingers white, and top of our hands with red paint to do a handprint  Santa. 

Santa is awesome……yes he is! 

Then we added some glitter glue to our Santa Hand prints….

I’ve tried my best Santa Claus! 

I’ve always wondered if the elves have big ears…..lol…..

We had some replies already to our letters! The school secretary raced into our classroom with the freezing cold envelope we’d sent to the North Pole!!!  It was marked “return to sender”. And guess who had written us back? 

 Each of the kids got a reply to their letters to Santa!!  Santa’s elves made time to write personal letters to each of the students. Super cool Santa!!

 So I hope everybody gets what they wanted for Christmas!!

Lots of electronics on the gift list this Christmas! 

 Hope you get everything you wanted from Santa Claus too! 

Photobucket
I’m linking to My repurposed Life.

REINDEER CRAFTS AND SONGS

I was an art minor in college. And I’ve taken lots of art classes in my life. I am so glad I teach a gifted class because we have the time to link art and good literature several times a week. They get the other work done quickly so I am free to compact instruction and add enrichment in may forms.

Bag of Glittery food for Santa’s Reindeer on Christmas Eve….HERE at Idea Room is the poem and oatmeal and decorating sugars to add to the little baggie for each of your students.

 Another one is HERE at Organized Home. I think it is even a bit cuter.  And it would be lots of fun to make some reindeer cupcakes the day we make all the other reindeer stuff.

Magic Reindeer Food Gift Tag
I think the poem here is really cute. Organized Home came up with the graphics too.
I also have the kids make a  brown bag to wrap of their parent gift and we put a reindeer on the top and staple it. Inside I add the reindeer food to kind of “cushion” the little handprint ornament we make to go inside. 
Here are some reindeer handprint ornaments to make for Christmas gifts. They are easy and turn out pretty cute. 

Reindeer Pokey (Sung To: Hokey Pokey)
You put your antlers in,                   ANTLERS
you put your antlers out,
you put your antlers in,
then you shake the,em all about.

You do the reindeer pokie
And you turn yourself around,
That’s what it’s all about.

You put your hooves in,                HOOVES
you put your hooves out,
you put your hooves in,
then you shake the,em all about.

You do the reindeer pokie
And you turn yourself around,
That’s what it’s all about.

You put your tail in,                      TAIL
you put your tail out,
you put your tail in,
Then you shake the,em all about.

You do the reindeer pokie
And you turn yourself around,
That’s what it’s all about.

You put your red nose in,              RED NOSE
you put your red nose out,
you put your red nose in,
then you shake the,em all about.

You do the reindeer pokie
And you turn yourself around,
That’s what it’s all about.

You put your whole selfin,              WHOLE SELF
you put your whole self out,
you put your whole self in,
then you shake the,em all about.

You do the reindeer pokie
And you turn yourself around,
That’s what it’s all about.

Other cute songs on Christmas themes can be found HERE at Everything Preschool. I love to just leave the CDs of Christmas caroling on while the kids are doing art. It is fun to hear them singing quietly along while they work.

 Here is my hallway bulletin board this year.  I have been teaching the kids what a homophone is and what “captions” on pictures in books and newspapers are. So I made this funny “caption homophone” for the first and second graders in our hallway to enjoy.

The reindeer are made with a square of brown butcher paper, a glittered red circle nose, oval eyes with rectangle eyelashes on top and some holly and berries traced from some plastic coins. The kids did their own antlers out of their own handprints. They turn out pretty funny. 

Cute Christmas Song I Love….sing it to Jimmy Crack Corn 

Eight Little Reindeer in the Sky
Santa said Fly Dasher Fly
All the little children are tucked in tight
Because it’s Christmas Eve Tonight

Seven Little Reindeer in the sky
Santa said fly Dancer fly…. etc. (Each chorus starts with one less reindeer, use names below)
Prancer, Vixen, Comet, Cupid, Donner, Blitzen

Chorus
Rudolph’s nose is shining to light us on our way
Santa’s sleigh is filled with toys for all the little girls and boys…..

A bunch of Christmas writing stationery so that you can write about your FAVORITE THINGS at Christmas time or maybe do a CHRISTMAS ACROSTIC POEM can be printed off from Activity Village. It’s so great to do a writing project along with our art.

Handprint ornaments made into reindeer. 

Weather and Clouds

We are done with our weather unit. We first learned about cloud types and made a flap book. The 4 types of clouds we learned about were; Nimbus (storm clouds), Cumulus (white puffy clouds), stratus (blanket of fog) and cirrus (thin wispy horse tail clouds).

We wrote facts underneath each type of cloud picture. Then we added the cotton balls.

We did cotton balls and white yarn strips (cirrus)  for the types of clouds. Scholastic News is a great resource for teaching clouds. 

 We made light blue ones and had drawn lines under each flap to write a few facts about each type of cloud. Check out the Scholastic News website for great info and pictures on Clouds. I order the Scholastic News every year. A lot of times I save the science ones to use with my units.

Picture I use for teaching clouds. I also use the Scholastic News website. 

The Weekly Reader/Scholastic News have a product called Science Spin. I order that every year for an extra dollar or so  per student. I use them because I have no science textbooks. I also order a lot of science reading literature and always keep it at the SCIENCE CENTER. It is the most populated center every day. 

This was a leftover one I had from last year. This year’s class did a lot more writing. We used rulewrs to write  some light lines so the facts would be neatly written. 

Here is the mini flap book we made on light blue construction paper. We used cotton balls for the clouds and used grey and blue chalk to make them look like Nimbus (stormy) clouds. For the cirrus clouds we used pieces of white yarn. For the foggy stratus clouds we cut a square of cotton
Then we wrote a definition of each type of cloud. We looked at internet pictures of the types of clouds and read 2 literature books, and a Weekly Reader.
aThe Cloud Book By dePaola, Tomie (Google Affiliate Ad)
Cloudette By Lichtenheld, Tom (Google Affiliate Ad)

The next day we did some Water Cycle Activities. We Read a Weekly Reader on the Water Cycle that had a cool diagram.

I have about a dozen books on weather. This is just a sampling. I’m always on the lookout for Scholastic books and Amazon used books on the topics I teach in Science. Most of my legislative money goes for books. 

A weather crossword I use in my weather unit is HERE at teach-nology.com. Some years I have them also do a weather ACROSTIC POEM or we write a story after reading Cloudy With a Chance of Meatballs.
Some free weather stationery is HERE. And .HERE is a printable of all types of weather in a cute blackline from Scholastic that you could use to make your own magnet matching game like mine below.

This was a center game. I had added velcro to the back and they used the carpeted wall to match the word to the weather picture. I left all the weather books at the Science Center along with this game. 

I have an auto harp I play and the kids love singing songs to the music. I also have  about 2 dozen types of instruments and some drums and xylophones so we never lose interest in singing to science texts. 


Water Cycle Song:
Tune: Here We Go Round the Mulberry Bush
Here we go round the water cycle, water cycle, water cycle.
Here we go round the water cycle, each and every day.
The ocean water evaporates, evaporates, evaporates,
The ocean water evaporates and makes tiny drops.
The clouds condense to make a raincloud, make a raincloud, make a raincloud,
The clouds condense to make a raincloud, and some feel really heavy!
The heavy drops precipitate, precipitate, precipitate,
The heavy drops precipitate, to make water accumulate. (puddles, lakes, rivers, and underground wells)
Then it’s time to start again, start again, start again,
Then it’s time to start again, the never ending Water Cycle!


We make a rotating water cycle wheel on a brad, coloring it and cutting it out. On the back we have a Water cycle poem;

 We read lots of books on the results of Wicked Weather. And the Hurricane Sandy came right along when we were discussing weather damage.

Tornado Tube Classroom Kit
Tornado Tubes are a fun way to show the motion of  hurricanes and tornadoes.
Tornado Tube
You can get this little connector for as little as $3.00 to make your own classroom tornado tubes.

   
 This is a Tornado Tube. I put 2 empty 2 liter bottles together with one of them filled with water. The kids loved coming up and twirling it around till it made a tornado. You can get the Tornado Tube from Steve Spangler Science..

I had the kids put together a page of  puzzles; tornadoes, hurricanes and lightening. This is what it looks like before . 

The last thing we did was making a thermometer with paper.Check it out HERE. We talked about hot and cold, cool and freezing weather and what temperature each would be. Then I showed them lots of coats, sweaters, bathing suits etc. and asked what temperature each would be warm. A few more worksheets are at Superteacher Worksheets.. Then we did some temperature worksheets like these Here at www.education.com. We had a great time learning about WEATHER!