A Tutorial is HERE at Paper Zone Blog for how to do a cool, giant paper snowflake. I used 8 1/2 x 11 copy paper sheets and had each student do 1/6 of the snowflake. Another one with cool photos is HERE at A Cup of Calm.
 |
| A Cup of Calm had cool pics to guide me through it! |
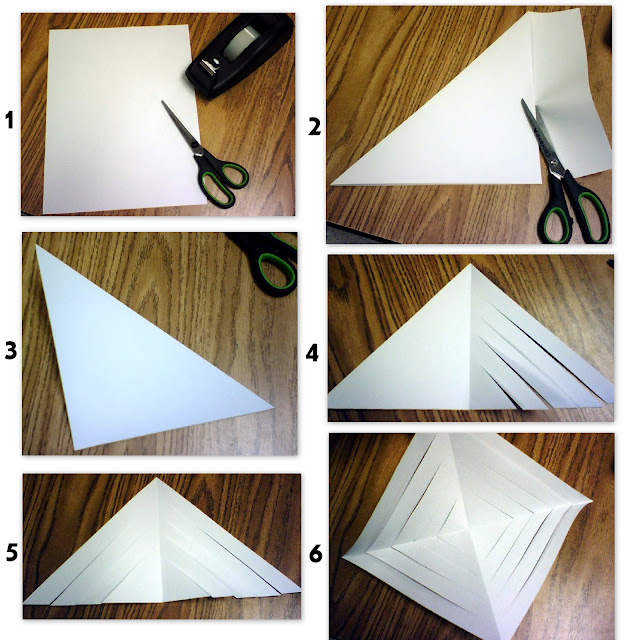
You start by using a perfect square of paper, just like in Japanese paper folding, or doing a square snowflake.
Then you fold twice. The side where there is a single fold you cut 4 lines almost to the edge, that line up with the side with the long side of the triangle.
| Don’t these snowflakes turn out awesome? |
Fold the square diagonally to form a triange. Then fold that triangle in half again to form a smaller triangle. Unfold carefully. Attach the 2 outside tips of the square to each other in front. Then attach the next tips in back with tape. Then the next tips in front with tape. That the last inner tips in back with tape. Do this 4 or 5 more times. Attach the ends together with a stapler. You will have a 5 sectioned star snowflake or a 6 sectioned snowflake. hang up in the center of your room for quite a breathtaking display.
 |
| Just staple all the 6 parts together to form the snowflake! All Done! |
A fun interactive snowflake making website with magic scissors that cut a new snowflake every time is called Snowflake Barkleys.com HERE is the link. It’s a cool and fun website for the kids to get an idea how to cut a snowflake.
These are beautiful! We are making these this week. No snow in our future so I guess we'll make our own.
2B Honey Bunch
The Best Endings
Well we have plenty here already, and December just started! Man how I hate scraping off my windshield in the mornings. Ugh! But it is pretty on the trees. These add a lot to the inside of the classroom, for sure!