Plants and Seeds and JACK AND THE BEANSTALK!

                                                    
Reader’s Theatre
We had a lot of fun this week doing a Reader’s Theatre of Jack and the Beanstalk to go along with our plant unit. I found some puppets for each of the 3 pages of text using these coloring book pages found at HERE at Sparkle Boxes.   Then we divide up the parts and have readers use their most expressive voices. This is the way I did it this year.

 Another way I’ve done it some years is to have each child bring in an empty cereal box. Then I cut out a square out of one side of the box after school (to use as a puppet theatre stage). Then we put the characters on Popsicle sticks upside down. Students paint black poster paint on their cereal boxes or cover them with paper (or spray paint them with a can of black paint after school). As the readers theater is read the kids can act out the parts on their own individual puppet theater stages on their desks. It’s a lot of fun. (but a lot of work too!) A picture and link to how to make a puppet theater out of a cereal box is HERE at Toddler Crafts. Or another cute one that shows how to do the puppet on a stick is HERE at Flipflops and Applesauce. I can’t find my sample or I’d snap a pic of it. Another cool tutorial is
this website HERE       

PUPPET FACES
 I blow up the characters large for a class puppet for some kids to act out the parts too. The link for character masks is HERE at Sparkle Box. You will need a color printer for the masks. I just put them on poster board and taped them to rulers to keep them sturdy. The kids LOVE doing these mini reader’s theatres. A link for a cute but long 4 page readers theatre is HERE from the Grandview Library.

There is also a crossword puzzle of Jack and the Beanstalk at this link from ABC teach.  It was a fun activity for my kids to do after reading the story and acting out the reader’s theater. My students loved this activity and didn’t even need the word bank. 

SCIENCE
 On Monday when we plant our seeds we will watch the time elapsed seeds growing into plants on one of the utube videos below. Then we are planting our seeds in recycled soup cans. You can use washed out soup cans from home, some washed out pint size milk cartons covered in paper, or make a terrarium out of liter or 2 liter bottles cut in half similar to the example picture below. I just use the spout for air hole and I cut out about 3 inches of the middle section of the bottle.

TERRARIUMS (using empty 2 liter bottles)

A really fun activity to teach seeds and plants is to make individual terrariums. A good step by step how to is found at this link to Teaching Tiny Tots HERE. I love how she used ivy. I’d like to use fast growing grass seeds or radish seeds so the students can see the roots and how they grow up into stems and then on the radish, leaves. Start by reading the book From Seed to Plant by Gail Gibbons. She is a master of children’s science books.
 2 Liter bottle terrarium instructions HERE

Another fun planting activity is doing “Sprout Houses” in a zip lock baggie. That’s what we are doing this year. I pass out Lima bean seeds that have been soaking overnight. Then I pass out wet cotton balls. A link to a fun lesson plan using Lima beans is HERE at A to Z Teacher Stuff. We use the Lima beans as our seeds for our sprout houses which are another kind of terrarium. Tape them up against a window for light. Watch what happens in a week!  I really like the kids to plant radishes because they come up within about 2 to 3 weeks.  I’ll post our sprout houses tomorrow.

Lima bean and cotton balls make up our Sprout Houses

Some of my girls making their Sprout Houses”

BOOKS

Flower Garden by Eve Bunting
Sunflower House by Eve Bunting
The Tiny Seed by Eric Carle
Planting a Rainbow by Lois Ehlert

From Seed to Plant by Gail GibbonsFrog and Toad Together by Arnold LobelJock in the Beanstalk by Stephen Kellogg One of my favorite books that my own children loved was The Tiny Seed by Eric Carle. It goes through the plant cycle in a really fun way that kids will enjoy. ART PROJECTThen afterwards we make an art project using real sunflower seeds as the round middle part of a sunflower plant.  I’ve done it with yellow hands traced and cut out  around the circle of seeds, I’ve also used yellow paper petals, and I’ve used painted dots of yellow inside traced petals (pointillism) with Q tips dipped in yellow paint.  I will post pictures of all of my samples. Each year I tweak it a little bit.

WORD SCRAMBLEAnother fun link to a plant and seed word scramble of plants and seeds vocabulary is HERE at ABC Teach.  I would attach the word bank to the page so kids will have that to use which makes unscrambling a LOT easier! (My kids all told me it was “too easy” with the word bank. Oh well!                                   MUSIC  (use percussion instruments) A Seed Needs (To the tune of “Ta-ra-ra Boom-de-ay” )           I see you are a seed,Tell me what DO you need?I need some soil to grow,And then the sun to glow,Water to make me wet,Air for my leaves to get,Space for my roots to spread,I’ll make your flower bed! by: Iram KhanI always look for a poem to put on the back of art to sing or read together for shared reading. This is a great one for the backs of our sunflower art projects or our veggie garden arrays. A fun MATH ACTIVITY designing a garden for Frog and Toad for their 24 plants can be found HERE . It is a math problem solving that is challenging and fun. I will give the kids a page of clip art plants to color with 4 of each plant and they will choose the number of plants to map out a garden “array”.  The book is called Frog and Toad Together  by Arnold Lobel. The chapter is called The Garden.  I turned it into a lesson on “arrays” and multiplication. They lined their garden veggies up and multiplied the “rows” times the “columns” of veggies. Here are a few finished ones.  Some did larger arrays and some just did 2 x 4. So it is a great lesson for differentiation with that open ended aspect to it. I also modeled one on the board and wrote in “column 1, column 2 and Row 1, Row 2 etc. So they could refer to mine. Everybody did it a little differently. 

Allie’s vegetable garden array…
Nova’s veggie garden array…
Kate’s veggie garden array…

Math: Attribute Seed SortAfter reading How a Seed Grows by Helene J. Jordan we will do a fun math activity. I buy a package of dried 7 bean soup mix (found in rice section of the grocery store). It is in a plastic bag. Give each table a Dixie cup full of  the bean mix. Then give each table a construction paper Venn diagram drawn on it in black marker. The task is to use the Venn to place the seeds into 2 groups depending on what attribute the students decide as pairs or a table. (bumpy, smooth, black, spotted, oval, round, white etc.) It really helps to first do a brainstorm of all the words to describe the many beans and list them on the board. Have table captains write the 2 attributes on 3 x 5 cards and place at the top of each circle of the Venn. If they can then find one with both attributes to go in the center section they get a gummy bear each.  Then have students walk around and see what other attributes the other tables decided on to give their Venn’s.  

7 bean soup and venn diagrams..I add a few seeds, large peanuts, pods from outdoors….a great activity!


Hi Girls! They are sorting their beans and seeds…
Some wrote white and brown,  others seeds and nuts,  others big and little….
They added their own category titles on the yellow stickies…

We’ve also do a few worksheets and a journal entry about our “Sprout Houses” and how our lima beans are doing in the wet cotton balls. We sorted out the ways SEEDS TAVEL as partners using this file folder activity page I made up.  We read a few books on  HOW SEEDS TRAVEL too. (wind, water, nature, people, animals).                                    PLANT A RAINBOW!!! Veggies and flowers Another  thing we do in this unit is plant some flower seeds in a clear cup or else from a small milk carton or recycled can.  I have kids cover the can or milk cartons with cute scrapbook paper. A Fun plant tags can be found at this link HERE at Chart Jungle.  Names can go on tags too with sharpie marker. I’ve had good luck with beans and radish plants. I’m a black thumb usually, so I go with what has a quick germination. Radishes are 3 weeks!!! 😀

I will post pics of finished cute cans with our plants…

ART/SCIENCE MURAL So we end our unit by doing a mural. After reading Flower Garden by Eve Bunting, I give each child a small 5 x 5 piece of colored paper (flowers- use all colors), a long strip of green (stem), a 2 x 2 piece of black (seeds) and some green crepe paper 3 x 3 pieces (leaves), and a 4 x 4 piece of white (roots). I tell them they each have 4 jobs to do. They must take the papers and do a root, a leaf, a stem, a seed and a flower. (some years I delete the seed and pass out real seeds (pumpkin, sunflower, large ones that show up on the mural). Then I give them all about 5 or 6 minutes to cut out.

If you look close you can see a real seed or “bean” between the stem and root…

Then I start the mural as soon as a few are done.  I say,”If you have a cool looking root come on up!” If you have a cool looking stem, come on up!”and I have a glue bottle I put a few dots on each root, stem, etc. and we start to put the mural together. Kids glue down the parts of the plant on a  blue piece of butcher paper with brown glued along 5 inches of the bottom for dirt. .  Little by little the flowers will start out mixed up but will be finished as a flower collage. Nobody gets to put their whole flower together. And I don’t use all the kids flower parts. They put their root on some one’s seed, their flower on someones stem etc.  Then I have the fast finishers take black sharpies and label the 4 parts of the plants on about 5 of the flowers across the mural. Some kids make a sun, some clouds, etc.  It always looks fantastic.  I label it PLANTING A RAINBOW. Of course we have to read the story too! It is such a beautifully illustrated book on planting a flower garden.

Here is a sample center activity I have along with 2 similar matching activities  at the magnet center.

 PARTS OF A PLANT – MAGNET CENTER This idea was taken from a Red Butte Garden docent that came into my 2nd grade classroom and did this one year. I loved it and have used it ever since.  I  have the parts of a yellow sunflower plant I made up and laminated and put magnets on along with the labels that I place out at the magnet center. Kids love to put the flowers together and label them. The other center has pictures of parts of plants we eat and what type it is (root, leaf, flower/fruit, stem etc.)  I hope you enjoyed my plant and seed unit. I will post our “plants” very soon.  Happy Spring Planting!
                     

The Very Hungry Caterpillar & Eric Carle Author Study

We used oil pastels to decorate the green covers and do all the art inside…

The Very Hungry Caterpillar by Eric Carle is another of my favorite books. It is so clever and cute, and it’s a great addition to the insect unit we are about done with!!!

As a class we read The Very Hungry Caterpillar and students orally retell the story using  character cut-outs from DLTK’s website link HERE. Then we did a Butterfly Life Cycle earlier as part of the science rotation I did in our first grade team. So my class adds this writing project retell to our science unit on life cycles.  

Lots of the kids drew bright and colorful fruits for the caterpillar to munch on…
It’s so cute to see the holes punched in each page. I punch 1 hole for page 1 where he “eats through one item”….then I punch 2 holes for page 2….3 holes for page 3….4 holes for page 4 etc……
The end of the story has a chrysallis and then a pretty butterfly pops out! That dark green thing in the middle is the cocoon. I just freehand drew them, along with mini caterpillars to draw on each page and copied them off with the butterflies…

WRITING

 We do a fun and creative innovation on Carle’s book. I cut construction paper into 4 inch wide strips the long lengthwise way. Then  I staple them into pages with these lengths; 4,5,6, 7,8,9,10 inch lengths. Then punch 2 holes through 2nd page, 3 holes through 3rd page, etc. See my sample. The only real instructions they had after we brainstormed food items on the board, was to use 1 adjective or describing word on EVERY PAGE!  They are getting good at creative writing now!


Emma did these cute illustrations..5 holes on Friday, Double that on Saturday.
I punch holes in the pages 1 hole Monday up to 10 holes Saturday
The kids have to come up with a ton of stuff to have that poor caterpillar eat!

Then we rewrite the story doing our OWN version…. filling in food items we choose to write about. I bought the caterpillar and book at Kohls last year for $5.00. Actually I got the caterpillar for $2.50 because they were leftover on clearance! Gotta love a bargain! Hard to believe huh?  I love Eric Carle books! He’s a great one to do an author’s study on….kids love his books!

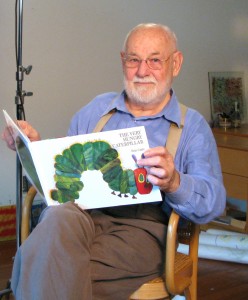
Author Eric Carle

Other fun books by Eric Carle are out so
kids can read them and we can add to ourknowledge base on insects…..And we cancompare and contrast them to spiders!


A cute butterfly coloring page is HERE at Twisty Noodle. We will attach the  poem below to the back of our Hungry Caterpillar books and read it together! The best part about the book is using Crayola oil pastels to do the pictures of all the foods the hungry caterpillar eats during the week.


POETRY or MUSIC (Sing to the tune of Itsy Bitsy Spider)

A little, green caterpillar crawling on a leaf,

Spun a little chrysalis, and fell fast asleep.

Then while she was sleeping, She dreamed that she could fly.

 And later when she woke up, she was a BUTTERFLY!


I have bugs, handheld viewers, cards to look at….
I bought a kids microscope on sale with strips of butterfly life cycle slides…kids LOVE to go to this center


MATH:

Graphing- What is your favorite bug? Butterflies? Honeybees? Grasshoppers? Dragonfly? Ladybugs? These were our top 5 we voted on. Guess which one was the winner?

The dragonflies were the winner on our Weekly graph….
We gave these Dollar Store bug holders out to a few kids to find “bugs” at recess….Joe brought in a centipede!

Here we are doing our +10, -10, +5, -2, Math Caterpillars


Estimation- Estimate how many Dollar Store bugs  are in the jar?I don’t have very many so everybody is really close on this one! I give a ring pop for 1st place. Everybody else gets a GUMMY WORM!

Estimation Jar….Nova won! 30 bugs!
We are making our caterpillar math projects….roll 2 dice…write number… Plus 10, minus 10, plus 5, minus 2…


SCIENCE

Watch a monarch butterfly come out of its chrysalis on video.

http://www.learner.org/jnorth/tm/monarch/ChrysalisEcloseClip1.html

 http://www/kidsbutterfly.org/  Do a life cycle of a butterfly. A link for a black line page of the 4 stages of a Butterfly can be found Here at Digital Pencil.org.  They have lots of games, a podcast and another video of a butterfly pupa stage. You can also buy the butterfly larva at Carolina Biological Supply for about $15.00. The link is Here for Carolina Biological Supply. I usually don’t send away for them until April anyway so now would be a great time to do it!


I have 2 big boxes full of insect material and about 15 books….


 P.E. “Bug Garden”.  Have students sit in chairs in a big circle. One student is in the middle without a chair. Give students names;1 ladybug, 2 dragonfly, 3 butterfly, 4 honeybee.  Then start over going around and around the circle till all are named. Then tell the caller to call out an insect name. (bees) All the bees must jump up and fly to another chair. Nobody who was a bee can stay in the same chair. The caller grabs one of the chairs and sits. The one who is leftover is the new caller. Then one fun part of the game is if the caller says “Fly Away Bugs!” then all the bugs get up and trade places. Last one to find a seat is the new caller!


More of my insect book collection…I like text “sets” of fiction with a non-fiction topic…

ART: Mosaic Butterflies– Children cut out butterfly pattern out of black paper. Cut out a few circles and ovals out of each side in symmetry. Then cut tissue paper squares to fit over the ovals and circles. Then  glue metallic mosaic tiles on the wings surrounding the circles. Put a ball headed clothes pin you have painted a bright color and pin in the middle and glue. Put black sharpie or wiggly eyes on and bright colored pipe cleaner antennae on top (wrapped around the ball head “neck” of the clothes pin.


 Another idea is to use Karo syrup and food coloring and make designs on a card stock butterfly. They take about 3 days to dry but they turn out beautiful! Back them with colored paper or black for a real dramatic effect! A teacher friend of mine does a cute trick when painting butterfly colors on large, white butterfly cut outs. She has the kids blob paint in about 5 places on the butterfly. Then she folds the butterfly in half and they smooth over it. Open it back up and both sides have a symmetry of paint blobs. It looks really striking on her bulletin board too! 

More Math:
Caterpillar Shake Up!  – Use an egg carton. Put numbers 1 – 9 in each “egg holder”. Place 2 chips in the carton and close it and shake. Whatever 2 numbers chips landed in write them down as a 2 digit number. Then add + 10, take away -10, add +5 and take away -2. This will give you 4 math problems for each of the double digit numbers. example 21 would be 31,  11, 26,  19.  Then we glued down circles with the double digit numbers written on each circle. Then we glued all the circles together forming caterpillars. Put 2 eyes and antennae on the last one and some legs on each circle. Here’s a picture of our finished math caterpillars! 

Roll dice twice…use both numbers to make a 2 digit number
Then add 10, subtract 10, add 5 and subtract 2 to make 4 new numbers…
color them the same color as the caterpillar’s circle color….
We put the math on the back…caterpillars on the front…super cute bulletin board!

We then put the Caterpillar Shake Up egg carton at a center with new rules. Just shake it, write down the 2 digit number you choose (ex. if you roll a 3 and a 4 you could make 43 or 34) Then Have a partner do his shake and he puts down a double digit number he creates. Then you both  add the 2 numbers together to get the total. Then go again taking turns.

I hope we get some better weather soon so those caterpillars really WILL come around! But in the meantime we just put some ants into our blue gel antfarm. We will see if they make tunnels this week and we will post a picture when they do!  


Cinco de Mayo Fun!

Today we celebrated Cinco de Mayo. We ate tortilla chips and mango salsa. Then we played CINCO BINGO with numbers I called out.  (20 + 20 + 1 or 5 tens 3 ones or 1 quarter plus a dime) and kids had to figure out the numbers before they placed their bingo chip. They are getting good at this.

After about 3 games and 6 winners later, we read 2 Weekly Readers and read all the picture captions. Then we created a mariachi art project on a Mexican flag.   And sang a song to the tune of the ABCs.

We sing this song using percussion instruments!

 I had made up a spinner with Mexican words the kids might not know.  Then we read the book FIESTA (that is in an old literature series we still have in our closet at school_  It tells about how Mexican kids celebrate Cinco de Mayo in their community. After discussing some of the new vocabulary in the book we had kids come up and spin the vocabulary spinner. Then they had to use the word in a sentence. Everybody was great at it.

We did our vocabulary test this week using some of the Spanish Words we learned.

Then we passed out Mexican sombreros for art and some Oriental Trading stickers on the Mexican theme. They colored, cut out and decorated their sombreros.  We counted up to 10 three times in Spanish. Then I’d ask the kids “What is ocho, what is tres?” They loved it!

Here we are just before our 1st Grade Musical called “Seasons Change”
Boy did they do a fantastic job dancing the Maypole Spring dance!!!

While they were working I read them The Tortilla Factory. They loved eating their plates of tortilla chips and salsa with mango and peach. Mmmmmm….. Some years I buy a pinata or we make little ones out of brown paper bags and tissue paper with a donkey head. I usually fill the pinatas with colorful taffy. A cute book on pinatas is Curious George Pinata Party by H.A. Rey. It also has the spanish right along with the English words.

Everybody picked out 7 stickers to put on their hats.

We did the hats in red, green and yellow
The Mexican Hat Dance is one of the cute songs on the Dance CD

Lastly, we have to do the Mexican Hat Dance. I have a Dance Party CD that I use all the time for many holidays. It was a great purchase! And we make speech bubbles with “talking marks” of what the Mariachis were saying to one another and put them and our hats up on the bulletin board. We call the quotation marks 66 and 99 (the number words) in my class. Kids love to celebrate Cinco de Mayo.  Happy Cinco de Mayo everyone!

To the Picasso of Mothers! Happy Mother’s Day!

 
                           Picasso’s Version

I love this art project.  Look up the website Mrsbrownart.com at this link HERE. Scroll down to first grade art projects. Look for this Picasso re-creation.  I have a story to go along with it.

 When Daniel, my youngest boy went to a gifted 1st grade class in  California, his gifted teacher Mrs. Seaton did this project for a Mother’s Day card.  I treasure this card so much. I love the handwritten message to me. It means even more because we lost this child when he was in a car accident 5 years ago.

 I never knew which of the masters this particular teacher had used as a model but I remember hearing that they had used a famous painter as inspiration. I loved the card so much.

I told that story to a parent helper one day 4 years ago just before Mother’s Day. We were just cutting out hand tracings for the Mother’s Day card..  She went out and bought the print of Picasso’s work that week, and the class parents presented it to me with a lovely note, a teacher bag with all the kids’ “finger” prints on it made into insects (I’m a science nut teacher and they all knew it) and a  gift certificate to my favorite store, Kohls.

Now, the Picasso copycat art…. it isn’t just a beautiful card that I got once from a very sweet little first grade son of mine; it is also a labor of love from parents who showed they cared about me, the teacher. I loved that gift from the heart and I treasure it.  And every year as we do our Mother’s Day cards I think of my little first grade Danny Moss. And I think of the parents and kids of my class of 2018 and I smile. You’ll be in my heart forever guys…  Happy Mother’s Day to all the fantastic moms out there! Enjoy your special day!

Mother’s Day Ideas

MOTHER’S DAY GIFT IDEAS….

  1. Every year it seems like I reinvent the wheel and come up with another kind of mom’s day gift. I love having the kids write a card. I have them put their handprint on the front in some cute way. Then they write a really nice letter inside telling their mom things like; I think you cook ______ really good.  My favorite thing you do with me is ________. Things like that with specifics. I loved learning that one of my boys loved me to make Taco Salad. I never knew till I got his first grade card!

Then we make some sort of gift. Here are some I’ve done in the past. 

  1. Make a recipe book with recipes from the students and a real recipe from the moms on the back. Copy them into a class book. Put a picture on the front of each and decorate with scrapbook paper.
  2. Make a silouette with each child’s black silouette on the front and a letter/card on the back.
  3. Get some rinsed out baby food jars or small sauce jars from the kids. Use a solution of half water half glue. Paint on 2 inch squares of pastel tissue paper. You can also use modge podge. Fill each glass jar with a voltive candle. Wrap with tissue paper and ribbons when dry. 
  4.  Get Dollar Store whisks and fill with any type of wrapped candies. Wrap up with celophane and ribbons. Add a note “Whisking you a Happy Mother’s Day!”
  5.                                       

  6. 2. Have kids bring in some short, fat cans like pinapple or fruit cans or could even be soup cans. Cover with pastel scrrapbook paper. Line the top with a coordinating ribbon. Cover inexpensive Bic pens with floral green tape and add a flower to the eraser area. Put the finished “flowers in your “pot” by adding rice or dried beans. Voila! A cute pot with flowers. 
  7. Pot some soil in a small ceramic or clay pot. Have students paint hearts and kisses and flowers on with acrylic paint. Tie a ribbon around the rim. Add alphalpha or grass seeds to the dirt. Let it grow for a week or so. When it is high send it home with a cute scrapbook paper note that says “I love you with every hair on my head!”.
  8. Make bath salts out of Epsom salts and scented oils. Wrap in celophane with cute ribbons. Attach a poem;  Roses are red, violets are blue, here’s some bath salts I made just for you! Stamp a KISS on the bottom of each card with red ink.  
  9. Hand Prints out of clay glazed and fired. I’ve actually never done this yet. It would be a lot of work.

It will have to be a surprise which one we are doing THIS year! hehehe…..

Free happy Mother's day  Themed printable stationary(stationery) and happy Mother's day  border paper for school teachers and students

Bath Salts Recipe-
3 cups Epsom salts
1 tablespoon glycerin
perfume (or lotion)
two drops of food coloring
 Combine glycerin and food coloring. Add perfume to make a fragrant mixture. Then add to Epsom salts. Stir thoroughly. When it’s dry wrap in celophane and pink ribbons.

Some of my favorite books about a mom’s love for her kids.

Here is how to make a box for your mother’s day presents.You can make another one that will fit over this one and make a little “box” to put a cute treasure inside. One year I got kits to make up beaded bracelets from Oriental Trading. It was surprising how well the kids did on beading. It was easy for them. Then we put them inside a cute box made from hot pink paper and put some heart stickers on the top.  You could use scrapbook paper or neon papers.


I’ll post the ones we decide to do this year.   Happy Mother’s Day!
                    

Royal Wedding Wishes!

Since the news people have all been calling it the Wedding of the Century I thought that we would mark the day in our classroom today.  So I had the kids write letters to Prince Will and Princess Kate congratulating them on their BIG DAY!

They each said what they would give them for a present if they could send a gift across the pond. We did “sloppy copies”, then I edited them, then we did brightly colored final copies. We had everything from a Lear Jet to a giant anaconda. My favorite was “a big yellow ball like those that hamsters run around in” only it could be for Will and Kate to run around in. Super cute. I made copies of the letters and told all the kids I’d mail them to Buckingham Palace. Maybe we’ll get a note back!

Then we made some Royal Crowns. A link for a tutorial on Medieval Crown is HERE at firstpalette. We just HAD to mark the occasion somehow. They will look back in their writing portfolios sometime when they are older, and remember the Wedding of the Century and how they kinda took part.  : D

What Did YOU do for Spring Break?

This past week was my Spring Break from school. We are so lucky as teachers, to have this week off to veg out, get rejuvenated and play with our families and get some good reading in.

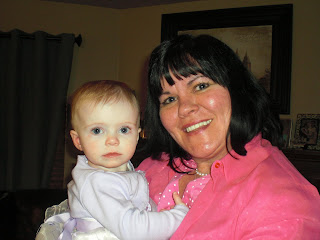
Josie and Grandma at Easter time….

Marisa turned 4 on the 20th so we went up to Discovery Children’s Museum at Gateway Mall. It was fun to follow the girls all around taking pics of them playing in the construction zone, the supermarket and the water and magnet centers. They even climbed up into the helicopter. So cute! We saw a lot of my students present and former there too. It’s a great day for a day off!


In the construction zone… they loved shoving fake bricks down the slide…


Megan engrossed in the playhouse furniture…


Marisa and Tiff in building blocks…


What’s more fun than splashing in the water wheels?


Marisa loved the post office….
Megan loved the little cars…
And the magnetic gear wall…


I’m making a yummy concoction guys….wanna sip of it? mmm nope.


Look what I can do!

 I got to read a lot too. I am working my way through the Sarah Palin’s “Going Rogue” and also Cristine Northrop’s book on The Wisdom of Menopause. Don’t laugh. It could happen to YOU too! It’s a great book recommended to me by my friend and college roommate. Yeah. now we are both old. It sucks.

Johnny and I on Easter….

So John and I heard it was FREE week for all the National Parks. And I had told him months ago we should go back and see Old Faithful the geyser at Yellowstone. It’s probably been 30 years since I’ve seen it…(I went there with an old boyfriend hehe). So we decided to go up to our cabin at Bear Lake and stay the night and then get up (after making John’s famous waffles) and drive to Jackson Hole.

We had to stop and snap this gorgeous scene on the way to Yellowstone last week….
We saw water fowl…and beautiful scenery…

It is a fun touristy place with lots of beautiful (and very expensive) shops and museums. I guess a lot of celebrities have places near Yellowstone. John kept telling me Harrison Ford has a place nearby. (I’d like to go see Harrison….yeah…love him….didn’t he marry Ally McBeal?)  Anyway, we had lunch there at the Great Harvest Bread Company. We live high off the hog you know.  Then we took some fun pictures around town. They have lots of artsy sculptural designs in bronze. I’d love a bronze in my front yard…yeah…in another life. Those things are thousands of dollars!

Jackson Hole had neat bronze statues…
Don’t ya love it…Bruce just does his own thing…when we’re trying to take pictures!
Antler arches….some nice tourists took our picture for us!

I felt very confident in going to Yellowstone because I had made maps and gone on the Internet to be sure the gates were open and stuff like that.  I handed all that stuff over to my navigator husband….who left them on his desk at home. Um hum…..I shoulda left them in my purse.

Yummy lunch at Great Harvest….


Mark Twain is behind me….

 I distinctly recall seeing that the gates open on April 15th when I checked Yellowstone’s website. So why didn’t they tell us ONLY the west entrance was open. We drove to the South entrance of course. And all these cars were turning around in front of us. What the heck?


We saw a couple of Moose!


Johnny was so much fun to be with….he makes me laugh….
I shot a rainbow as it started sprinkling…you can barely see it tho….
Pretty lake in Teton forest just outside of Yellowstone Park….

Well, we decided to go take some pretty pictures around the Teton forest and around this lake, I can’t remember what it is called. We saw 2 moose, some water fowl, and a few rainbows as it started to lightly rain. We listened to that new country/crossover brother-sister band called The Band Perry. I decided that I LOVE all their music! We are going to go get tickets this Friday when tickets go on sale for Tim McGraw because they are his lead in band. And they are coming to the new West Jordan concert place. We had a great time hanging out together with Brucie our doggie.

Bruce is bored…but he doesn’t want to miss a thing we are talking about….he leaned on my headrest most of the ride!
It was a really fun day hanging out with my 2 men. I LOVE time off. It makes life worth LIVIN!  Mmmhmmm…. Happy Spring!

EARTH DAY! Hooray! Let’s Recycle!


WHAT A WONDERFUL WORLD….LOUIS ARMSTRONG SINGS

I see trees of green, red roses too

I see them bloom, for me and you
And I think to myself
What a wonderful world
I see skies of blue, and clouds of white
The bright blessed day, dark sacred night
And I think to myself
What a wonderful world
The colors of the rainbow, so pretty in the sky
Are also on the faces, of people going by
I see friends shaking hands, sayin’, “How do you do?”
They’re really sayin’, “I love you”
I hear babies cryin’, I watch them grow
They’ll learn much more, than I’ll ever know
And I think to myself
What a wonderful world
Yes, I think to myself
What a wonderful world.

Earth Day Art! 

Earth Day is one of my personal favorite science/social studies units to do in whatever grade I’m teaching. I think it is sooooo important for kids to be taught awareness for how we are taking care of the living things of our earth.  We take so much stuff for granted don’t we? Things like clean water that flows and flows from our faucets and land around our houses for planting fruit and veggie gardens, and how easy it is to throw stuff in the trash and have the trash man haul it away. Kids are not aware of landfills, wasting water while they brush their teeth, or reducing the amount of garbage we throw out. They have fun realizing that THEY can become recyclers.  How GREAT is that? 

Teaching kids about the 3 Rs, Reduce, Reuse, Recycle….for Earth Day!

A fun contest is finding all the words you can make from EARTH DAY. A printable link from ABC teach is HERE.
                              

So for Earth Day every year we start out by reading the book Michael Recycle.  It is a funny book that introduces simple recycling, reducing and reusing to minimize waste. We discuss the 3Rs Reduce, Reuse and Recycle and what they each mean. Then we do a fun picture/word sort on what kinds of things we recycle. A link to a cute Earth Day  RECYCLE SORT is HERE. Then we have previously asked for parents to help us find something to recycle into a pencil holder. Most of the kids bring in washed out cans, soup size or veggie size.  Then we put colored masking tape along the top rim (in case some are still sharp) and then we pick out some scrapbook paper Mrs. Moss has had donated.  I then have the kids choose a construction paper 2 inch ring to put around the top for writing.  We use thin black “gel pens” and they put the 3 Rs over and over “Reduce, Reuse, Recycle” 3Rs.

Other Earth Day Crafts can be found HERE at Kaboose Website
Kids can recycle too!  
Each table sorted paper, plastic, glass and metal pictures into the 4 recycling catergories
Teaching Kids how to recycle…..

  Then I give each child a cheapie Bic pen and a Walmart or Dollar Store pansy flower (they come in bunches for $1.00) and a 6 inch long strip of green, floral tape.  They are to tape the flower to the pen as best they can by winding it around and around the pen.  This is for their pencil can but we have RECYCLED things and REUSED  too! OR they can  plant a small plant in their Earth Day decorated can with a small caption “Keep the Earth GREEN” This also might be a great gift idea for Mom’s Day. I’ve done that in the past. It is still teaching recycling!                                      
Reduce, Recycle, Reuse
(Tune: “Three Blind Mice”)
Reduce, recycle, reuse.
Now’s the time to choose.
There must be no excuse.
 It’s up to each one of us to do 
our part to make the Earth clean, it’s true.
 So let’s work together, yes, me and you!
Reduce, recycle, reuse! 

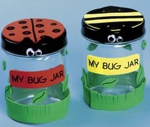
bug jar
Next year I think I’ll come up with a recycling project to use with glass jars.
They could each make some new invention from a Glass jar they recycle.
I love doing those kinds of things…..it gets creative kids thinking! I found
lots of crafty ideas HERE at Planet Pals website.

Then we start a 3 Rs chart to use for a writing project later. The kids will add to it each day of the unit listing what kinds of things we can RECYCLE, what things we REUSE, and how we can REDUCE our trash. I pass out 4 inch round card stock badges to each of them to color and wear home.

Nova’s showing our brainstorming board before we wrote our Earth Day thoughts….


DAY 2
The next day we start by reading a Weekly Reader or Scholastic News on Earth Day and what it is around the US and what kinds of projects kids are doing to pitch in and help . Then we wash our hands to get ready for a fun song and art project. A link for printed instructions on this art project are HERE at DLTK Kids. I add peach paper hands holding the earth and glue it on black paper when dry. It looks pretty cool!. You can add a few a small rainbow to the bottom that says “Save the Earth”.  I’ll post finished projects after Spring Break.

I punched out some little peachy hands for the kids to glue over the world…
Coffee filters and watercolor made this cool earth art!

We use coffee filters and green and blue watercolor paint and the kids paint the world or their rendition of how the globe looks.  When they dry we glue them on black paper with 2 cut out peachy hands glued to the sides as if holding the earth. Under it we color a clip art rainbow that says “I Can Save The Earth”.  While they are painting I read them the book Earth Day-Hooray!  It is a great book because it is about recycling but it integrates place value math concepts too.

Some great Weekly Scholastic News that we read through…


Day 3
The third day we talk about “The Water Wasters” and we read a mini play about kids who waste water. I have a water waster wheel I show the kids where it lists water activities like washing the car, brushing teeth, showering versus tub bathing and how many gallons of water each uses or wastes. We brainstorm ways to reduce our water wasting. The play is really cute.I think I got it from the EPA. A link is down at the end of the post.  Then we do some worksheets in our “Earth Day Packet” I’ve made up for the week.

I got the beads from Oriental Trading over the summer…I added green beads and the kids made these
cute bracelets out of chenille stems cut to their wrist size and twisted when they were done.  SUPER EASY!
They also have Earth Day inflatable GLOBES
you can get for about $1.00 each. The link is HERE at Oriental Trading!

We made Earth Day bracelets…We’re Going GREEN!

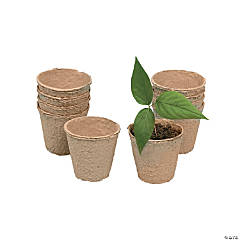
Design Your Own Watch It Grow Seed PotsHERE at Oriental Trading
They also had a 24 pack of these cute pots to decorate and plant vegetables or flowers for a fun activity.
They were only $7.00 for the whole 24 pack.  Now that is some money I would spend in a heartbeat!

Some wonderful songs can be found on the First Grade Factory’s blog. A link to her Earth Day Songs is HERE. I will choose a few to put on the backs of artwork we do. I always link up art and music so the kids are doing shared reading practice while singing songs and they don’t even know they’re practicing reading!

Day 4 Take Me Out to the Garbage!
 We talk about “litterbugs” and how kids help by picking up trash at parks and beaches. We go outside on the playground and pick up trash in the corners and by fences for 10 minutes.  They are amazed at how much garbage they come back with. Then when we’ve come back in and washed hands I read them Where Does the Garbage Go? And the book Trash. Kids don’t usually know about dumps and land fills and how fast they are filling up. Time for more discussions!

I have another activity we do cooperatively. I have a role playing activity where they pull scenarios out of envelopes and come up with solutions to some problems that kids could most likely solve such as seeing other kids littering, etc.

The Stationery is from a Scholastic Book of Stationery.  The link is HERE at Amazon is Scholastic’s Stationery Book.  Another one I love is this one HERE at Scholastic is a Month by Month Stationery Book.. I think both of these books are around $12.00.  Both I’ve used
probably more than any other teacher resource book.  They are GREAT! 

Then we do an Earth Day Writing entitled….I Can Save the Earth By…  and the students free write from everything they have learned about Earth Day. The results are always amazing to me.  They really do “get it” and they have heart about keeping our earth healthy.


An activity they can do in my community is decorating brown supermarket bags with Earth Day pictures and messages. We only have to go pick up 20 bags and have the kids do the art and then return the bags. They also like us to make a few posters for the store. We may do that again this year.

A fun word search I made up for Earth Day can be found  at this link  HERE at Teachers Corner. I would
add some cute pics of the world to it. It is only text.
                                                           

Children of the World Floor Puzzle
HERE is a World Floor Puzzle at Lakeshore that would also be a fun center activity for Earth Day! I think
it was about $12.99 and all my students absolutely LOVE floor puzzles! What a treat that would be! 

A free resource I got years ago that helped with learning activities for this unit was from the EPA (Environmental Protection Agency) I think they had Superfund money but they sent me lots of really cool and colorful books, color books, badges, crossword puzzles and printables for kids. They will send it to you too. It’s called the Planet Protector’s Club.  The link for you is HERE. This is where I made up my “packet” of worksheets from. There is a reader’s theatre in there too. Fun! HAPPY EARTH DAY!

The Stages of a Ladybug’s Life

Books:  The Grouchy Ladybug by Eric Carle
Five Little Ladybugs by melanie Gerth
Are You a Ladybug? by Judy Allen Tudor

I love Eric Carle books. One way I love to introduce telling time by 5 minute increments is using the book “The Grouchy Ladybug”.  It has clocks on every page and they have incremental times listed.  It’s a good springboard for telling time.
We read the book and then we make a ladybug clock. I just found a basic clock pattern and copy it off on red construction paper. Then I add a half circle shaped, small, black, head and have the kids give it a face with white crayon. Then we add 6 black legs and we accordian fold them so it looks kind of funny. Here are our ladybug clocks.

Very Grouchy Ladybug Clocks
Then we read books on Ladybug Lifecycles and I also have a few Weekly Readers/Scholastic News that I save if they have any Science in them.  I also save the Science Spin magazine if they are good ones.

SHARED READING

“Five Little Ladybugs”

Five little ladybugs climbing up a door, One flew away and then there were four.

Four little ladybugs sitting on a tree, One flew away and then there were three.

Three little ladybugs landing on a shoe, One flew away and then there were two.

Two little ladybugs looking for some fun, One flew away and then there was one.

One little ladybug sitting in the sun, She flew away and then there were none.

MUSIC: I found a cute song called Ladybug in my Soda on the website K-8 Kidstunes and got a copy for 99 cents in an MP3 download. The link is HERE but you do have to sign up a “kid” to get the cheap version. I have kids and grandkids so it’s easy now that I have signed up. It’s a funny song with a real catchy beat and easy to learn.

Peter is making his Grouchy Ladybug Clock


MATH:
A fun printable with black dots on individual ladybugs to print out can be found HERE
at A Kids Math. You can print off a dozen of these to place in a center with a key. Kids write down their answers on an answer sheet and then check with the key.

We kept these in our desks for a week and used them to practice telling time….

Here is a link for a telling time worksheet HERE at ABC teach.

Andrew is proud of his cool clock!

CLOCK MATH
Every day for a few weeks call out different times and have them put the hands on their clocks. Be sure to also introduce half past, quarter past, quarter till. These are really difficult concepts for young children to get so I introduce it in first grade. I also have a magnetic clock I keep on my white board. I draw 4 lines on the fact to “cut” the clock into “quarters” or fourths. I point out that 3 and 9 are the quarter past and quarter till numbers.

Fun Game: Find a partner and use both of your ladybug clocks. Decide to do “o’clock” or “thirty” for doing elapsed time. Then decide how many hours difference there is going to be and make up a sentence. Example:  3:00 is 2 hours later than 1:00. 12:30 is 3 hours later than 9:30 etc. Elapsed time is another very hard concept for young kids to get. This is higher level but some of your high kids will get it and you will be differentiating for those who can do it.

We played this Bug Bingo and then I left it out for a center game….great for insect vocabulary development!

The next week after doing our life cycle books we painted our own ladybug beetles!
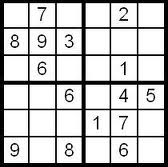
Attach a poem or a Sodoku math to the back for fun!
Another cute poem I found online…Use it on the back of your clocks!

SCIENCE: Do a Life Cycle of a Ladybug wheel on a paper plate divided with a criss cross. The link can be found at A Kids Heart HERE. Color the life cycle and then glue it down. OR….Write the 4 steps to the life cycle of a Ladybug. We decided to do a 4 flap book and used macaroni, dried beans and rice for the stages.

Here is the top of our flip book. We folded it into 4, cut just the top layer.

         Another fun center I do is I have 2 classroom microscopes and insect slides. I put those out with a bin full of dollar store plastic insects and 4 little magnifying glass viewers and insect books. I took a picture on my classroom camera and then left it in the classroom! I’ll post pics of that next week too. The kids LOVE LOVE LOVE this center. I’ve collected about 2 dozen insect books so I put a new batch out each week and we switch from ants, to ladybugs and dragonflies, and next week is grasshoppers and caterpillars.               

WRITING: I love to do a minibook describing the life cycle of a ladybug.  I use yellow construction paper and give each student one large piece I have folded in half the long way. Then fold that in half 2 more times to make the 4 folds. Then I cut 4 slits evenly in just the top half of my paper. It will give you 4 pages to lift up and write.
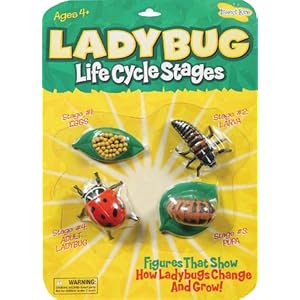
   LADYBUG LIFE CYCLE STAGES BY INSECT LORE

Here is the 4 stages (art from Enchanted Learning) writing from a first grader!
Then we do our own Ladybug Life Cycle Flap Books. Inside the top flap we paste a picture of the life cycle stages. On the bottom of the inside flap we draw pencil lines with a ruler and write 2 sentences depicting what is happening in the stage in the picture above the writing.  A link for the clip art stages is at Enchanted Learning  HERE for Ladybug Lifecycles. They always turn out really cute. Don’t forget to watch the utube video before doing the writing.

Cute painted ladybugs with their chenille stem antennae!
Completed Flip Book. Oops, he forgot to color the pupa macaroni!

 On the tops I use brown and green crepe paper to make twigs and leaves. Then I add macaroni for the life cycle. A few pieces of rice for the eggs, then a kidney bean for the larvae worm stage. Then a piece of shell macaroni for the cocoon stage. Have the kids color the macaroni with markers.  And finally a clip art ladybug to color for the final adult beetle stage. I found another lip art ladybug I liked for the cover and I typed up the 4 words of the stages. Then I copied the Enchanted Learning page with these additions. That’s the life cycle!
Then we watched the life cycle utube video from the top of my post.
A fun website that has lots of ladybug facts is called Ladybug Lady and her link is HERE. She also has lots of good ideas for classroom teachers.

I got a larger one of these and 5 smaller ones. I’ve used the large one for larva.

Get some ladybugs from your local Home Depot or Lowes. I bought some individual butterfly garden holders from Oriental Trading a few years back and we put one on each table for kids to observe with hand lenses. It is fun to see how different their colorings and sizes are and to see them close up. They only last a few days though so I’d set them free in your garden after a day or so.

We traced small and large paper cups for the spots….

ART: Paint a ladybug on art paper. When dry use black markers to make the line down the middle and dots on his back were traced using the top circle and bottom circle of a dixie paper cup. Add 2 wiggly eyes. Paint yellow, orange and red. Wait for color to dry. Then add black painted spots. Dry and then Cut out. Add some black chenille stems with tape for the antennae and 1/2 inch by 6 inch legs (we accordian folded the legs)..  On the back type up this poem and read for a shared reading activity.

We read Scholastic News on Ladybug and Dragonfly Life Cycles and did a Venn Diagram comparing them.
Did you know they come in 3 colors? Red, orange and yellow!

Here is our finished Ladybug Life Cycle bulletin board!

FUN MATH EXTENSION!

Add a fun Sodoku to the back of your ladybug pictures or clocks!

I hope you have fun seeing what we have learned about LADYBUGS!