Brown Bear Brown Bear Teddy Bear Picnic

Here the kids are getting all ready to run over to the bounce houses on field day on the last day of school. There was also a giant parachute we played with. 

It is the last week of school and the end of my year teaching kindergarten. I have loved it. It is like trying to keep a lid on popping popcorn!! Yup. I wasn’t that successful at keeping the lid on, but we had a lot of fun every day!

This is the little Patriotic Bear I painted and put on a wreath on my front door. I added a little flag and some stars and flowers too. 

I love the book Brown Bear, Brown Bear. It is perfect for Kindergarten. They know most of their color words and can read the simple text from the story since it is so repetitive.

These were the 3 funny 6th grade teachers who dressed up all in the 50s for the dance festival the last day of school. haha. They looks so cute. Our class danced to Ball in the Jack. We rocked it! 


So for the Teddy Bear Picnic that I usually have at the end of the year we will do some Brown Bear Activities. Here are a few I came up with that are lots of fun.

We went into the gym and watched a Disney movie and ate popcorn after field day. FUN! 

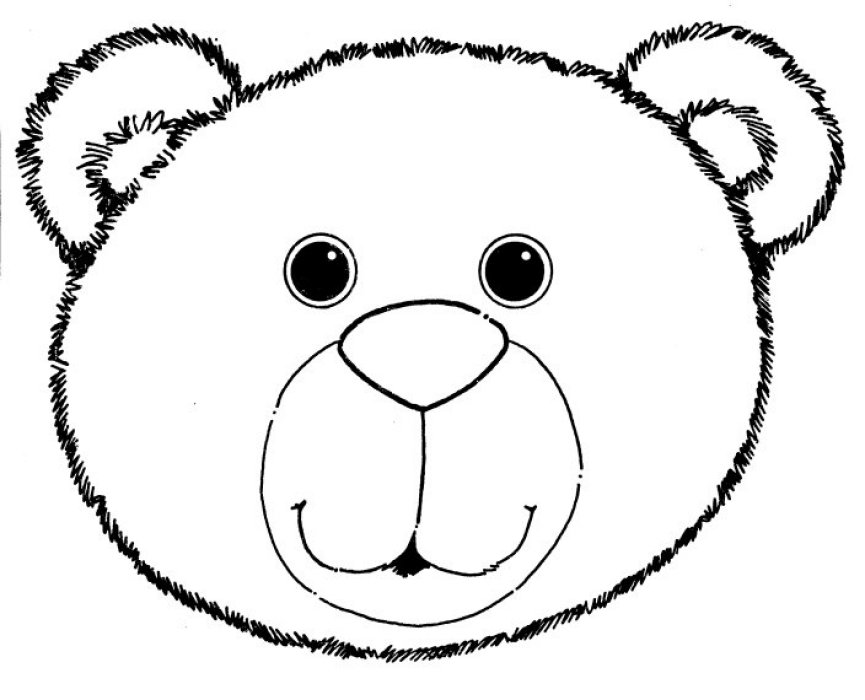
1. ART – MAKE A BEAR WITH MOVEABLE ARMS AND LEGS or just a Bear HAT- We are only using the head this year to make a hat. It is HERE. The arms and legs if you want a jointed bear are on this page HERE at Virtual Vine along with a gazillion other great resources. Look under the quilt for 3 printable body parts. It turns out cute but takes a while for the kids to color. Or make a Bear Hat. Use a Bear coloring page and just use the head and a brown strip of construction paper to go around heads.

We made this Brown Bear only we didn’t make it into a hat. We made Bear puppets on a stick instead. But we’ve made these in past years. HERE is a cute art bear from Girl Scouts of USA.

2. SHARED READING – Read the Book Brown Bear, Brown Bear. Make a necklace after coloring all the brown bear characters. Add pony beads in between each character on yarn for a cool and colorful Brown Bear Necklace. Perfect art activity for kindergarten. Free printable is HERE. Or you could make a fruit look necklace and add the characters in between several fruit loops. That’s fun too.

Read the book together with the Youtube of Brown Bear, Brown Bear, What do You See? It is a cute one.

3. PHONICS – Matching Center “Rhyme Time” Activity after reading the book Bear Says Thanks. HERE. There is also a writing activity and a cut and paste freebie. A cute mini books for $3.00 is HERE at TPT.  A free version is HERE at TPT. Thanks gals!

There are always activities you can do with addition and subtraction using counter bears and a number line. 

4. MATH – Fun Brown Bear “counting the characters” cut and paste math activity great for kindergarten. It is a freebie on TPT HERE.

Holding our Teddy Bear Puppets and puzzles. 

5. PICTURES – Take a picture with your Teddy Bear. I also found a picture
frame to color and put a picture inside with the bear hats and their teddy bears they brought for the read-a-thon.  It is cute. Check it out HERE.

You can always do a Bear art project using lots of brads and brown paper. We didn’t have a lot of time so we made bear heads on a stick (puppets) instead. They were cute. 
This is my little patriotic bear and Uncle Sam on my entryway table. I’ve got all my red, white and blue stuff out for July. I got the little stars and stripes (the red and white one is to the right but you can’t see it in this pic) buckets from the Dollar Tree. 

6. Read-a-Thon with Bear books. After doing all of our BEAR activities we will do a read-a-thon with our Teddy Bears we’ve brought from home. Then we will have a picnic with hot dogs, root beer floats, chips and gummy bears of course. Then we will go outside and draw bears with sidewalk chalk. It should be a very fun Teddy Bear Picnic this year.

Here’s the hubs and I at Yellowstone visiting one of the fun gift shops in Jackson Hole. We usually go to our cabin at Bear Lake the weekend I’m off of school to unwind. And we usually take a short tip up there or some town close by. 

7. Writing our own Brown Bear Brown Bear innovations. “I see a red fish (or Blue Bird) looking at me”. OR….Each child can write about things that are brown. “Brown can be a bear, a hamburger, a chocolate bar and a coconut.”  Brainstorm on the board a list of brown things for them to choose from. This is an especially good idea for ESL kids who need language experiences.

Field Day and Teddy Bear Picnic on the last day of school. 

We came back in the classroom after field day and ate hot dogs, chips, cookies and drinks. It was fun to have a picnic with our Teddy Bears! Teddy Bear Picnics are the bomb! The last day of school was sure lots of fun. Have a great summer everybody!

15 Pirate Party Activities

a PIRATE card art project we made turned out cute. 

I always do a Pirate Party at the end of the year. It is a fun day we look forward to all year. I’ve done different things each year but these are 15 of the most fun things I’ve come up with in 21 years of teaching. Have kids all put their name on a brown bag and add a handle to it. Put some torn red/white fabric and tie a strip on the handle.  Add a pirate sticker or skull crossbones printout  to the bag. Then have the kids go to 6 stations of activities you choose and bring their bag with them for all the prizes and loot they will get! All stations should take about 8-10 minutes.

CRAFT TYPE ACTIVITIES 
1. Whole Group Activity – Make a Pirate Hat (Do altogether on tables – directions and printable tutorial diagram are HERE at Birthday in a Box.
The skull and crossbones printables are all over the internet. HERE is a cute one, and it is free! 

Pirate Hats – I used black butcher paper folded like a sailor hat. Kids added their pirate names to the back and skull and crossbones I copied and they glued them to the front. 

2. Station 2 – Pirate Name  (What is your pirate name?)  Print out this freebie on a big poster on a table. Kids write their funny pirate names on the back of their hats with white crayon or chalk. Hats made with black butcher paper. Add a skull and crossbones free printout cutout to each hat. HERE is a freebie Find Your Pirate Name Game.

We’ve made black, red and white bracelets with pony beads in some of my past pirate parties. 

3. Station 3 – Get some Pirate Bling (Make Fruit Loop necklaces with gold coins or use pony beads in black, red and white) glue gun a chenille stem loop to the gold coins before the party. Or make a mustache on a stick!

I used black poster board for the eye patches and we taped a piece of black yarn on top and tied them in a bow around our heads. It was easy. The mustache was construction paper taped on a skewer stick. 

4. Station 4 – Get a Tatoo and an Eye Patch. (Face Paint a scar or put tatoos on arms) Put an eye patch on some string and tie it around forehead. HERE is a free printable. Get pirate tatoos at a party store or Oriental Trading. Some eye patches are HERE as well as a beard you can put on a stick.

5. Station 5 – Make a Pirate Hook Hand. Directions on how to do it using red plastic cups and tin foil are HERE. Decorate it with these doo dads HERE.

CARNIVAL ACTIVE TYPE CENTERS

6. Station 6 – Walk The Plank Obstacle Course. 2 games here. 1st is put a plank of wood between two crates and kids walk with one eye closed and hands behind back. 2nd obstacle is hop with a tennis ball (canon ball) between your knees and drop it in a bucket. Everybody gets a chance to do 1. Then watch others. Then do 2nd obstacle, then watch others.

For our Pirate Party all the kids dressed in black and white. 
Have a fun photo station where kids have pirate hand hooks, eye patches, fun hats and take pics!

7. Station 7  and share Pirate Jokes Check out some at Enchanted Learning. and do a ring toss on water bottles. Use cut out black and red plastic plates (just cut the outside of the plate to make ring toss rings).  Read a joke, throw a ring.
example: What’s orange and sounds like a parrot?
(A carrot!)

 Another joke: What did the pirate say when his wooden leg got stuck in the freezer?  Shiver me timbers! Check out this page for joke ideas HERE at Enchanted Learning.  We did a pirate maze and jokes and pirate math on the back when the kids first arrived at school. It was a good ice breaker activity. 
Some of the girls really dressed up for the Pirate Party! Super Cute! 

8. Station 8. Pictures & Throw a sponge at the pirate. Take turns getting behind the cut out pirate face. Get an assortment of spongy balls and cut out some square sponges from the dollar store. Take turns seeing if you can hit the face. Take pictures at the end of each child in the pirate cut out. If it is an outside summer party on a hot day get the sponges wet.

They loved their pirate patches! They all wore them home on the bus ride. 

9. Station 9. Pin the Patch on the Pirate Printable is HERE.  I’ve done this with 1st and 2nd graders and it is lots of fun. I just blew up a pirate coloring page and backed it with red and white striped paper and bordered it with black. HERE is a link to eye patches you can print up or just cut them out of black construction paper and have kids tape them on. Cover their eyes with red bandanas and sing “Yo Ho, Yo Ho a Pirates Life for ME!” as you spin them around.

LEARNING CENTERS (EDUCATIONAL)

10. Station 10 – Pirate Bingo Game (using sight words- good for 1st grade or end of kinder) free printable games HERE. Or HERE is another cute Bingo game.

Here was my Pirate Bingo we called Buccaneer Bingo. Get free copies from Kinder Gater Gals at TPT HERE.

11. Station 11. Math Cardgame – Pirate War – get in groups of two partners. Both of you put down a card. Add up the numbers. The one with the highest sum gets both cards. Person with the most cards at the end of 10 minutes is the winner and gets a jewel to put in their sack. Check out THESE free printables. Or THESE that I used. Kids can cut them out and take them home in envelopes.

12. Station 12 – Pirate Go Fish – Use these 16 colorful pirate pictures and copy twice for each partnership. 2 kids cut out and then play go fish or concentration with the cards. The free printables I found are HERE. Also an ABC Maze Printable is HERE. or HERE is an ABC order Pirate game.

REFRESHMENT TABLE IDEAS 

Here was my classroom Pirate Party Refreshment Table. We had 2 kinds of drinks too. I don’t know why that duct tape is there, we didn’t eat any duct tape. lol. 

13. Station 13 –Refreshments

1. Pixie Stix (pixie dust) (add little black triangular pirate flags to the top).
2. Pirate Canon Balls (cheese balls or malt balls)

I just got cheese balls (generic) from the market and made up a cute sign. 

3. Fish and Chips (orange goldfish crackers  and potato or tortilla chips)

Next to this bowl is a bowl of cheese fish crackers. Get it? Fish and “chips”. lol. 
Here are the goldfish that went with the “Fish and Chips” Signs. I just typed them out and pasted them on red paper then on black to border it nicely. Then I added stickers or pirate pictures I got off the internet. 

4. cupcakes with pirate Cupcake Toppers HERE, or HERE. 
5. Fruit Roll Ups wrapped with a pirate treasure map coloring page
6. Pirate Popcorn – use jello and make red popcorn balls, or just get some caramel corn or regular popcorn and call it “Pirate Popcorn”.

We had double stuffed Oreos and of course Chips Ahoy cookies. 

7. Chips Ahoy or Pirate Os (oreo cookies).

Here are some “skeleton” brownies I made at Halloween that would also be great for a Pirate Party. The heads are candy melt discs, the bodies are yogurt covered pretzels. I used icing for arms and legs and faces. 

8. Skeleton Brownies.

14. Take Home Gift Ideas
1. Goodie Bags with pirate items inside. I had jewels from the dollar store, rings, pirate bookmarks, chocolate coins, lollypops, and cute little chocolate pirates wrapped in gold foil with skulls and crossbones.

Aren’t these the CUTEST Chocolate Pirates wrapped in foil? A parent bought a whole class set of them. They went into my goodie bag. Another parent bought each of the kids 2 gold chocolate coins. Those went in too. In years past the kids have gotten pirate black balloons and pirate erasers.

2. ABC  maze HERE and wrap it around a fruit roll up.
3. Lollypops or Tootsie Rolls  taped to a small Pirate wordsearch HERE.
4. Pirate Playdough (make your own in purple or black) I have a recipe for Koolaid Playdough HERE on my blog. Put them in mini ziplock baggies.

Land Lubbers Licorice. haha. 

5. Pirate Superballs and Balloons. I bought mine from Oriental Trading HERE. They are tiny but fun to play with.  Wrap them together in a bag.
6. Landlubber Licorice – This is cute in a jar. The above one was for a different party but you could put pirate skull and crossbones on the jars. Make an assortment of “Pirate Loot” and put them in bags like this tied with black yarn.

I also had pirate superballs I had ordered from Oriental Trading a few years ago. They have lasted through several years of classroom parties. 

PARTY ROTATIONS 

I try to have 6 really good PARTY ROTATIONS (centers) and kids spend 10 minutes at each one. They go around in groups of 4 so the games can be played multiple times (like Bingo).  I try to do 2 crafty type activities, 2 active play activities, and 2 learning games (educational).

For a home party you could  fill cookie jars with candy or gumballs and let the kids do their own goodie bags. 

If I do a bingo I try to have the words along with the pictures so they are reading. The first activity is making the hat and bag. They take the bag around with them. At each center is a fun token or giveaway (pixie stix, rings, bubbles, bead necklace etc.) so they have an assortment of take home prizes. Some are just prizes if they win.

I’ve used this party bucket for prizes, ice and cans of sodas and all sorts of things. Just add vinyl lettering to a red bucket from the craft store and then for each party add a decal, sticker or printable coloring page to the top on a theme for the party. Skull and crossbones work perfectly. I do this with small buckets to hold silverware, napkins, and craft supplies at the rotations too.

The whole party should last about 75 minutes. Have fun Mateys! Argggg! And have fun Walking the Plank!

Pirate Party Fun! 

Insect Activities

We made some cute insect models of ants out of egg cartons a few years back when I taught 2nd grade. Then the kids wrote informational texts on insects and where they are found, what they eat and what they look like. I thought it might be fun to post it again since we are doing insects this week. 

rts.We used insects after reading our Reading Streets Play on Ants. I had each student get an insect book out of the library, we wrote down facts in cooperative groups. Then we added those facts to our own “sloppy copies”.  Everybody shared facts. Then I edited the reports.

Then we rewrote them on this nice insect stationery. I had 2 styles to choose from.

           Then we illustrated them.  I loved this dragonfly and all the beautiful background too…

       Fabulous art here! I think Jack did this one. I gave them simple clip art insects to use as models.

  Ant and Caterpillar poems in the pocket chart center….The kids had 5 poems to choose from.

There’s a ladybug poem and a cricket and one other. 
We used egg cartons cut into 3 sections for the 3 body parts of the insects. They chose their own pip cleaners, wiggly eyes and made a tongue and antennaes.  Some are very colorful!

We made our ant models out of egg cartons cut into 3 body parts and painted.

We painted the egg cartons red or brown or black then when they were dried we added the pipe cleaners and wigglyeyes. We sang the song THE ANTS GO MARCHING 1 BY 1
HURRAH too. Kididdles has the words
and click for the music too. 
We made “ants” after reading our Reading Streets Literature play on the Ants and several other cute stories about the hard life of an ant. .

             After we wrote our reports I had the kids draw pictures of their insects and color them.

Insect cards with facts on the back I got from the Dollar Store at the science center.. 
Insect Books at the Science Center

                                      I like this one…its got character!

                                 Gotta love a ladybug, right?

                                           Dragonflies were very popular reports…..

Ladybug art….so beautiful! I have some really talented kiddos. This is really one of my favorite art products from one of the kids this year. It should be framed. Period. 
Last year we made grasshopper life cycles. They were too easy. This year we did Insect reports.
The GRASSHOPPER Life Cycle wheel printable can be found at Lapbook Lessons. for a fun extension. A cute cricket craft is HERE at Jennwa’s blog.

                 Some did praying mantises and others did crickets or grasshoppers.

A cute Insect Bingo game I copied as well as fun vocab cards and other interesting life cycle wheels (ALL FREE!) is HERE at Bogglesworld.

 Did you know there were 300,000 kinds of beetles in the world? Yeah, me neither!

                                              Henry had a walkingstick and a buddy on his back!

            I think we only had a few  ladybugs in the bunch!

 This insect was so nicely done, I was quite impressed by Kiera’s art talent!

We did a few worksheets too; a crossword puzzle and a cut and paste about insect vocabulary. The link for some great worksheets and crosswords is at Boggle Worlds.

Then we wrote reports on insects. They got into cooperative groups and had individual school library books on their insect of choice. Everybody shared facts with everybody else. They are very proud of their research reports.
I found some cute stationery in a Scholastic book Check it out HERE.
Insect reports – the kids did whatever insect they chose. 
Here is a close up of the ants and the reports
We are all proud of our little ant creations….
Here are some of the Cooperative Group’s posters….everybody added facts to the posters of Ants, Grasshoppers,, Dragonflies and Fireflies, Beetles and Ladybugs, and Honeybees/Wasps/Yellowjackets.  
Insect posters….we kept adding to all 5 of them the whole unit long….
Science Center microscope with metamorphosis of a caterpillar slides…. 
Insects hanging out at the Science Center of our classroom….
My SCIENCE CENTER has insect books, write and wipe off activities and these insects with viewers. It also includes the microscope with slides of insects morphing. It is a popular center. 

Great job everybody. I loved teaching you all about INSECTS! 
 

Father’s Day Pirate Cards from Handprints

We made some cute little Pirate Handprint Cards for Father’s Day on Friday.

Father’s Day Pirate Cards from Handprints. 

We painted the palm of the kids’ hands peach colored (white with a little orange mixed in) and just the top of the palm by the wrist red, and all the 4 fingers black. We didn’t paint the thumb. Then we pressed them on folded 9 x 11 white cardstock. Inside we glued in our handwritten messages on cute stationery I found for free at Teacher Pay Teacher from Whitney Parlin HERE. The 2nd download has the Father’s Day Papers. I made 8 copies of each style and the kids chose their favorite to write on.

Sorry I forgot to take pics, but they wrote “Happy Father’s Day. I love you. You are good at….. and we brainstormed about 10 things dads are good at. The kids added a few that matched their dads. They were really cute. One little boy said his dad was good at shooting guns. Another boy said his dad is a good cook. Super cute!

My class with their Father’s Day Cards. These pirate handprints turned out cute and only took about 30 minutes to do the entire class. 

Then we glued on black hats and I copied off some cute pirate printouts we glued on the hats. Then I gave each child a wiggly eye and an eye patch to glue on. They made the face with black crayon and added a black line for the eyepatch.

Father’s Day Pirate Cards from Handprints. 

Then I typed up Dad You’re GRRRRREAT! and they glued those down at the bottom of the card. I was thinking of putting You’re a Grrrrrreat Matey, Dad! But it sounded kind of weird. Too Punn-y maybe?

If you can think of a fun one-liner for next year’s card, write it in the comments.
The link for the free PIRATE printable skull and crossbones is HERE at Lee Hansen.com. Thanks LEE! And HERE is a fun math match up Pirate game I downloaded as a fast finisher.

Arg! Mateys, Have a Happy Father’s Day!

Ladybug Art and Life Cycles

We are studying insects lifecycles this week and we finished Ladybug Life Cycles. It was a lot of fun to paint some giant ladybugs and write a few facts about them.

Ladybug Paintings and Informational Writing by Kindergarteners in my class. Good job guys! 

Ladybug Painting and informational Writing. 
We made life cycles and labeled them too. 

I read the kids some non-fiction books about ladybugs and they loved hearing about how they hatch and eat their own eggshells! And they look like little spiders when they first hatch from eggs! They are called “Larva”. They eat like little pigs for weeks!

We wrote facts about Ladybugs. 

We put on 2 curly antennae on top of each ladybug head. Then added wiggly eyes and a smile in white crayon. 

Then they turn into pupa and make a little cacoon  and stay inside of it until they have morphed into the flying insects they become as adults.

The Ladybug Art and Writing made a cool bulletin board out in the halls. This is our final bulletin board of the year. I love doing art with kids! 

A Science Spin we read from Weekly REader (All About Ladybugs). I save the good ones. 
Lots of good facts here! Great handwriting too! 

Here are our cool “Informational Writings”. These are  KINDERGARTENERS too! Didn’t they do a fantastic job? I gave them white paper and they painted their “oval” in red, orange or yellow. Then we glued on a head, 6 legs (1 x 4 inches) and 2 wiggly eyes. They drew on smiles with white crayon. Then they glued on black circles I had some mom helpers cut in different sizes. Next year I’ll add a black line down the back of the painted ladybug before adding the “spots”. It would have looked better. Live and learn! 

Did you know ladybugs were cool AND cute? WE did. 
Books we will read for insect week this week. 

We brainstormed a list of facts about ladybugs, and some describing words on a giant piece of red butcher paper shaped like a ladybug. That is a great way to instill some background knowledge or schema before writing projects. 
Ladybug painting by Mrs. Moss’ class of kindergarteners. 

For more activities I did when I had 2nd graders check out a previous post I did HERE or another one   HERE.

Here is our cute little ladybug art. We also did a life cycle, but I forgot to snap a picture. Here is what we did last year 

A fun printable that I laminated for a center is HERE at a Kids Heart. Then I bought some dry black beans in a bag and the kids pick up a handful and drop them on the board. They add the two sides of beans together and write an equation. It’s a lot of fun at center time. I just printed them without spots.

Grant did an excellent job on his writing. He is a very good writer! 

Writing is SO important. It is reciprocal for learning to spell, phonics and sounding out, handwriting, and reading. It helps improve all 4 areas of Language Arts. That is why I do it every single day. Kids in my class are real good spellers and I believe this is why. (I also do sound spelling on white boards “word families” every single day. It helps with all of the above also.

A fun Insect Center. 

I’ve also done the caterpillar larva and praying mantis larva during this insect unit. Once I bought live ladybugs and we kept them in the butterfly house for a day and then went out and let them go. You can get them for about 5 bucks for a ton of them at Home Depot in the spring and early summer.  You can also buy the larva HERE at Insect Lore for about $15 bucks. 
I had these insects out at a center too. Most of the kids can tell you insects have 3 body parts and 6 legs. 

We made little ladybug puppets with this song on the back too. It was fun to sing to the tune of “If You’re Happy and you Know It!”

OH I WISH I WERE A LITTLE LADY BUG (2 TIMES)
I’D BE SHINY RED AND BLACK
I’D EAT APHIDS FOR MY SNACK
OH I WISH I WERE A LITTLE LADYBUG! 

Memorial Day Activities for Kids

This Monday is Memorial Day. We get the day off so we can honor all those who protect our country. I teach the kids about the 5 branches of the military; Army, Navy, Air Force, Marines, and Coast Guard. Most of them know a few branches but not all or what they guard and protect. HERE is some Vocabulary to go over with the kids. I had them copy the word. Fast finishers copy a few times.

I love this book called H Is for Honor: A Military Family Alphabet by Devin Scillian and Victor Jushasz. It is a look at military life for the entire family. What boot camp is like, why soldiers make sacrifices, and how much letters from home mean to those serving far away.


I read this to the kids and we talk about some of the sacrifices that military 
families must make so their loved ones can serve us as Army and Navy and Air Force men and women. 

This eagle painting is out of handprints in brown for the fingers and palm, and the thumbs are either red or blue. The white tailfeather is just a pointer finger in white paint. I added red and blue and silver glitter to the red and blue and white painted thumbs. The kids added the white heads, and beaks. Then when they were dried we added a wiggly eye. 

This was something my nephew Tyler put up on his Facebook page one day. I typed it up and added it to a poster I keep up in my room during our study of what Memorial Day is all about. 

Here are pictures of all the branches of the military I found online for free. The kids chose their favorites and colored them and we make a cool mural of all the symbols and uniforms of the 5 branches. 

I make a big brainstorm of all the kids’ ideas on the board. Then we write a few more as sentences beginners; such as….I am proud of our military because they….or….Thanks to the military men and women of the …..or…On Memorial Day we remember all the military men and women for…..


Some coloring pages I leave out for fast finishers and some stationery sets I got on TPT. HERE are some Cute Ones.  Some of them I added the words Memorial Day or a flag to. A cute math coloring page I found HERE too that I just changed a few of the harder equations. I also cut out “Presidential” and put “Memorial Day” instead. 

My cute entry table all decorated for the holidays coming up…..

 I have a few bins in my storage room for Patriotic holidays. I usually put it up end of May and leave it up through the summertime. I add red and white flowers to my greenery baskets around the house too. Silk geraniums work well.

I love this Uncle Sam and red, white and blue quilt I have in my living room. So Patriotic! 


For Fast finishers I had a few coloring pages kids could choose from before going to centers. One of them is HERE. A cute minibook to copy, color and read is HERE. We only did 4 pages. 

Memorial Day Table Decor

 Now I just need to finish decorating the house for all the Patriotic holidays coming up. I leave the decor up from Memorial Day through 4th of July. It is fun to change it up around the house. And I got some new white couches, so it is fun to switch up the pillows. I have a few navy and red ones that work great! 

Frog Life Cycles in Kindergarten

We’ve been having lots of fun learning about Frog Life Cycles! Here are some of the Frog Art and Writing we did this week. And we did a Frog Life Cycle cut and paste too. Check them out!

Frog Life Cycles on top, Frog Art with that curly tongue in the middle, then we wrote Frog reports. They are really great! 

I shared a few pictures I found on the internet with the kids. This is one GIANT frog! Big ones are called Goliath Frogs. (go figure). 

We read a Scholastic News on Frogs and a few cute books on frogs too. 
A few of the books I show the kids during Frog Week. 

This is a great book to read showing the life cycle from egg to tadpole to adult Frog. 

We cut and colored some colorful frogs for art this week. 
Here are the kids with their frog life cycle wheels! Whee! 
A fun Math hands on activity I do is these subtraction Frogs on a Log. They are lots of fun to do. And kids love to play with them in centers. 
Here are the Frog Life Cycles we did. So Cute. The kids wrote the names of the 4 frog stages too. A freebie life cycle wheel I found is HERE on TPT. I also found some cute frog bookmarks HERE at TPT.  Both are free.  

Our bulletin board outside has all of our frogs on it. It is very colorful! 

Some great little Frog Facts. 

I loved this little report. It is as good as any first grader could do it! Good Job! 


Frog Jokes

Q: What happens if a frog parks in a bus stop?
A:  He gets toad away!

Q:  Why are frogs always happy?
A:  Because they eat whatever bugs them.

Q:  What happens when two frogs catch the same fly?
A:  They get tongue-tied!

Q:  What do you get when you cross a pig with a frog?
A:  A ham-phibian!
  

Q:  What kind of frog lives in a tree house?
A:  A tree frog!


This also was an awesome Frog report. I am proud of all of the kindergarten kiddos. They did a good job on this INFORMATIONAL WRITING. 

Frogs DO make a ribbit sound. 😀
We made these frog life cycle wheels yesterday to finish up the unit. They turned out cute…just like these kiddos! 

The kids had their choice of colorful wiggly eyes to glue on their frogs. I had some giant eyes to choose from, and all colors. 

Frogs are always a really engaging science topic for little kids. I love Frog Week!


Books in our unit…..
I  always like to mix fiction with non fiction in text sets. 
Frog and Toad are Friends by Arnold Lobel
Frog on a Log by Phil Roxbee Cox
Froggy Learns to Swim by Jonathan London
Flashy, Fantastic, Rain Forest Frogs by Dorothy Hinshaw
Fantastic Frogs by Fay Robinson
Fabulous Frogs by Sue Unstead
That Toad is Mine
 by Barbara Shook Hazen 
A link for a reader’s theatre of the book is HERE

I copied off the words to a song we sang about frogs and we glued it onto the back of the frog art. 

A CUTE little printable book to copy and color is HERE at TPT and is Free. It is in the same vein as Brown Bear Brown Bear. But THIS ONE at TPT was my favorite. I used this one for the life cycles above. The kids had to color and cut and paste the pictures onto cloud shapes. 

5 Little Speckled Frogs Song. I made these felt frogs to go with the song. 

Five Little Speckled Frogs (song lyrics)
Sat on a speckled log
Eating the most delicious bugs. Yum! Yum!
One jumped into the pool
Where it was nice and cool
Now there are Four green speckled frogs 

Four Little Speckled Frogs
Sat on a speckled log
Eating the most delicious bugs. Yum! Yum!
One jumped into the pool
Where it was nice and cool
Now there are Three green speckled frogs (keep going down to none)

The kids always love singing this song and acting out “diving into the pool”. The text for the song can be found HERE at The Virtual Vine.  More frog activities are HERE. Lots of freebies!


MUSIC: Sing the song Frog on a Log or 5 Little Speckled Frogs acting out the frogs “jumped into the pool” and use percussion instruments with students as you sing the song whole class. Copy off the lyrics on to an overhead or a poster board to sing along. Or type up individual copies of the song to glue on a puppet. We glued our song on the back of our colorful frogs and sang it together. 


 The UTUBE song with words link is HEREA coloring page frog printable  can be found at this link HERE.  Have fun enjoying our FROGS! 

Plant Life Cycles for Kids

We finished our unit on plant life cycles this week and took home our little radish plants. I forgot to water them the day before so they were kind of hanging by a thread. I have a natural black thumb I have come to believe. It just isn’t my forte. I can cook, and decorate, and I’m a pretty good artist and party planner. But my plants around my house are always looking a little beat up.

I start with this lovely book called THE TINY SEED by Eric Carle. It tells how plants travel by wind, water, animals and humans planting seeds. It is also on a youtube, but I usually just read the story to the kids.

Then we look at dried Lima Bean seeds that I’ve put in a bowl of water for 2 days. Each child gets a napkin and a tiny magnifying glass. The seed coats get very soft and peel off really easily. We look at the little root at the tip of the lima bean too and we talk about how that turns into longer roots that grow down into the dirt.  Then we get seeds and plant our own plants into pots of dirt. I usually do radish seeds because they germinate in 3 weeks. (if I don’t kill them before then!) A link to a fun lesson plan using Lima beans is HERE at A to Z Teacher Stuff. A link to a cute lima bean plant coloring page with labels to cut and paste is HERE at Kindergarten Crayons. Another one is HERE at TPT “Magic Beans”. It is a cute one too. 

Some years we take the lima beans and “sprout” them in cute little construction paper “Sprout Houses” stapling a baggie filled with wet cotton balls inside and hanging them onto the windows for a week. 


The next day I read the kids Flower Garden by Eve Bunting. It is a beautiful and colorful book that I love and they always do too. Then I have the kids look at my poster of Parts of a Plant too and we discuss the parts. Then we color a picture of a flower and label the seed, root, stem, leaf and flower. While they are coloring I show this short video that has a great visual (with clay-mation) on the parts of plants.

The next day I read the book Planting a Rainbow by Lois Ehlert. And we do a mural of the parts of a plant, each child doing a flower, a stem, a root and a leaf. Then we mix them all up and glue them on each other’s roots and stems. It turns out looking like this. (I cut out a long strip of brown for the soil and glue that on before school starts onto a piece of blue butcher paper. Then I usually glue on a small sun in the top corner of the mural before we start. I tell the kids plants need sun, water, dirt and air to grow.

While the kids are coloring and cutting out their mural pieces, we watch the youtube below on what plants need to grow. Then we look at a Scholastic News on the needs of plants and parts of plants.

Other books we read during the week as we make a mini book and watch our plants grow are these;
BOOKS on PLANTS AND SEEDS 

Flower Garden by Eve Bunting
Sunflower House by Eve Bunting
The Tiny Seed by Eric Carle
Planting a Rainbow by Lois Ehlert

From Seed to Plant by Gail Gibbons
Frog and Toad Together by Arnold Lobel
Jack in the Beanstalk by Stephen Kellogg

The next day we read From Seed to Plant by Gail Gibbons. It is a true science book so I do skip over some of the parts. It is very detailed. But I love how she makes science interesting to kids. Then we color and cut out and staple together a mini book on parts of a plant and how plants grow. 
I found a cute one HERE at Worksheetplace.com. It was a freebie download and the kids loved it. 


Some years we do a terrarium out of a 2 liter clear soda bottle. We add dirt and succulents from my home garden, and shells and little rocks to it. It is a great activity but takes a lot of time cutting the bottles in half. 2 Liter bottle terrarium instructions HERE

We are almost done with our unit. The last thing we do is discuss parts of the plants we eat. I have lots of little cards of fruits and vegetables and we put them in categories in a pocket chart; leaves we eat, roots we eat, stems we eat and flowers/fruits we eat. 

This is the side of my black filing cabinets. It is the magnet center. Every few days I change the activity. Lots of times it is math or science. 

One of my centers I have made up is Parts of a Plant for the magnet center. Here is what it looks like. The kids love to put the 3 plants together and label them. 

A fun song we sing is this one: 
MUSIC  (use percussion instruments) 
A Seed Needs (To the tune of “Ta-ra-ra Boom-de-ay” )  
         
I see you are a seed,
Tell me what DO you need?
I need some soil to grow,
And then the sun to glow,
Water to make me wet,
Air for my leaves to get,
Space for my roots to spread,
I’ll make your flower bed!

by: Iram Khan


 CELERY SCIENCE EXPERIMENT

Lastly we do another science experiment using celery in a cup of water and adding food coloring to different cups of celery to see what happens when the celery drinks the water through the stems.
Check it out….We do THIS experiment at teaching tiny tots

Community Helpers

Community Helpers is such a fun topic to study in school. Kids love to make police hats and badges for art and a puppet to start a puppet show writing project. We always sing a few songs about different occupations, read these fun story books,  and do some riddles on the same topic.

Community Helper Stories. Here are some of the fun stories I read the class. For social studies we learn about communities and what that means, and we talked a lot about helpers in our community.
Community Helper Books I read to my class during Community Helpers unit. 

Then we made a brainstorm on the board of all kinds of community helpers. We would make a puppet out of 2 of them and think of a story idea with a problem that could happen to one of the puppets we chose. Then we had to come up with a solution to the problem that another puppet (community helper) might come and fix for us. We made a list of problems and a list of helpers. Then we decided on 3 opening sentences to get us started and everybody chose one.

 I  modeled how to start a puppet show with the class. Our class story had a baker that had a fire start in his bakery and called the fire department and had firemen come put out the fire. Then the baker gave some cupcakes to the firemen and they became friends after that. (gotta have a happy ending people!)
Here we are doing a match game using community helpers and what they do for us. The kids had to match up the occupations with a riddle of what they do. We did it in small cooperative groups of 3 or 4. Here are my little police people matching up their cards. (some of the boys were too “cool” to wear their hats home.) Isn’t that so funny? Gotta be macho in Grade 2! tee hee…..)

We also did a few worksheets on vocabulary words from the Reading Streets story and some community helper songs.HERE are a few songs I thought were fun. I played my autoharp and we sang to a few familiar tunes.   I had the kids do a few fun activities like a Venn diagram comparing and contrasting Urban communities with Rural communities.

Here at First Palette.com was a lot of free printables of community helper people to use as puppets. We put heads on bodies out of paper and glued them to tiny popsicle sticks. 

My goal was to have them write a fictional story with a problem, a solution and the setting would be a community helper’s place of business. We are learning about story structure. Then they buddied up with a partner who did their puppetry for them while they read their story in a microphone.

Here are the finished puppet shows and puppets. I forgot to take a pic of our puppet theater I got out for the occasion.It was cute seeing them taking it all so seriously. Some of them got “stage fright”. Good thing we had a microphone!  It took us all week during writing workshop to finish the puppet shows. Then we read and shared them in the afternoon. HERE at only passionate curiosity are some cute visuals you could put up in a pocket chart. Another cute one that is free and downloadable is HERE at k-3 teacher resources.

 Here is our finished bulletin board. I also had a magnetic match game with these little community helper cutouts they could match up at the magnet center. I’ll take a pic of that too.

 Some of the kids made more than 2 puppets, and some had extra visual aides…..like wedding cakes or butterflies.

Lots of great illustrations happened here…..yup! 

     I try to get them to learn the vocabulary in the writing process. The one before sharing is illustrating. So they learn what to do to become great illustrators; at least 4 colors, no white showing.

HERE 
are a few songs I thought were fun. I played my autoharp and we sang to a few familiar tunes. Then I read them a few stories on people that help out in our communities. We are a mixture of urban and rural where we live. And a mixture of both where houses are outside of a city is called Suburban.

Community Helper Puppets and Stories we shared last week to go along with reading The Twins Club.

Bulletin Board of our Community Helpers and our Puppet Show Stories….

We also did a fun activity using URBAN, SUBURBAN, and RURAL. We did a Venn Diagram to compare and contrast both. The kids did it on whiteboards while I did the one on the doc camera.

Kids did a venn similar to this one….

 Then we came to the rug and did a brown bag activity where they each got 3 cards (using the COMMUNITY CHARACTERISTICS CARDS found below at UEN) and they had to decide which bag labeled Urban, Suburban and Rural, to place it in of the 3 Vocabulary Words.. HERE at Utah Education Network are all the activities and some lesson plans to go along with it taken from our Utah core

Each bag had the caption “URBAN” or “RURAL or “SUBURBAN” and kids had to come up and place picture in the right bag. The class all helped. 

There are many youtubes about communities highlighting our vocabulary. I liked this one and it was a short 5 minute video. There are longer ones with reading blurbs on each scene too. ..

 Nice Handwriting and illustrating on all of these cool puppets guys!

 It was fun to listen to such creative stories. We have some budding authors in our class!

Community Helpers Puppet Shows

Our vocabulary for the week were  the amazing words from Reading Streets. I keep them in a pocket chart all week and we do short activities with them every day from acting them out, to switching around the words and then matching them back with definitions. Then we tested them all on Friday. 30 kids all got 100%. Way to go parents!! Woot!

 This little artist in my class won the illustration contest.  We have lots of other good illustrators too!

 Another fun things to do in this unit is to play Community Helper Bingo. A VERY easy one is HERE made by Michelle Prinzo. It would be great to put these words in the pocket chart to help the kids learn the vocabulary of different types of community helpers.

Our finished puppet shows and puppets were awesome.

 It is a fun reading unit and a great story to compare with Country Mouse City Mouse. I have 3 different versions and it’s fun to read them to the kids and get a different response and perspective on each one. And we are thankful for all those community helpers we rely on.

Earth Day Activities

We are learning about recycling, plants and seeds, and being a friend to the earth in honor of Earth Day, which is coming up very soon. (April 22nd).

Earth Day Activities we did in my Kindergarten class this week. 

Earth Day Writing Projects 

I love this part of the year where spring is starting to bloom with tulips and daffodils everywhere, new birds and nests all over the trees, and the weather is starting to change and get warmer. My students are loving it too.

I visited Thanksgiving Point recently to see some of the gardens and loved all the tulips in a variety of colors. 

We’ve been so lucky to have springlike weather early in Utah this year. I love it! 
I wish my garden looked this wonderful. The colors of all the flowers was just fantastic. 

So we did watercolor painting on Monday using coffee filters to make the earth. I put out watercolor paints and used a spray bottle to get just the blue and green wet. Then passed out paint brushes and coffee filters. This makes it easier than using cups of water which always spill. I just walked around respraying the blue and green with water. Then we glued the dried “earths” onto black construction paper.

Then we colored some rainbow cutouts that say “Take Care of Our Earth”.  You can also download GOOGLE EARTH  onto your computer and show the kids the earth all the way to the close up school from way up in the sky as it moves closer and closer to your neighborhood. It is way cool! 
Kids do lots of neat things all around the whole world on Earth Day to help and to participate.

I have lots of neat books on Earth Day and they help remind us that we are keepers of the earth. We can help keep it clean, and we can reduce garbage and water usage, even when we are only 5 years old! We read a few Scholastic News on Earth Day that I have collected over the years too.

And I found some cute math graphing activities HERE at TPT on the theme of Earth Day that are freebies! Yay! There were also some cute pieces of stationery for writing.

Just some of the 20 books I have on EARTH DAY topics. I have downloaded copies of things from the U.S. EPA Department too that have many free activities for kids. HERE at epa.gov is a color book. HERE is a free activity book to download too with mazes, math and other fun things. 

After that we colored rainbows and glued down hand die cuts to show how the earth is “in our hands”. Then we sang a few earth day songs and read some books on how we can recycle.

BOOKS

Flower Garden by Eve Bunting
Sunflower House by Eve Bunting
The Tiny Seed by Eric Carle
Planting a Rainbow by Lois Ehlert

From Seed to Plant by Gail Gibbons

My favorite is Michael Recycle. It is a really funny one on a little superhero comes to help us learn how to take better care of things in our homes and yards.

Planting a Rainbow by Lois Ehlert is a great book we read right before planting veggies and doing our “Planting a Rainbow” Mural. We added the “parts of the plant” after designing our own flowers and leaves.  The insects and butterflies are stickers. 
Planting a Rainbow mural. 

We colored our own mini book on steps to being helpful on Earth Day. Then we wrote a few ideas on how we can do our part. And we planted our own radish seeds into pots of dirt. Then we made a mural of our own “Planting a Rainbow” like the book above. It turned out really pretty. We all did either a leaf, a flower, or a glued on a seed or stem.

Take Care of the Earth. Plant a plant or tree on Earth Day, April 22nd. 
We wrote about things 5 year old kids can do to help keep our earth clean and green! 

We decided to plant little seeds into biodegradeable pots from Home Depot. I think I got these at Walmart for $2.50 for 24 of them. Then I got free seeds and potting soil (excellent resource) from Thanksgiving Point. The guys in charge of the gardens there do a few classes a year for teachers and gardening enthusiasts and they gave me a box full of stuff for free. Such nice people there!

TERRARIUMS (using empty 2 liter bottles)

A really fun activity to teach seeds and plants is to make individual terrariums. A good step by step how to is found at this link to Teaching Tiny Tots HERE. I love how she used ivy. I’d like to use fast growing grass seeds or radish seeds so the students can see the roots and how they grow up into stems and then on the radish, leaves. Start by reading the book From Seed to Plant by Gail Gibbons. She is a master of children’s science books.
 2 Liter bottle terrarium instructions HERE

I made this pretty Earth Day banner that says “LOVE OUR EARTH” and strung it up on twine. Then I added blue and green ribbons to the ends. It is neat. You can get a free copy HERE. as the banner on our bulletin board.

Another fun activity is making these EARTH DAY Bracelets on a pipe cleaner. They are easy using green and blue pony beads and some foam beads I got at HERE at Oriental Trading is some foam shapes that have peel and stick. I’d take pictures of the kids and make a picture frame with them. 

You could also make some blue and green playdough for Earth Day. The recipe is super easy. I would add some blueberry Koolaid for a cool berry smell and blue color. 
Ingredients for Play Dough 
  • 1 cup flour
  • ½ cup salt
  • 1 cup water
  • 2 tbsp canola oil
  • 2 tsp cream of tartar
  • blue or green Food coloring
  • Mix it all up in a mixing bowl and blend for a few minutes. Add 1 package Blueberry Koolaid for a cool smell. Put into “snack bag” size ziplock baggies. 
 HERE is a cute bookmark and writing paper. HERE is a mini book we copied and read. And  HERE is a bingo game. It was a little advanced for my kiddos having terms such as “fossil fuels”. But it would be great for older kids 3rd grade and up. 
 

The students did a good job coming up with ideas for me to write on the board. So we did a brainstorm of Things like picking up trash at the park, turning off the water while brushing teeth, recycling old clothes and toys, planting flowers and trees, and not being a litter bug.

Here are our finished pots and seeds to finish off our week of projects. I like doing radish seeds because they only take 3 weeks to germinate. So the kids won’t have to wait long to see some stems and leaves sprout!

Happy Earth Day April 22nd! Plant a tree, or a bulb, or some veggies in your backyard today!